A while back I worked out a drop in RAM replacement on the Midway Y-Unit Arcade hardware.
Twistedsymphony's Projects
A while back I worked out a drop in RAM replacement on the Midway Y-Unit Arcade hardware.
I recently picked up 2 “non-working” Konami M2 boards. I’ve since managed to get both of them working. This hardware is actually fairly robust and it took minimal effort to get mine working but a long the way I learned a lot about how the hardware works and some common problems you might run into.
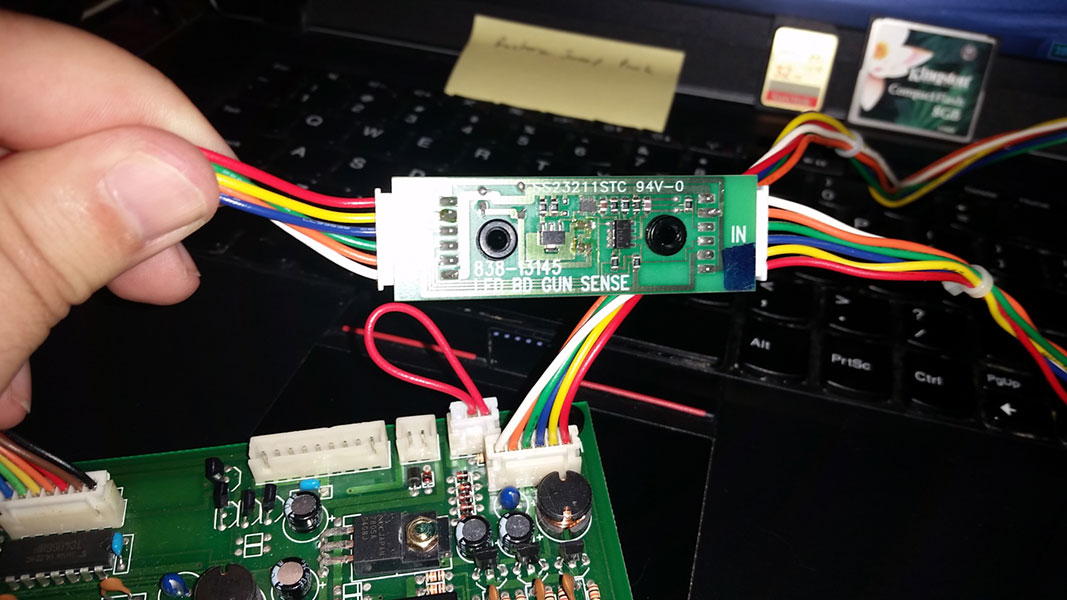
In Part 2 I broke down the details of the LED board, in Part 3 I broke down the details of the Sega/IR Sensor Board. Here in Part 4 I’m going to cover the Gun Sense Board and Protection Board
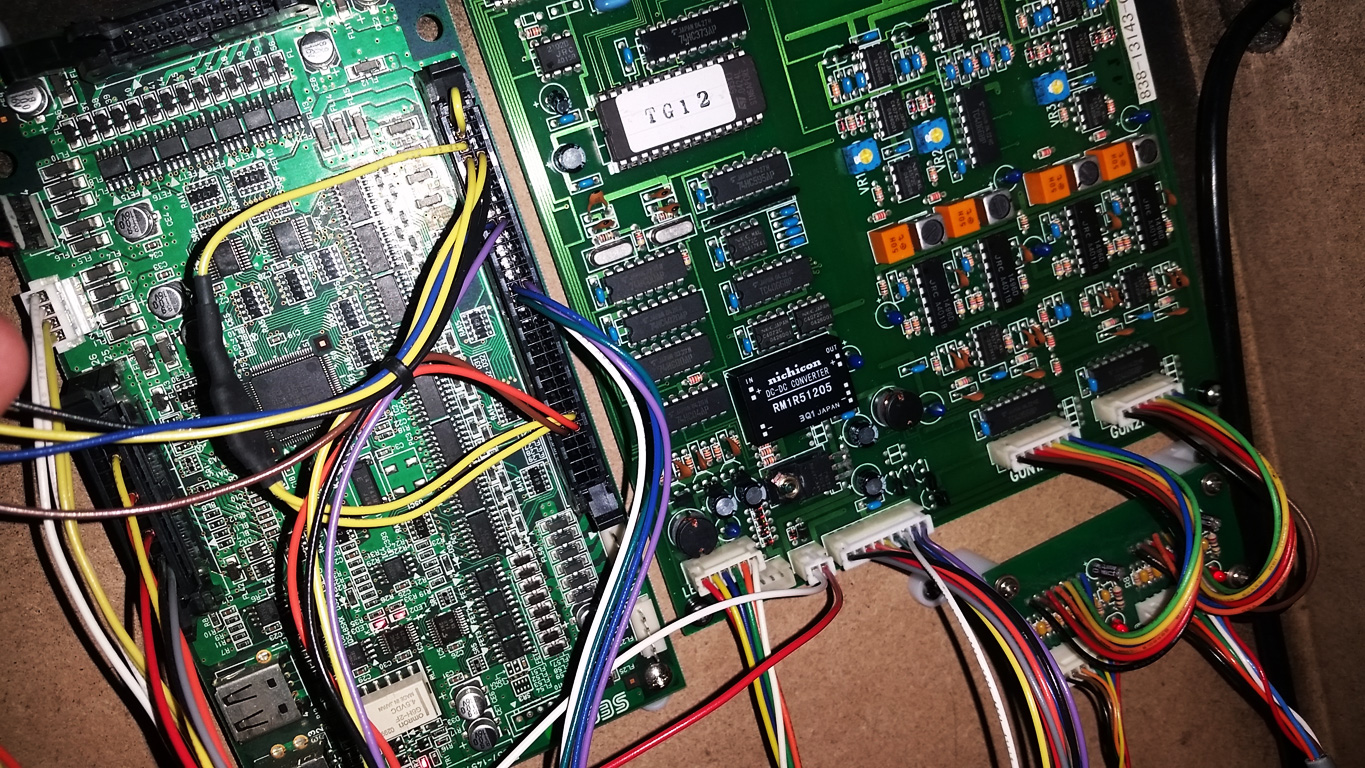
In Part 2 I started breaking down the technical details with the Sega/OHMIC IR LED boards. Here in Part 3 I’m going to continue breaking down the technical details.

In Part 1 I discussed a high level overview of how the Sega/OHMIC IR light gun setup works. Here in Part 2 I’m going to start breaking down the technical details.
In 1997 Sega released Jurassic Park The Lost World Arcade; a Light Gun Shooter on the Model 3 Arcade hardware. This was the first game to use Sega’s new IR gun technology, a system that they’ve used for nearly every light gun game they’ve produced since.

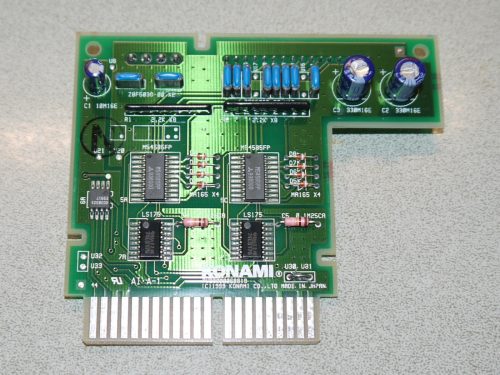
Last week I posted an article on getting light output from Salary Man Champ on Konami System 573, I suggest you read that first. Much to my chagrin the shift-register circuit I used there didn’t work with Hyper Bishi Bashi Champ. Through pictures I found online it seems that the 2 Player Hyper Bishi Bashi champ cart, while using the same light output pinout and having the same outward appearance and a very similar looking cartridge PCB actually used a very different light output circuit. Rather than a pair of shift-Registers it uses a pair of 74LS175 D-Type Flip Flops.
Here are some photos of the HBBC 2P cart (courtesy of nem on Arcade-Projects.com)
Continue reading ‘Light Output on Hyper Bishi Bashi Champ for Konami System 573’
I’ve been playing around with a non-rhythm game version of the Konami System 573 hardware, namely I’m interested in the various “Champ” games, these are collections of manic versus mini-games where you smack buttons and hilarity ensues. The most popular is Hyper Bishi Bashi Champ and Salary Man Champ. If you’re unfamiliar with the game each player has just 3 colored buttons (no joystick) and the buttons also light up corresponding to what’s happening in game.
 Continue reading ‘Light output for Salary Man Champ on Konami System 573’
I’m a big fan of metal cages over my Arcade PCBs. They’re the best way to protect the PCB and they help cut down on electrical interference so the game runs at it’s best. I own an ST-V (“Sega Titan-Video”) PCB (which is the arcade equivalent to a Sega Saturn) and I knew it had an optional Video board used in the “Print Club” machines. While trying to find info on that optional board I discovered that in the Print Club machines also had a cage around the whole ST-V Board setup! I found a complete setup for a reasonable price (less than that of a spare ST-V board alone, so worst case I break even) so I bought it.
A number of people have expressed interest in the size of this cage and others in seeing what the guts of this thing looks like so here’s a quick photo dump.
 Continue reading ‘Sega ST-V “Titan” Metal Cage (Atlus Print Club 2 PCB)’
I’ve heard a lot of people talking about Dreamcast cooling related to the GDEMU and USB GD-ROM devices. People claiming that by removing the GD-ROM drive the fan is unable to pull cool air across the power supply and other internal components and instead just pulls air through the large opening where the GD-ROM used to be; causing the console to run overall hotter than it did before. A lot of people have asked me if my GDEMU Tray or my USB-GDROM Tray helps with cooling. Without a good answer I decided to test.