Last spring I happened to come across a set of old Bose 901s for sale in the marketplace of my local car club… At a price of $25 including the equalizer unit I couldn’t pass it up. I contacted the seller and met him the next day in Manchester to pick them up.
For those of you unfamiliar with the 901s they’re Bose’s Flagship Stereo speaker set and they’ve been essentially the most expensive set of Bose Stereo speakers you could buy for the last 50+ years. They still sell them today, although they’re on “Series VI” now. New a set of Series VI retails for around $1400. Honestly the design of the 901s has barely changed save for the electronics in the “equalizer” module. The cabinet design, drivers, and wiring in speakers themselves haven’t changed functionally since the Series III.
I’m not a huge fan of these speakers but I bought them because my Father is, I really have no need or room for a set of 901s in my house but I figured I could fix up these speakers and it would make a nice Gift at some point.
My father had a set of 901s (Series V I believe) a number of years back and loved them, I remember he always talked about getting a pair way before then, and he was extremely happy when he was able to finally afford a set. Though about 2 years ago he had to sell them. So you can understand why I wasted no time to pick up such a cheap set of easily restored 901s.
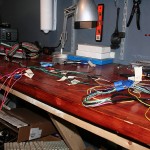
What I started with:
Being a Series IV (which sold new from 1978 through 1982) the cabinet style, though functionally identical the series VI (which was released in 1987 and has not changed since) does look quite dated in terms of the grill fabric and cabinet color.


Removing the Speaker Grills:
Obviously the first thing I did before I could attack the innards was take the original grills off.

The front grills are held on with 6 staples, 3 down the left and right sides. They were somewhat difficult to spot. I’ve circled it in the above picture.

I started by hammering a cheap screw driver under one of the staples to pop it out a little.

I then used some vice grips to yank the staple out completely.

Once the first staple was removed I had enough room to get my hand behind it so I just ripped the rest of the grill off by hand.

The front grill frame is made of particle board so the staples ripped right through it, but it doesn’t really matter because I wont be re-stapling it. Once the grill was off pulling out the rest of the old staples with the vice grips was easy.

The rear grill was simply attached with some tree-sap like glue, pulling it off by hand was a breeze.
Parts, Costs, and Planning:
Once the Grills were off I could get a good look at the drivers, time had not been kind to the foam surrounds. All of them were rotted, and some had fallen off of the drivers completely.


Looking closer at the drivers the cones, dust-caps, and voice coils all looked to be in great shape, it was just the foam surrounds that were decaying.
Parts Express sells kits to replace various components, you can buy dust-cap replacement kits, foam surround replacement kits, and if the drivers are so far gone you can even buy replacement drivers.

The kits I needed run $35 a piece and I ordered 2 Bose foam surround repair kits (10 foam surrounds per kit) to replace the foam on all 18 drivers (yes 9 drivers per speaker, each driver is <1Ohm and they’re wired in series). There are other kits available elsewhere for less but I know and trust Parts Express having ordered many times from them in the past.
The only other thing I needed for this project was fabric. Parts Express also sells Speaker Grill fabric but I opted to find some locally. I discovered that my local JoAnn Fabric store sells “Speaker Grill Cloth” for $10 a yard. They were having a 40% off sale so I bought 3 yards for $18 since there are some other projects that I would like to have the fabric for. Considering the width of the fabric you could easily get away with Just 1 yard for the 901s if you planned your cuts right.
Total cost of these speakers was ~$100 not counting disposables such as razor blades, hot glue, and sandpaper.
Driver Removal:
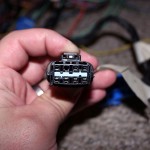
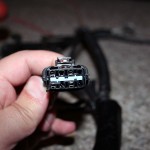
The first thing I did was remove all the drivers (3 bolts each requiring a 1/4″ socket).
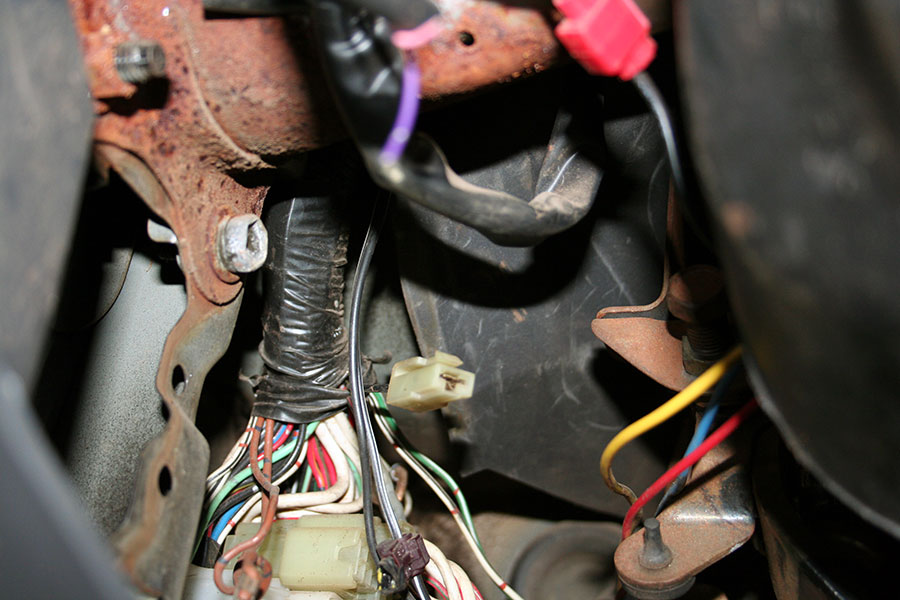
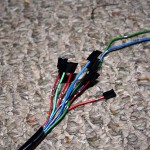
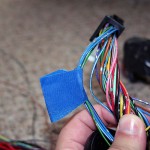
I was somewhat shocked when I pulled out the first driver to discover that they use wire wrap for all the internal electrical connections.

I’d never worked with wire wrap connections before. It seems most electronics had abanoned it before the 80s since the only arcade machines I’d ever seen use them were the extremely old pinball machines from the 50s. even those from the 60s and 70s had moved on to more modern connector techniques. I also discovered that it was difficult to remove old wire wrap without fitiguing and breaking the wire.

Since I don’t own a wire wrap tool, I decided that I wouldn’t worry about it and would rather just go with a spade style connector or soldered connections when I put the drivers back in. Based on what I’ve read elsewhere it sounds like the newer series 901s use soldered connections anyway.
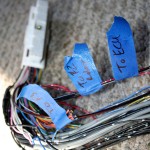
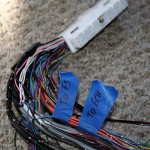
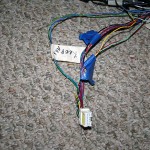
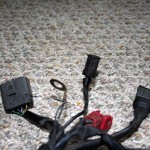
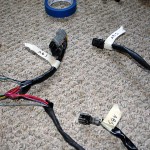
To ensure I put everything back the way it should be I numbered each of the drivers and each of the mounting locations, I also labeled the wires in the cabinet to ensure I didn’t reinstall any of the driver’s backward.


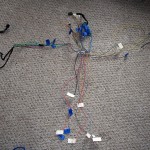
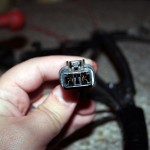
While I was in there I decided to map out the internal wiring. A quick search on google turned up this diagram:

The text listed with the image stated that it was the diagram for the Series II and Series III revisions, I would tend to believe it as it did not at all match the wiring I found inside my pair of Series IV speakers. I’d read that the Series IV through VI used similar wiring. Using the diagram above as a starting point I modified it to reflect the wiring found in my Series IV.

The yellow wire at attaches to the #9 driver goes to the “*” terminal on the outside of the speaker. I’m not sure what this terminal is used for but the labels on the speaker cabinet state not to use it.
Driver Cleanup and Prep:
Before I can do anything with the drivers they need to be cleaned up. All of the old decaying foam surround material needs to be removed and the surfaces cleaned and ready to glue on the new foam.
First thing I did is pull off as much of the rotted foam I could with my hands. Once the bulk was removed I used a razor to cut off as much of the old glued foam as I could, a fresh blade with sharp edge and the right angle and you can strip it off without much issue. I went over the glue foam on the cone 2 or 3 times taking off progressively more each time, as a paper cone it is extremely delicate so taking your time is preferred.

Next I used a small screw driver to scrape the old glue off the basket.


Once all the material had been removed I rubbed my finger over the foam on the cone to loosen up and brush off any dust or small particles that remain. Then I went over the whole thing with compressed air to remove any particles left, taking caution to make sure there isn’t anything under the cone.
Finally I went over the basket surface with isopropyl alcohol to make sure it’s completely clean, I don’t do this on the basket surface as it could damage the cone.

Now I have a nice clean driver ready to receive a new foam surround.

Installing the Foam Surrounds:
I started by placing a bead along the edge of the cone as well as one along the inside edge of the foam surround.

I used the swap to spread it out a bit, I did a little more after the above picture was taken, you want a nice thin, even layer over the whole area to be glued.
You should let the glue “set” for 5-7 minutes before attempting to stick the two sides together, it turns clear when it’s ready. Most of the time I found it was easier to know when it was ready by the clarity of the glue rather than some arbitrary amount of time.
Centering the foam surround is CRITICAL. the cone sticks up past the basket slightly, so I placed the ring, then pushed the cone down slightly and made sure that the ring is centered on the basket, then when I relieved pressure on the cone it would center itself.

After that I went around the edge of the cone applying pressure to ensure good adhesion.
Only the center part of the foam is glued at this point. It needs to setup for at least an hour before the outer edge of the surround could be glued. To be on the safe side I let them sit over-night before continuing.
Once the glue has dried on the inner portion of the surround I could begin gluing the outer edge.
I started the outer edge by first running a bead along the flat surface of the basket.

Then I put a small amount of glue under the edge of the foam surround, this is a pain since you have to peal the foam up with your hands and spread the glue over a small section at a time until you’ve gone around the entire edge. This is also why you need to let the glue on the inner edge completely dry before attempting the outer edge; the stress of pealing up the foam could compromise the adhesion on the inner edge.

Once the glue has been placed I used one of the included swabs around the parameter smoothing and evening out the glue on both surfaces.

Like the inner edge, I let this set for 5-7 minutes before affixing both surfaces, they wont touch since the cone naturally sits up higher than the basket.
Centering the outer edge is perhaps even more important than centering the inner edge. The reason being is that any mistakes made on the inner edge can be corrected with the outer edge, so there is no room for error. If not centered properly the cone will not be able to move up and down smoothly and the sound quality with be severely diminished.
To ensure it’s centered I used a bottle of water, with just enough water to push the cone down without crushing it. The water also ensures that it’s being pushed straight down and perfectly centered. My kit didn’t come with any, but some other kits include shims to help ensure that the cone is properly centered during this step.

Again I go around the parameter applying pressure until it’s affixed well. I leave the bottle on the cone for a minute or two to let it settle to ensure that the foam doesn’t pop back up.

The glue should dry for at least an hour before you reinstall them. Keeping them on their backs while they dry will help ensure good adhesion.
Reinstalling the Drivers:
I looked into various spade connectors that I could use to hook the wires up to the drivers but alas I couldn’t find any that were worth using. Without the proper tool to do wire wrapping I ultimately decided to just solder them back together, I don’t really plan on taking these things apart ever again so I might as well. Reading around I get the impression that the Series V and VI use soldered connections on the drivers anyway.
I started by ensuring I had straight/stripped wire ready on each connection, I used a slight bit of sand paper to take the dust and coating off the wires, they have a coating to prevent oxidation but it also hinders soldering (since it was designed for wire wrapping) just a light sanding is all that was needed to ensure that the solder will stick well.

I did the same on the drivers, only I used a screw driver to scrape it off since it was much thicker and heavier on the wire posts than on the wires themselves.

I tinned both the posts on the drivers and the wires.

Once everything was tinned I soldered each of the driver’s connections, tore off my wire markers (I wouldn’t want them buzzing inside the speaker once it was all back together).

After soldering each driver I bolted them back into the cabinet before starting to solder the next. I also re-used the original foam isolator that goes between the driver and the enclosure, these were still good and they keep the drivers from buzzing or rapping against the enclosure.
Since the wires were short I did the bottom row of speakers first, then flipped the enclosure upside down and did the other row, it saved me a 3rd hand.


Once the speaker has all the drivers back in place it is functionally restored.
At this point I tested the speakers. They sounded great but I did notice that one of the terminals was lose, so I pulled out the nearest driver so I could tighten the screw on the inside.

Grill Cleaning and Prep:
Now that the speakers were functionally restored, all that was left was to make them look a little more up to date. I decided that the wood coloring wasn’t all that bad, and while the cabinets had some scuff and scratches my wood finishing abilities have something to be desired. In the end the only updating I would do is the grill cloth, replacing the ulgy Tweed with some new, more modern black acoustic fabric.
Before I could do anything though I had to strip down the old grills to their bare frames.
I started by removing the push pin badges from the front grills.

The fabric on the front grills was easy to remove just pulled it off with my hands and spayed it with some compressed air and they were ready for new fabric.

The rear grills needed a little more work before they would be ready for fabric though. I used a razor blade to separate the plastic port hole trim pieces from the grill, then pulled the material off by hand just like the front, then I used a razor to clean up all the large glue bumps left around the port hole areas.

Unfortunately there were little bits of tree-sap glue as well as tweed “fur” stuck all over the grill frame to the residual contact cement. To get rid of this I took a block sander and sanded it down to remove all that. Then I dusted it with a damp rag then once dry I went over it with compressed air for a nice clean and smooth grill frame.

Grill Re-Upholstering:
Now that the front and rear frames were prepped they were ready to be reupholstered. I’m not much of a fabric person so I just did what made sense to me, overall I was pleased with the outcome though.
I started with the front grill. I laid the grill down on top of my fabric and cut around it so the fabric stuck out roughly an inch around the parameter of the frame.

Normally acoustic fabric is installed using a spay on contact cement. I really hate working with that stuff, and acoustic fabric is stretchy in all directions, so I decided I would just work my way around with some hot glue. It worked exceptionally well. After each tack I’d check to ensure I wasn’t introducing any wrinkles on the other side.

After I was done gluing I went around and trimmed off all the excess material.

Finally, I put the badge back in place though the original hole to complete the front grill.

For the rear grilsl I started by cutting, gluing, and trimming the fabric just like I did on the front grills.

Once the fabric was glued and trimmed I cut an X one of the port hole areas with a sharp razor.

I then pressed the port hole trim through, checked for wrinkles, and trimmed up the excess fabric.

After that I hot glued the trim ring in place (which also helped secure the fabric around the ring as well). Following that procedure for the rest of the port hole openings the rear grills look nice and neat when done.

Once all 4 grills had be reupholstered I hot glued them back onto the enclosure. I figured this would be more visually appealing than re-stapling the front or finding some kind of replacement glue for the rear. Hot glue holds securely but can also be easily pulled off if need be.
The front grills were tacked in six spots where the staples used to be.

The rear grills were tacked in ten spots where the “tree-sap” glue used to be.

The Results:
Overall I’m quite happy with the results, with a few days worth of work and relatively little money spent I ended up with a nice looking and nice sounding set of classic stereo speakers. Hopefully they’ll seem some good use in years to come.