In 1997 Sega released Jurassic Park The Lost World Arcade; a Light Gun Shooter on the Model 3 Arcade hardware. This was the first game to use Sega’s new IR gun technology, a system that they’ve used for nearly every light gun game they’ve produced since.
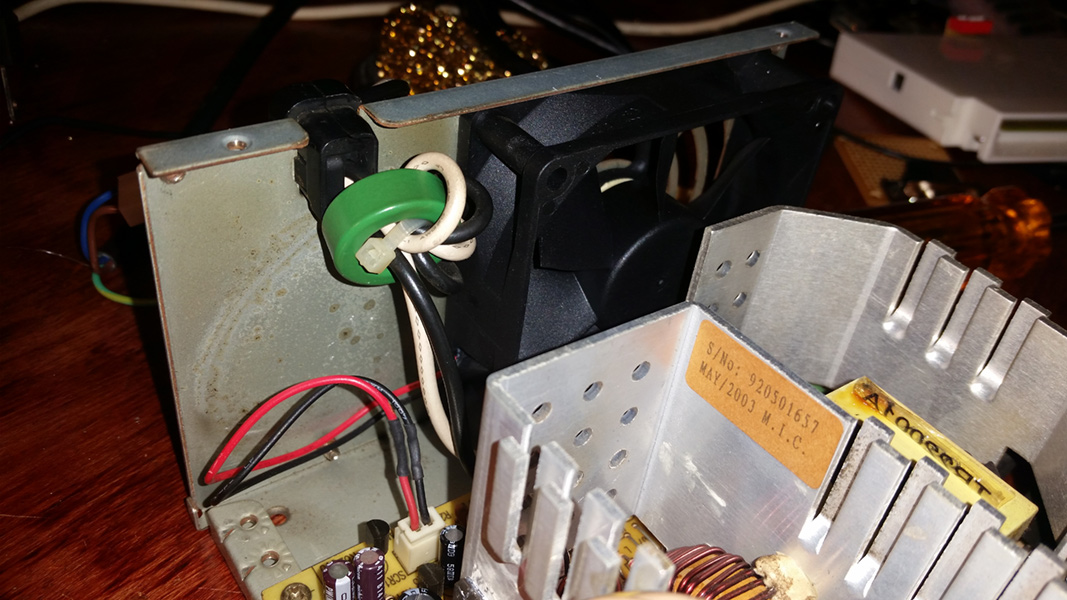
Recently I’ve been fixing up a Taito Vewlix F cabinet, this cabinet has the optional “JAMMA Kit” which includes the incredibly crappy Wei-Ya P271 Power Supply. This Power supply is notorious for pulsing the 12V line and killing itself (and potentially PCBs) when run on 120V AC.
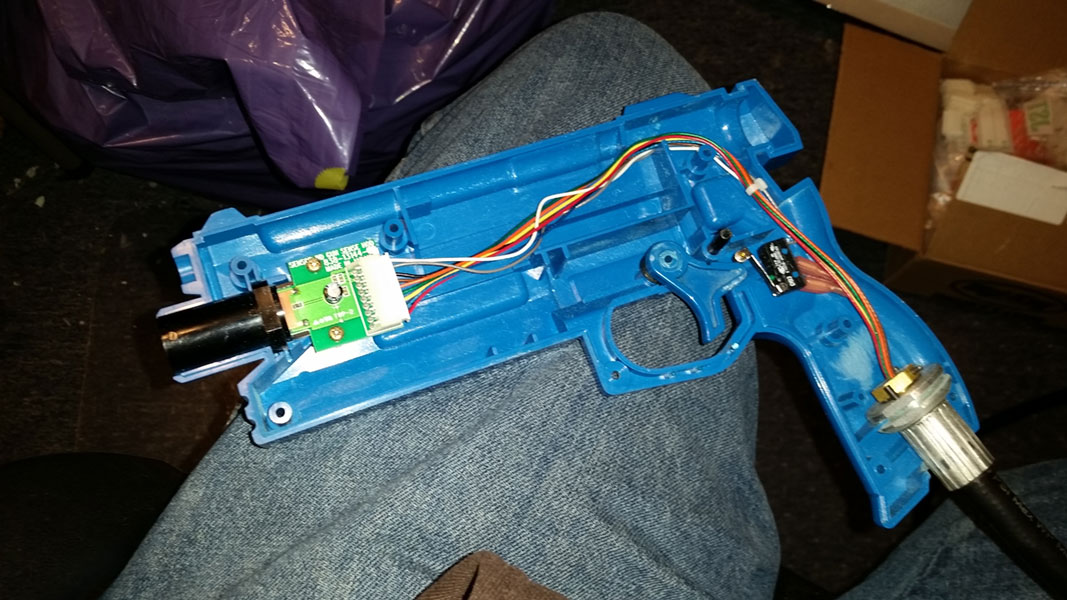
Continue reading ‘A Better Vewlix Power Supply’Last week I posted an article on getting light output from Salary Man Champ on Konami System 573, I suggest you read that first. Much to my chagrin the shift-register circuit I used there didn’t work with Hyper Bishi Bashi Champ. Through pictures I found online it seems that the 2 Player Hyper Bishi Bashi champ cart, while using the same light output pinout and having the same outward appearance and a very similar looking cartridge PCB actually used a very different light output circuit. Rather than a pair of shift-Registers it uses a pair of 74LS175 D-Type Flip Flops.
Here are some photos of the HBBC 2P cart (courtesy of nem on Arcade-Projects.com)
Continue reading ‘Light Output on Hyper Bishi Bashi Champ for Konami System 573’
I’ve been playing around with a non-rhythm game version of the Konami System 573 hardware, namely I’m interested in the various “Champ” games, these are collections of manic versus mini-games where you smack buttons and hilarity ensues. The most popular is Hyper Bishi Bashi Champ and Salary Man Champ. If you’re unfamiliar with the game each player has just 3 colored buttons (no joystick) and the buttons also light up corresponding to what’s happening in game.
 Continue reading ‘Light output for Salary Man Champ on Konami System 573’
What is ROMIDENT and why should you care?
When troubleshooting an an arcade PCB it can sometimes be helpful to compare the ROM data on your PCB to the ROM data within MAME. MAME is more than just a way to play classic games, the documentation within the source code is invaluable to understanding how the hardware works, and the ROMs themselves can serve as a tool to compare and verify the ROMs on your original arcade hardware.
To this end MAME has a great feature called “romident”. You’ll first need to use a EPROM reader/writer to read the data off of you EPROM or mask ROM and save it to a file, then you can check to see if that file exists in MAME by running this command: Continue reading ‘ROMIDENT Drag and Drop Tool’
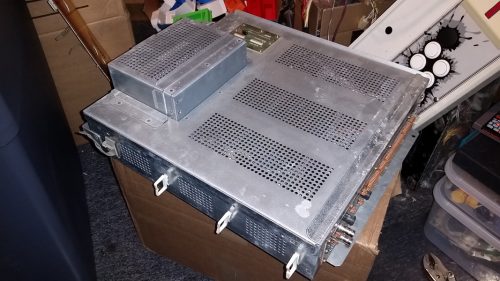
I’m a big fan of metal cages over my Arcade PCBs. They’re the best way to protect the PCB and they help cut down on electrical interference so the game runs at it’s best. I own an ST-V (“Sega Titan-Video”) PCB (which is the arcade equivalent to a Sega Saturn) and I knew it had an optional Video board used in the “Print Club” machines. While trying to find info on that optional board I discovered that in the Print Club machines also had a cage around the whole ST-V Board setup! I found a complete setup for a reasonable price (less than that of a spare ST-V board alone, so worst case I break even) so I bought it.
A number of people have expressed interest in the size of this cage and others in seeing what the guts of this thing looks like so here’s a quick photo dump.
 Continue reading ‘Sega ST-V “Titan” Metal Cage (Atlus Print Club 2 PCB)’
I’ve heard a lot of people talking about Dreamcast cooling related to the GDEMU and USB GD-ROM devices. People claiming that by removing the GD-ROM drive the fan is unable to pull cool air across the power supply and other internal components and instead just pulls air through the large opening where the GD-ROM used to be; causing the console to run overall hotter than it did before. A lot of people have asked me if my GDEMU Tray or my USB-GDROM Tray helps with cooling. Without a good answer I decided to test.
If you have or want to build an arcade machine that displays and plays emulated games as authentically as possible then there are a number of things to consider that are quite different when compared to building a normal gaming PC. This guide assumes that you have a functioning arcade machine already and that you’re simply looking to install a PC in it to use along side your arcade PCBs.
Continue reading ‘Building an Emulation PC for an Arcade Machine’
I’ve done a brief video tour of my Game Room for those that are interested.
If you want to know what it looked like before I got back into arcades, or a more detailed look at some of the Collectors edition console games on the shelves I have a similar video from 2012
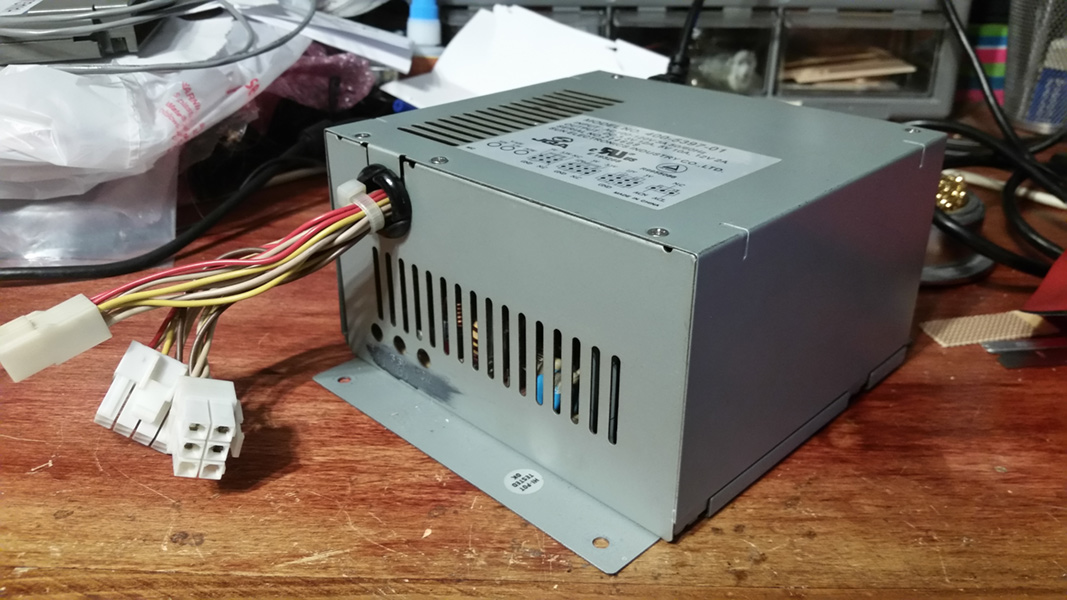
The Sun brand JVS power supply units also known as “NAOMI” PSUs due them being most widely used on that platform have become quite expensive in recent years, even worse is that due to their age many are starting to fail. What most people don’t realize is that similar to CRT monitors, power supplies usually fail due to aging capacitors and many can be revived with a simple cap-kit.
Why not just buy a different PSU?
Normal Arcade power supplies only supply 5V and 12V outputs where as the JVS power supply standard requires 3.3V output as well, also there is a specific connector (JST VL) used for JVS power connections where as normal arcade supplies use either screw terminals or Molex connectors. Even if they did support 3.3V output, the output amperage specs for JVS are also higher than what most 15Watt arcade PSUs can provide, some JVS boards have power consumption requirements low enough that this would be ok but others do not.
There are some people who make ATX to JVS PSU adapters allowing you to use a standard desktop PC power supply for JVS arcade boards however PC power supplies are not adjustable and depending on the specific board you’re using and how your specific ATX supply is tuned it may be providing voltages too high or too low to function properly with a JVS arcade board.
Why Replace the Caps?
Over time the chemicals in electrolytic capacitors break down and expand causing them to not work as well as they should which can cause instability and noise in the power output, in worst cases the capacitor housing can crack and start leaking which can cause corrosion of metal parts and erosion to the PCB. I’ve seen these Sun PSUs sell for $80-$100 in used condition on eBay, many of these are even in need of a cap kit. The very few shops that sell new JVS PSUs charge upward of $300. Meanwhile a cap kit can be purchased for about $8 and with about an hours work can make a dead or unreliable Sun PSU function like new again.
Not to mention spending some time and a little bit of money to repair instead of replace something is much better for your wallet, the environment, improving your skills, and preserving the authenticity of your arcade equipment. It’s win-win from all aspects.
The Cap List
This electrolytic cap list is for the Sun 400-5397-01 model number (the 400-5443 may or may not need the same caps, I didn’t have one available to check). The filter cap is generally very expensive compared to the rest of the list and generally only replaced on an as-needed basis.
C5 – 680uF 200V *Filter Cap
C9 – 47uF 50V
C14 – 22uF 50V
C15 – 10uF 50V
C17 – 1uF 50V
C18 – 2.2uF 50V
C19 – 4.7uF 50V
C21 – 1000uF 10V
C23 – 220uF 25VC24 – 3.3uF 50V
C25 – 330uF 16V
C28 – 2200uF 10V
C29 – 2200uF 10V
C31 – 2200uF 10V
C32 – 2200uF 10V
C34 – 4.7uF 50V
C35 – 2200uF 10V *A small diameter cap is preferred here
C36 – 2.2uF 50V
C37 – 0.47uF 50V
C38 – 3.3uF 50V
C41 – 10uF 50V
Cap Location Map
Here is a map I’ve put together of where each of these caps is located on the PCB and the direction each cap should be facing. When replacing the caps you should take note of the capacitance, voltage and orientation of the old cap to ensure that it agrees with the above cap list and the below cap map. The PCB itself should also note the capacitor number and orientation of each of these caps for further confirmation. I’ve run into other PCBs where the markings on the board didn’t agree with the direction that the old cap was installed, but in my experience the Sun PSUs have always been marked correctly on the PCB.
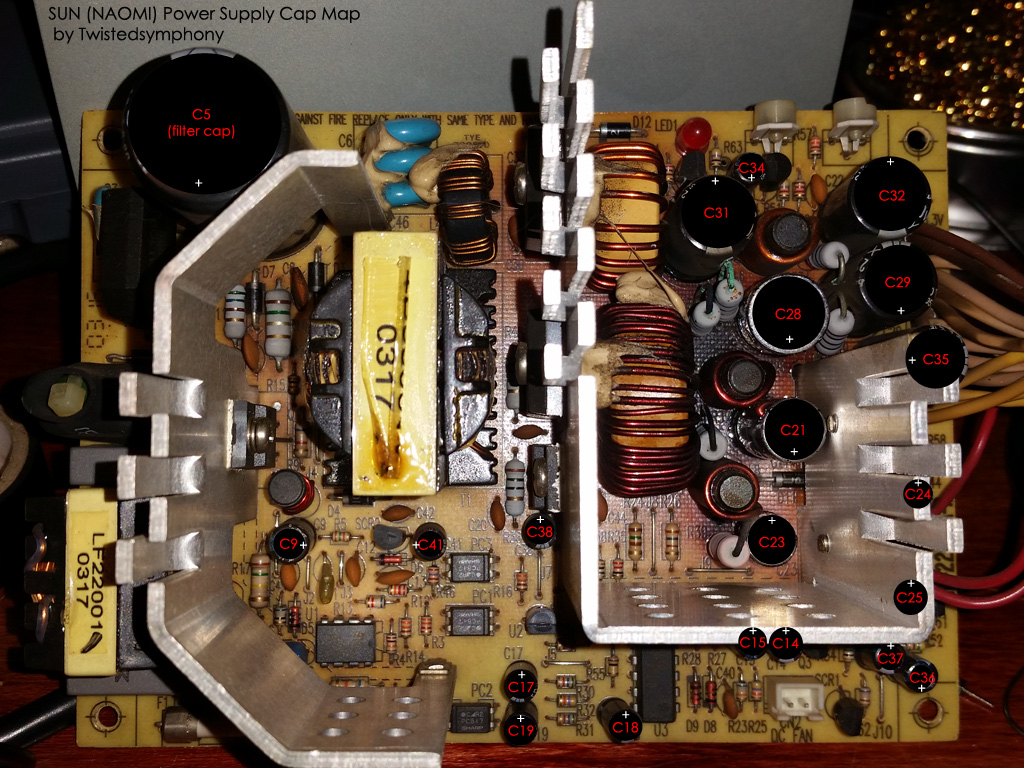
*The cap map was made from a photo I took of one of the PSUs I performed a cap kit on. take note of the blackened PCB by C28, this cap had already cracked and started leaking on the bottom which also caused the green/black corrosion on the neighboring resistors. Thankfully no permanent damage was done. I should also note that from the outside this PSU was running with zero problems. This was a ticking time bomb and I was lucky enough to notice the bloated and leaking cap before the PSU failed and or more serious damage occurred.
Replacing the Fan
These Sun PSUs also have an fan that can die or become very noisy. its the same size and shape as an 80mm (x25mm) desktop PC case fan. This is a 2-pin 12V fan that uses a 2-pin JST PH connector. Most PC fans wont use this connector but you can either cut off the connector of the new fan and splice on a pig-tail from the old one, or buy a JST PH connector to crimp onto the leads of your new fan. Either way replacing this fan is another cheap way to keep your power supply running in top shape for a good many years to come.
Where to buy these parts?
You can piece together your own cap kit using parts from Mouser, Digikey or your preferred online parts vendor, most of these stores will also carry the JST-PH connector for the fan as well. 80mm cooling fans can be found anywhere computer parts are sold.
If you’re interested in buying a pre-made cap-kit instead of piecing one together yourself Ian Kellogg sells one and he also sells the filter cap. I don’t know of anyone else making kits for these PSUs at the moment but if you know of any please leave a comment.