Archive for the 'Tools' Category

ROMIDENT Drag and Drop Tool

What is ROMIDENT and why should you care?

When troubleshooting an an arcade PCB it can sometimes be helpful to compare the ROM data on your PCB to the ROM data within MAME. MAME is more than just a way to play classic games, the documentation within the source code is invaluable to understanding how the hardware works, and the ROMs themselves can serve as a tool to compare and verify the ROMs on your original arcade hardware.

To this end MAME has a great feature called “romident”. You’ll first need to use a EPROM reader/writer to read the data off of you EPROM or mask ROM and save it to a file, then you can check to see if that file exists in MAME by running this command: Continue reading ‘ROMIDENT Drag and Drop Tool’

Bought myself a DSO Nano V2 today

I’ve wanted to add an oscilloscope to my electronics toolbox for years.  I’ve passed on a few projects simply because I wouldn’t be able to complete them without one. Well there are a few electrical loose ends to tie up with my LS1 swap so I finally bit the bullet and bought a DSO Nano. Much to my surprise they’ve releases a V2 of the hardware that’s even prettier than the original.

My two biggest apprehensions to buying this were that it only supports up to 1MHz frequencies and that it only has 1 channel. Ideally I like 100MHz and 2 channels at minimum but it was only $90 including shipping, which is a friggin STEAL for a digital capture scope, never-mind one that’s hand-held.

I was almost persuaded to belay the purchase again when I saw on SeeedStuio’s website that they’re taking pre-orders for the Beta version of the DSO Quad.

The Quad has 4 channels and supports up to 36MHz which makes it a huge improvement over the Nano and the pre-order price for the beta test is only $150, but the “estimated” release date is late March. Having the Nano will be an enormous improvement over not having a scope at all, and the Quad is cheap enough that I’ll wait until it’s out of Beta to buy one.  Either way, I’m stoked to finally have an oscilloscope at my disposal again, since I haven’t had access to one since college.

Large Format Scanner

I’ve been watching eBay for a while looking for a Large format scanner for a project I’ve been getting ready for and finally picked up this used Mustek A3 USB. It can scan up to 11×17. New these go for $175 shipped on eBay but I managed to grab this one for less than half of that.

I’m fairly pleased so far…

Mustek A3 USB

Evapo-Rust Mini Review

So I had these bolts and eccentric washers that I took off my car and replaced and really I didn’t even need to. The old ones were coated in surface rust so I decided to try some stuff to take it off.

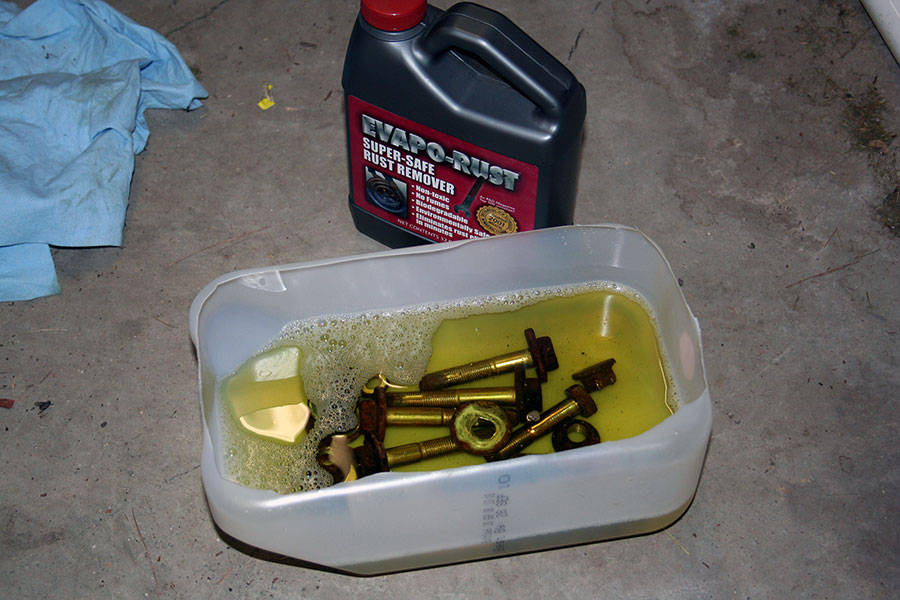
I had read a few raving reviews about Evapo-Rust and seen some videos so I decided to give it a shot. The stuff looks like anti-freeze but it feels slippery like dish-soap on your fingers. It’s pretty expensive too this bottle cost just under $9 and it was barely enough to do the hardware I was cleaning. Though it’s supposedly reusable so I dumped it back in the bottle once I was done.

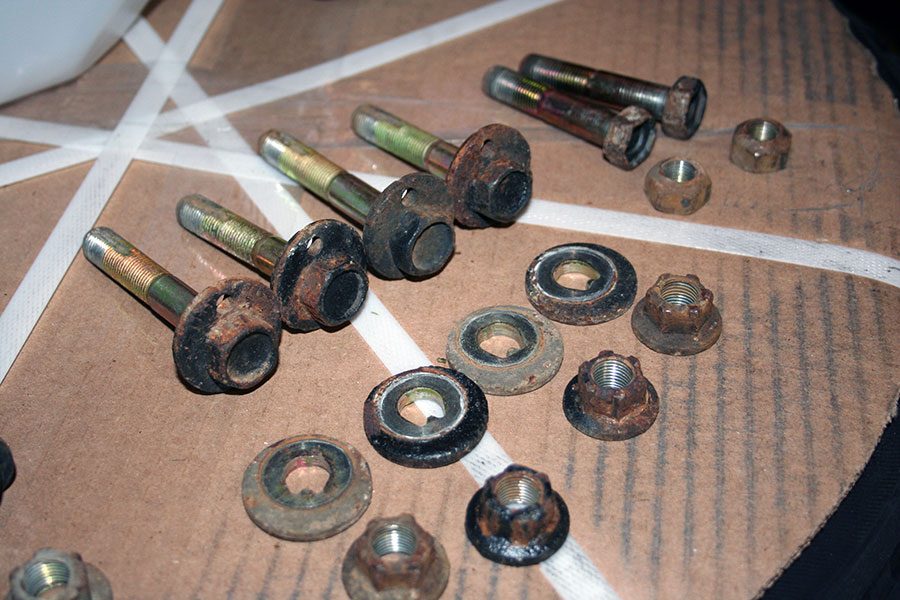
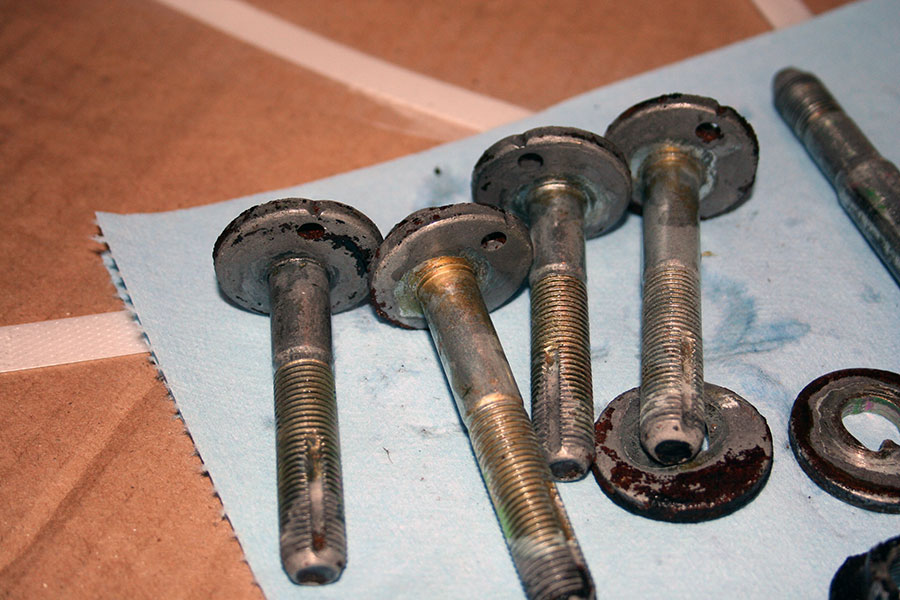
Here’s a picture of my hardware beforeI did anything.

 Evaorust Test Evaporust Test

Notice there is both surface rust as wella as this thick black stuff. That thick black stuff is rubberized undercoating because the previous owner of the car had it coated to prevent rusting and it got on some of the bolts. It looks really nasty but it doesn’t harm anything. Apparently Evapo-Rust doesn’t harm plastic or rubber so I went into this assuming that it would leave theundercoating stuff (which kind of sucks becaus it looks ugly).

I dumped the whole bottle of of the stuff in the bottom of a cut-up water jug and just dumped all my hardware in there. Supposidly it does it’s work in a matter of minutes but I was on my way out so i just left it for the night.

Evaporust Test

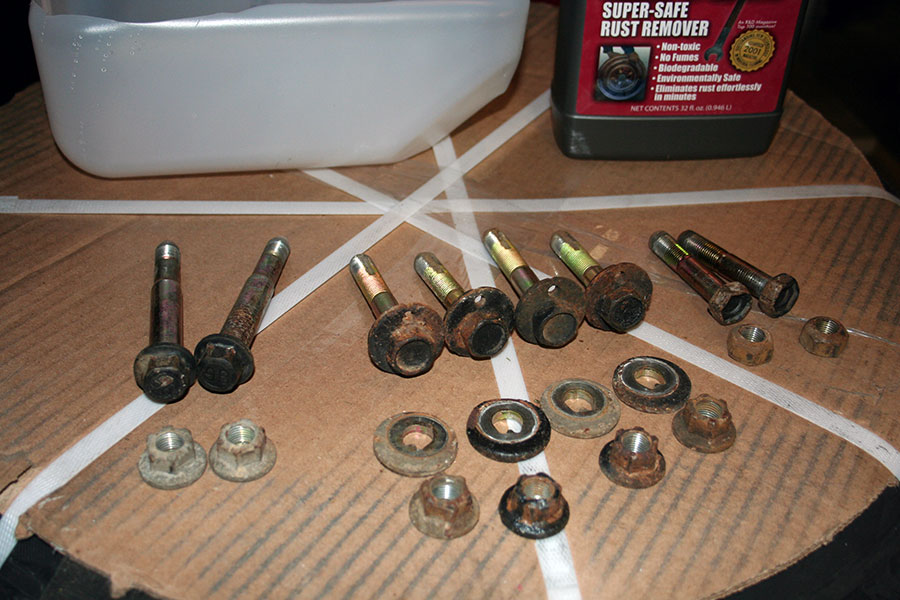
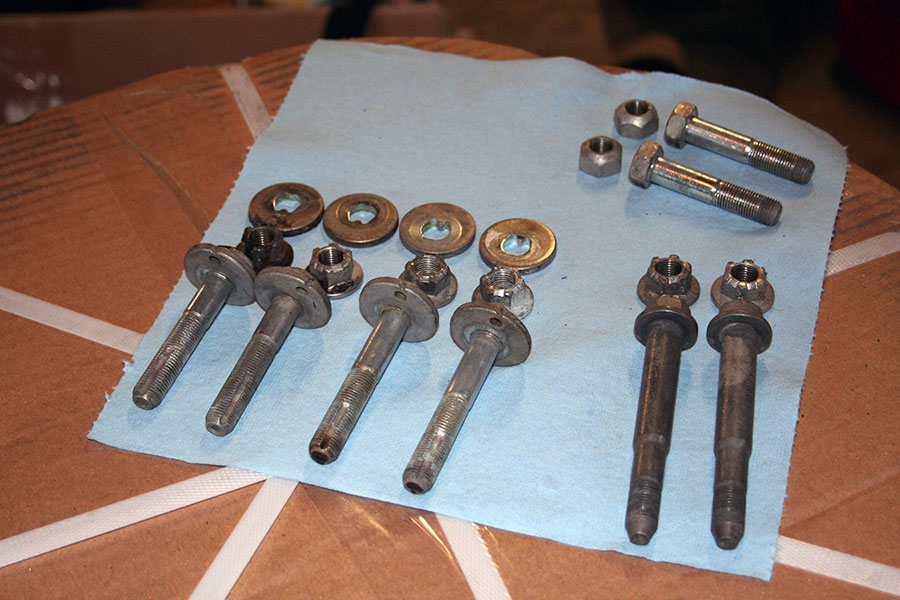
The next morning after rincing off the hardware it looked like this:

Evaporust Test  Evaporust Test

 Some patches of rust still remained but it was mostly cosmetic as the parts were all smooth to the touch. As suspected the undercoated parts were still narly. I decided to try a 2nd application to see if it could get rid of the rest of the crap to make them completely clean.

 Evaporust Test Evaporust Test

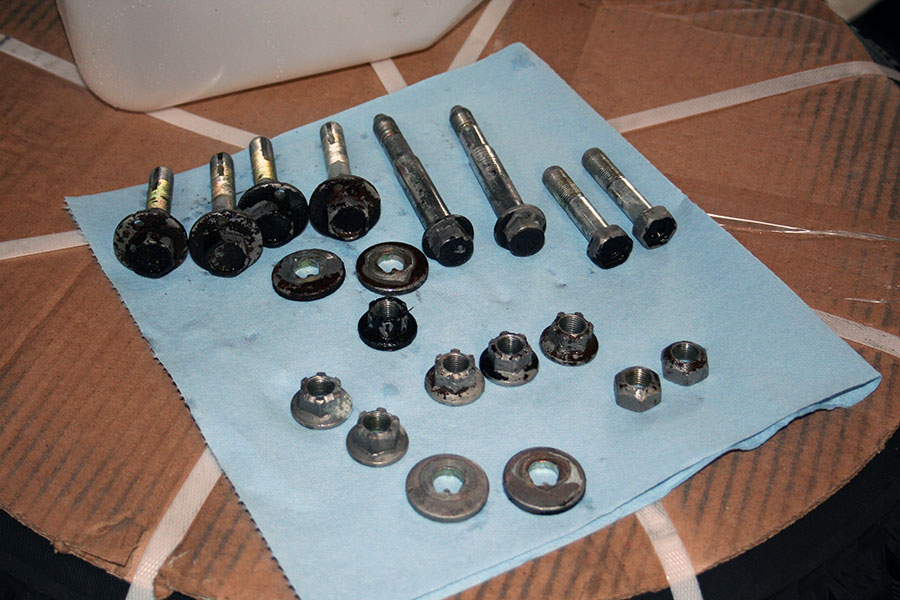
 I’m pretty happy with the outcome, if I want to remove the undercoated parts I’ll have to use paint stripper or a wire brush but on a whole the Evapo-Rust did it’s job. $9 might be a bit much but considering that all of this hardware NEW from Nissan cost nearly $100 to replace, I’m fairly certain that next time I take off some bolts I’ll clean them with this stuff before deciding to replace them. At least now the parts are clean enough that I’ll be able more easily sell them and recoup some of the money I spent on the new parts.

Refinish Restorer

After getting harassed by a co-worker for having ugly faded plastic cladding on my Vehicross, I finally got around to trying out the Refinish Restorer product I imported from Germany. I am so incredibly happy with the results, you have no idea.

BEFORE – AFTER

1999 Isuzu VehiCROSS Clear turn Signals, Nitto Terra Grapplers Vehicross with Refinish Restorer

My New Toy: A Light Tent

Over the Weekend I picked up a Light Tent. If you’ve never heard of one of these things it’s basically a white tent with a felt like material on the back and bottom and the top and sides are made of a semi-transparent white tent material. Color corrected lamps are placed outside the tent  and shine through the sides defusing the light. This is basically the kind of thing they use to make professional product photos with a pure white background and no shadows.

Professional tents can cost thousands and then you still need to buy lamps but this one was less than $100 and included the lights . It works exceptionally well for what I’m using it for. The included felt material comes in gray and blue (for easily cropping out the background in photoshop), I might look into  picking up some white material  and building some stuff to keep it under tension to keep out ripples and reduce shadows further.

In any case I’m more than pleased with what I got for my money. You can see the first photos I took with it over on collectorsedtion.org