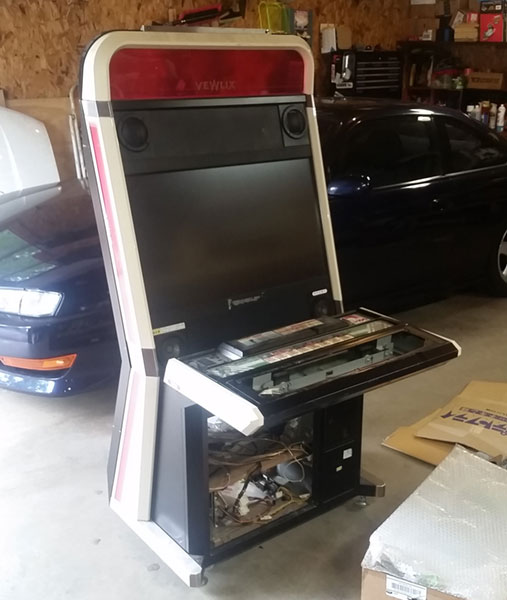
Recently I’ve been fixing up a Taito Vewlix F cabinet, this cabinet has the optional “JAMMA Kit” which includes the incredibly crappy Wei-Ya P271 Power Supply. This Power supply is notorious for pulsing the 12V line and killing itself (and potentially PCBs) when run on 120V AC.
The first solution that most people opt for is buying a Step-Down converter to supply 100V AC. This seems to make this power supply happy. The rest of the cab seems fine to work on 120V AC, and indeed, I had the opportunity to pick the brain of an arcade tech for Round 1 Arcades in the USA (who run thousands of these Vewlix cabs across the country) and he assured me that they don’t use Step-Down converters, but they also don’t use the JAMMA kit since they’re only running NESiCAxLive/ Taito Type X hardware, which has it’s own power supply.
The Second solution
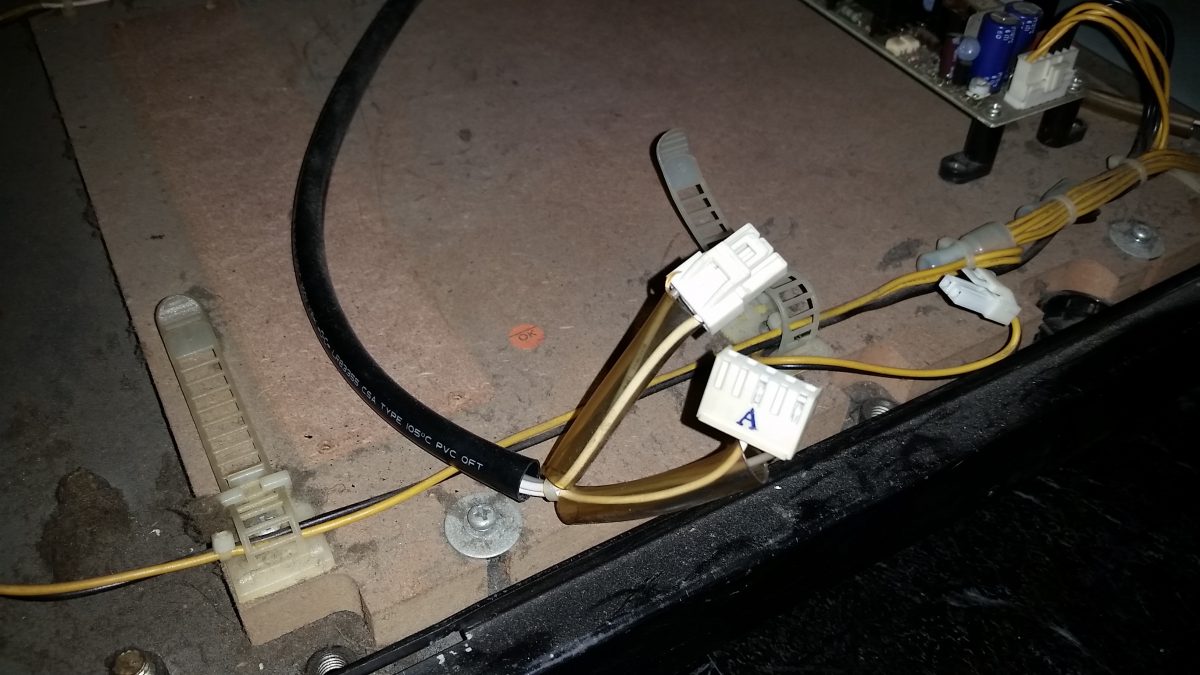
I was considering a second solution; planning to take a closer look at a component level of this power supply to see if I could modify it to play nicely with 120V AC there by no longer needing to run a bulky and expensive Step-Down converter. But to my “surprise” one of the 5V pins on my Wei-Ya PSU was burnt to a crisp. This cabinet came straight from Japan so it had never been run on 120V AC so whatever caused this burnt connector was either the PSU or the board it was connected to. I started looking for third solution.
The Sega Lindbergh Power Supply
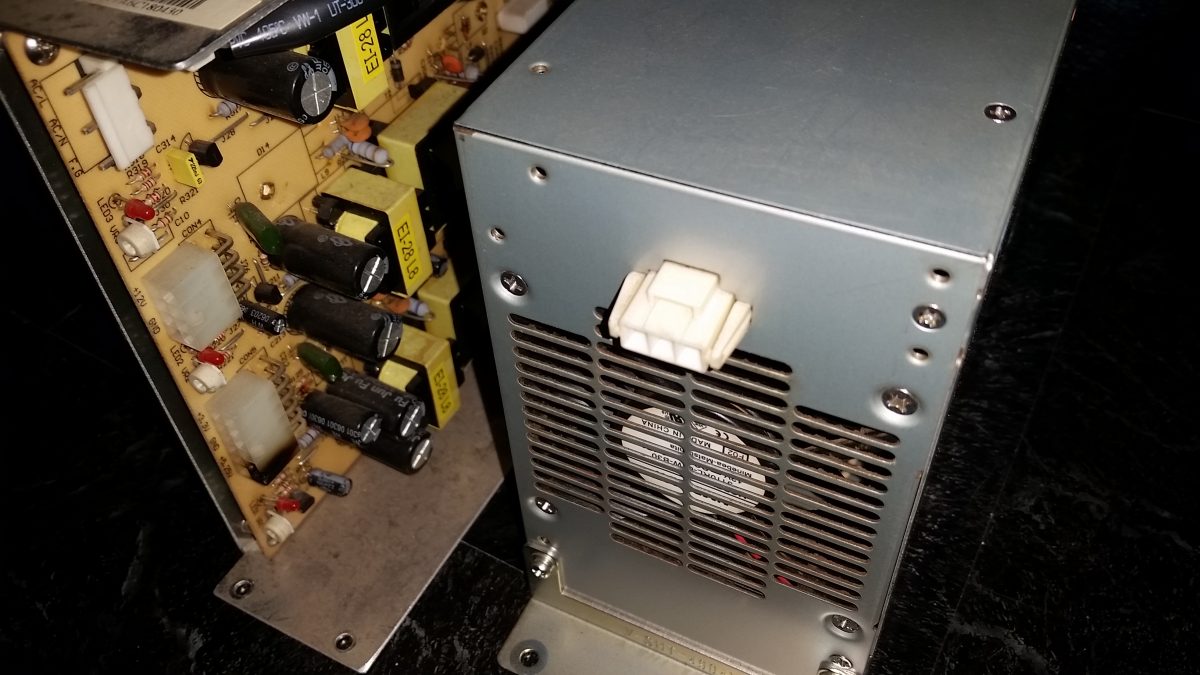
Like most modern arcade manufacturer, Sega moved beyond bespoke hardware and console based hardware to PC based hardware. But unlike their competitors their first PC based hardware; the Lindbergh, didn’t use an internal PC Power Supply, instead running on an external adjustable ATX Power Supply made by Sun. You may recognize that name as they also made the frequently sought-after NAOMI power supply. And indeed, the Lindbergh Power Supply has the features, specs, and looks like a beefed up version of the old NAOMI PSU.
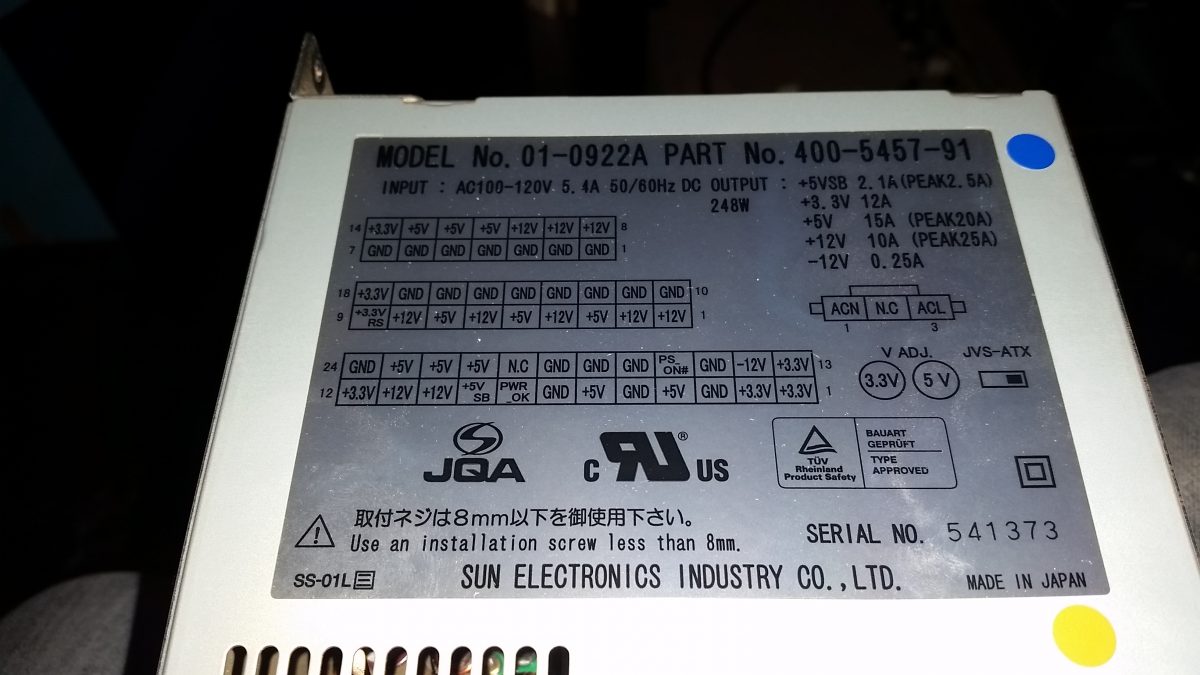
Sun Model No. 400-5457-91 features:
12A of +3.3V power (adjustable),
15A of +5.0V power (adjustable), and
10A of +12V power.
…it also offers a -12V line and can be switched between JVS and ATX modes with the ATX mode allowing the PSU to be switched on and off via a signal wire like a normal ATX PC Power Supply. This makes for an absolute beast of an arcade power supply. Also this thing runs rock solid on either 100V AC or 120V AC and indeed there were numerous Lindbergh based arcades that Sega shipped to the USA with this Power Supply in it.
These Power Supplies are a lot less common than the older NAOMI PSUs but (at the time of this writing) they tend to be priced the same or lower.
The only real failing is the lack of a -5V source required for the audio amp on certain older JAMMA boards, but considering the original Vewlix Wei-Ya Power Supply didn’t include this either, and I can’t think of any other JVS compatible Power Supply that does, it can hardly be held against it. Not to mention if you need -5V you can get yourself a Negatron.
Oh and one other thing that the Lindbergh PSU can do that the Wei-Ya can’t… Run a Lindbergh game. Not that there are many Vewlix compatible games on that platform (various versions of Virtua Fighter 5, and Power Smash 3 and uh… that’s about it really), but hey, the option is there. (UPDATE: after speaking with Ken at I-Repair-Sega on this topic it’s come to light that the Lindbergh PSU is in-fact NOT ideal for Lindbergh PCBs. Because it’s manually adjustable if the 12V rail is out of adjustment it can kill the GPU and other stuff in a Lindbergh. It’s actually recommended, by Sega, to pair the Lindbergh PCBs with a normal ATX PSU to prevent this from happening)
Hooking it up
So the Lindbergh PSU looks fantastic on paper and solves all of the problems associated with the Wei-Ya PSU but what kind of wiring mess do you need to deal with? Surprisingly, almost nothing.
If, like mine, your Lindbergh PSU came with the 24-pin connector then the only thing you need to do is de-pin the original Wei-Ya Harness and re-pin it into the 24-pin connector on the Lindbergh. Both the Wei-Ya and the Lindbergh use Molex MiniFit Jr connectors, the only difference is the size and pin arrangement. If your Lindbergh PSU didn’t come with any connectors than Molex PN: 5557-24R is what you’ll want. It will set you back about $1. I do highly recommend picking up the official pin extraction tool (Molex PN: 11-03-0044) This can be bought on Amazon for about $15.
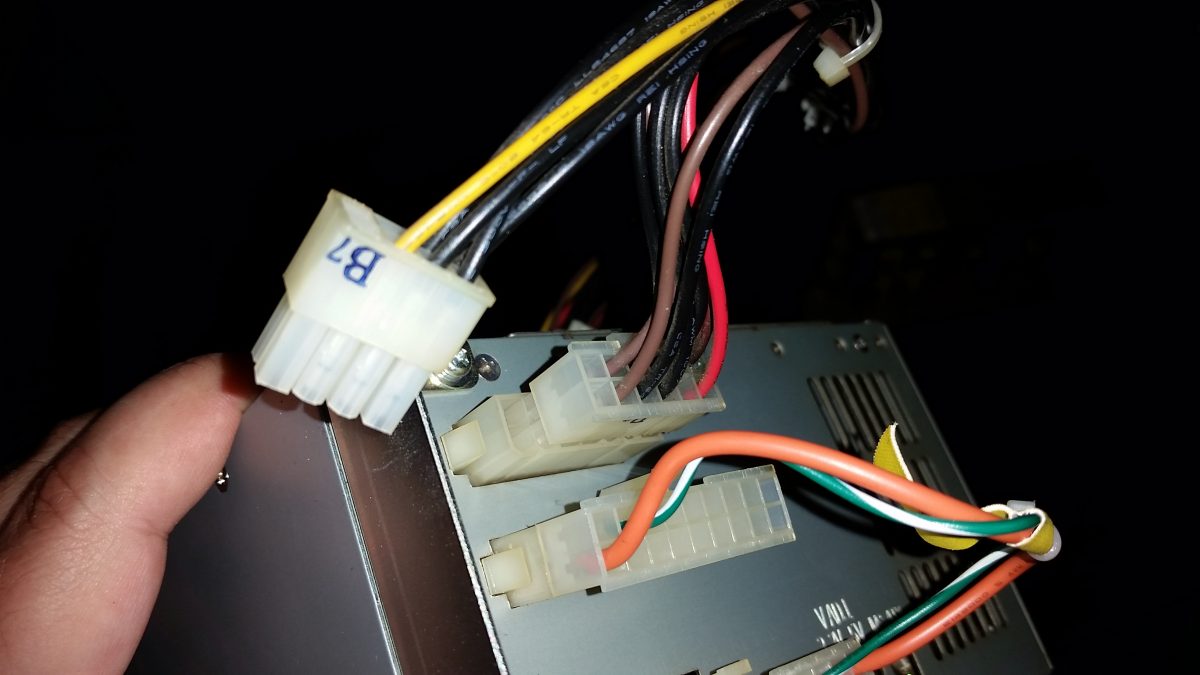
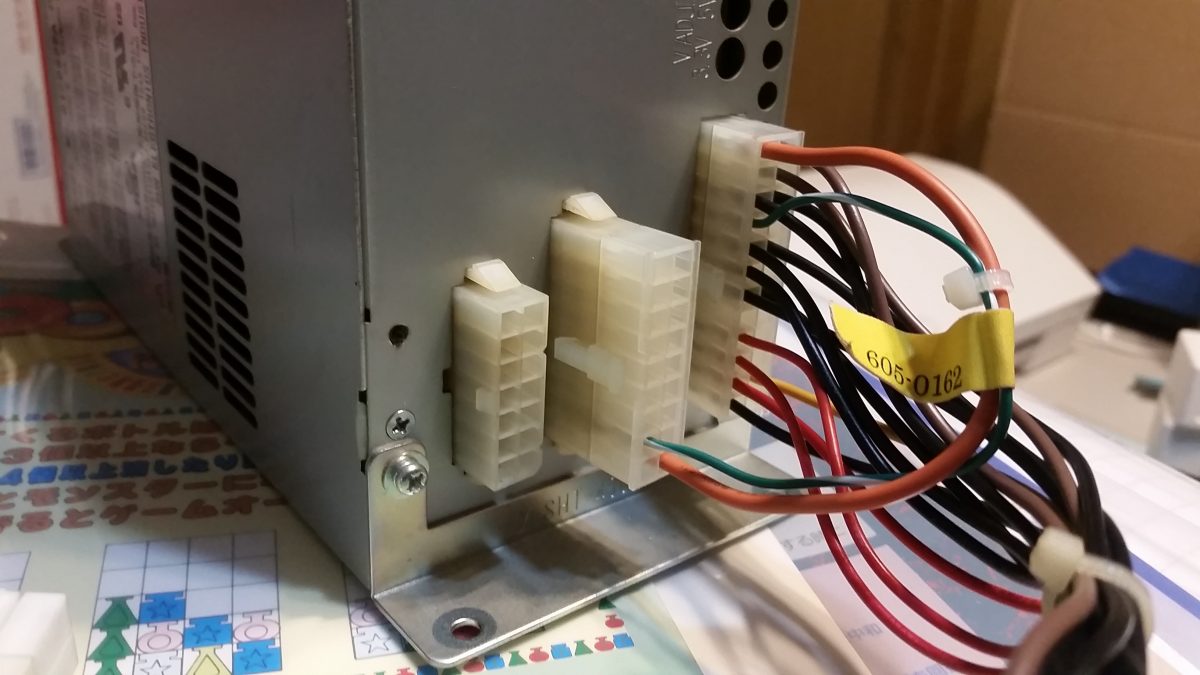
If you’re using the original output harness from the Wei-Ya it’s just a matter of matching colors to the pinout printed on the side of the Lindbergh PSU (and in the photo above).
Black = GND
Yellow = +12V
Red = +5.0V
Brow = +3.3V
As for the AC input; it seems that Taito was kind enough to supply a JST AC connector that plugs right into the Lindbergh PSU, it’s an unused connector right on the same section of harness as the Wei-Ya’s AC input connector. The Manual doesn’t mention what this is intended for but I wouldn’t be surprised if it was included specifically to run a Lindbergh PSU so that the Lindbergh Hardware would work in a Vewlix.
One small note here is that the Live and Neutral pins on the AC connector are reversed from what is labeled on the Lindbergh. This should be ok to run as-is but it’s easy enough to de-pin this connector and swap them around.
Disconnecting when not in use
It’s not wise to turn on a power supply without a load on it. Since the Vewlix has it’s own separate PSU for running the Amp and IO boards the JVS PSU will go unused unless you have a JAMMA board (or JVS Powered board) hooked up. This means that you want some simple/easy way to disable the PSU when it’s not being used. On the Wei-Ya Taito recommended simply disconnecting the AC input connector on the front. Unfortunately the AC connector of the Lindbergh PSU is on the back, and while there is plenty of room to reach around and unplug it, it can be annoying to do it blind.
However, as I mentioned before, the Lindbergh PSU can be run in ATX mode, which has a pin for a power-on signal. All you need to do is put the power supply in ATX mode and then tie this signal wire to ground to activate it. To de-activate it you could install a switch on this line, or even a jumper. My Lindbergh PSU has this wire run to ground on a separate output connector. I left that in place, so now when I want to deactivate it, I simply unplug that secondary connector. Another option would be to just tie that signal wire directly to a ground on the 24 pin connector and then just unplug the 24-pin connector when not in use. There are a lot of good options here.
Final Thoughts
I’m very happy with this solution, it feels like a true upgrade to the cabinet providing stronger, cleaner, and more reliable power without the use of a bulky step-down converter. Not to mention the added flexibility of uses. And most importantly this is completely reversible should I ever decide to undo it and “roll-back” to the original Wei-Ya PSU.
0 Responses to “A Better Vewlix Power Supply”