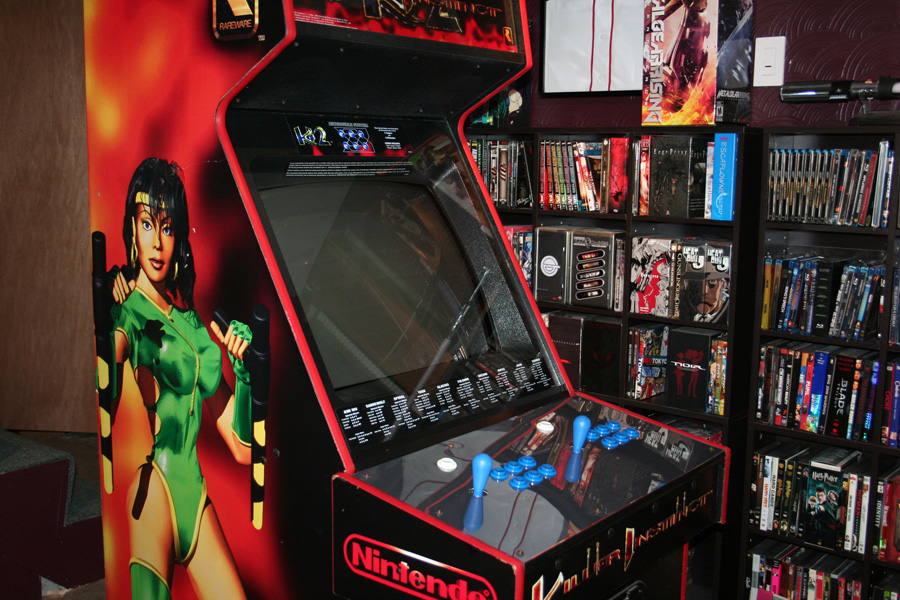
So I finally “finished” my killer instinct 2 arcade machine de-conversion.
Here are the changes I’ve made since the last update…
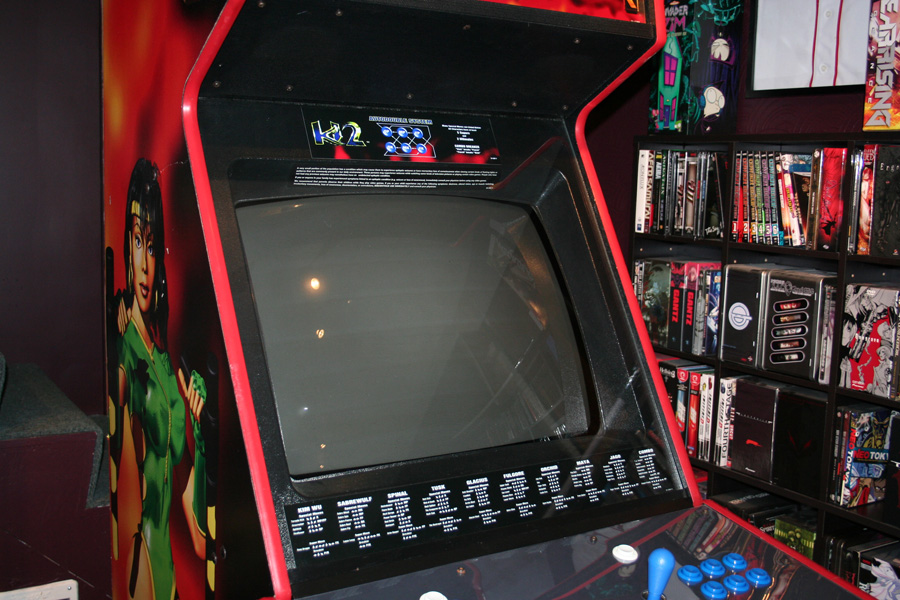
1. Tuned the monitor. The convergence on the monitor was way out of whack because the yoke was lose (missing a few wedges) I replaced the wedges aligned the monitor and build some homemade convergence strips to improve the image. I couldn’t get the convergence perfect but it’s better than it was and everything is secured properly now so it wont be falling out of adjustment again. I also manually degaussed the monitor because it needed it badly.
2. Added a light shield above the monitor glass, it bugged me that the marquee light was leaking into the monitor glass, a small strip of poster-board and some staples fixed that easily.
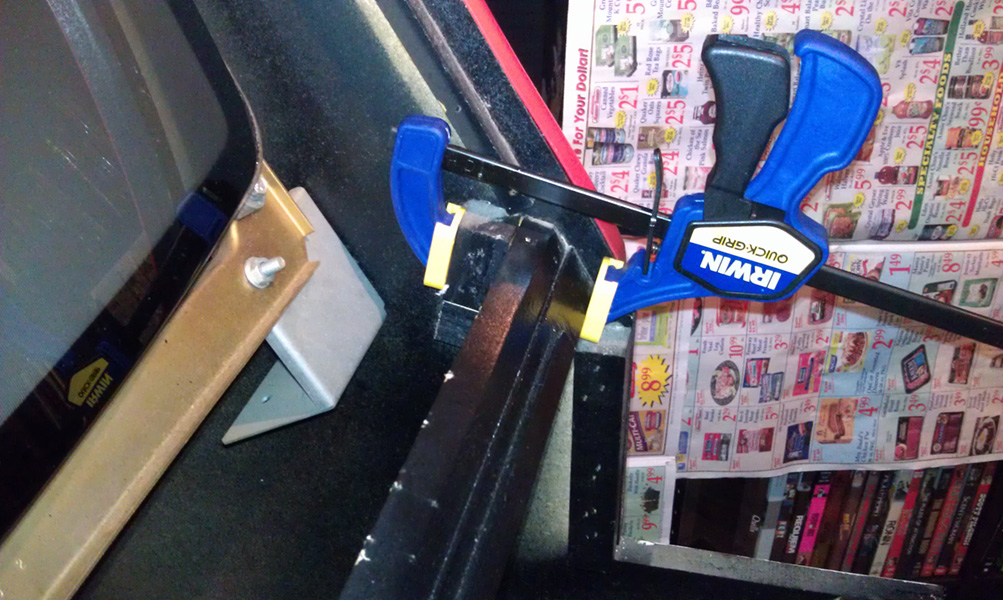
3. Repaired some of the structural wood that was lose, this picture is of the monitor bezel and glass support, it was coming lose and twisting so I pulled it, put fresh nails in it one size larger and then glued it in place. Now the bezel even lines up with the monitor better than it did before.
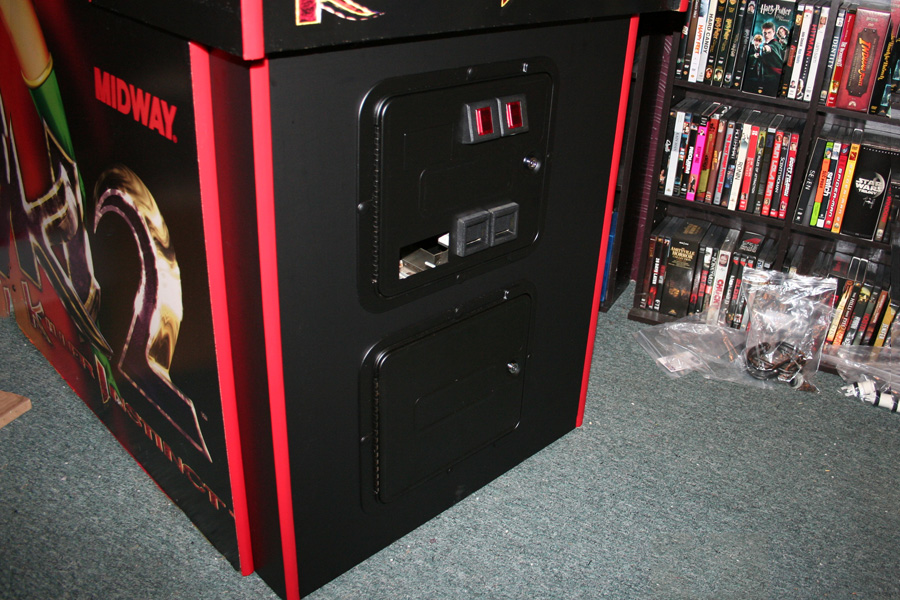
4. Kick panel fill, smooth and wrap. I glued wooden dowels into the holes left from a lock bar, then I bondoed them smooth and filled some rough edges along the bottom. Sanded that and the black portion of the sides smooth. Once everything was dry and smooth I wrapped it in Matte-Black 3M Di-Noc Vinyl (the same stuff they use to wrap cars).
5. Coin doors were powder coated, all the parts cleaned and rebuilt, even put some fresh bulbs and new locks in there.
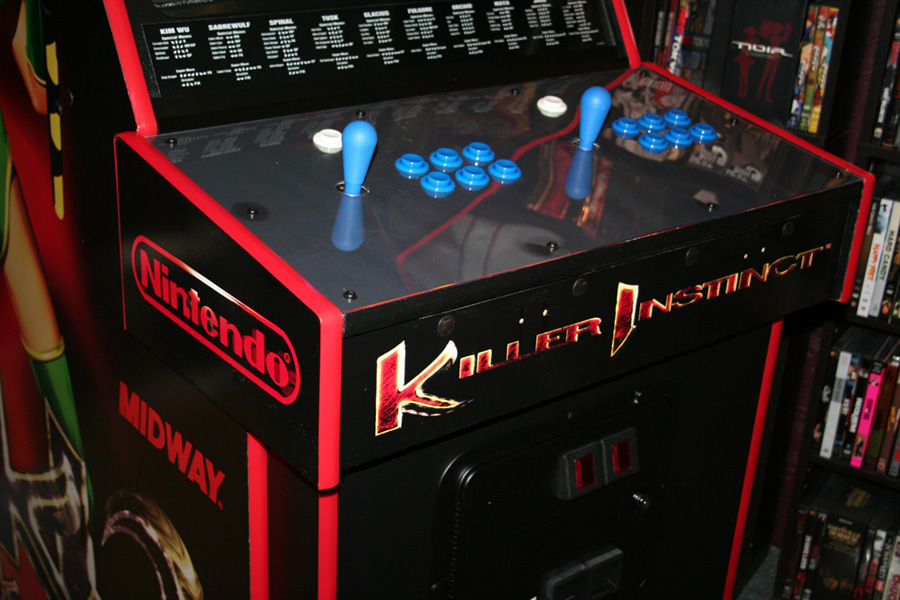
6. Touched up paint on the control panel box and some scuffs in the side art.
for reference here is what it looks like before the touch up paint:
7. All new fresh T-Molding
There are a few things that still need to be done but I can’t do them until I find the parts…
I need a coin door blank to fill in the bill validator slot
I need a control panel overlay to replace the matte black placeholder I have there now
I need a midway 120mm fan mount for the cooling fan
Not needed but I’d like new graphics for the control panel box front and sides
Sadly none of those parts are readily available so I’ll simply have to keep an eye out and buy them if and when I see them pop up for sale.
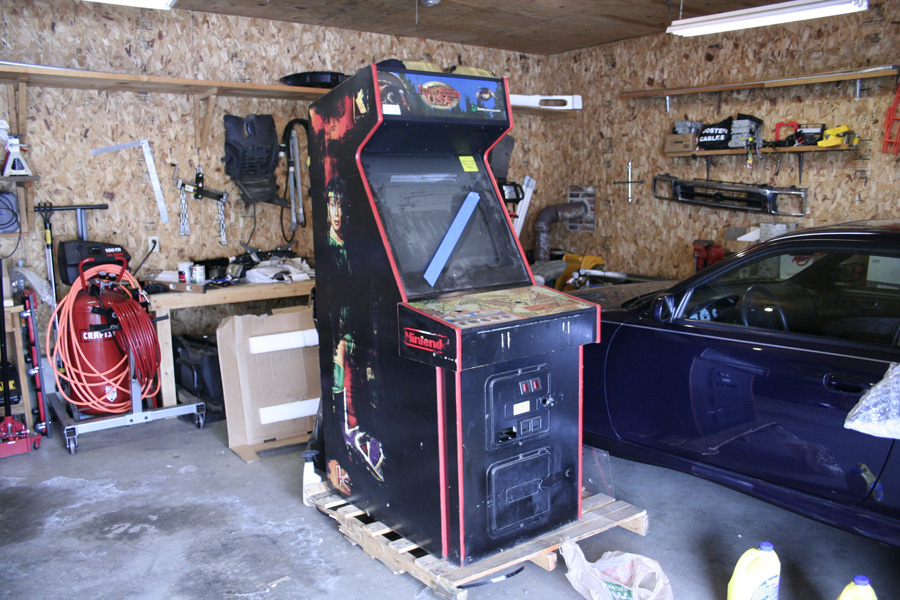
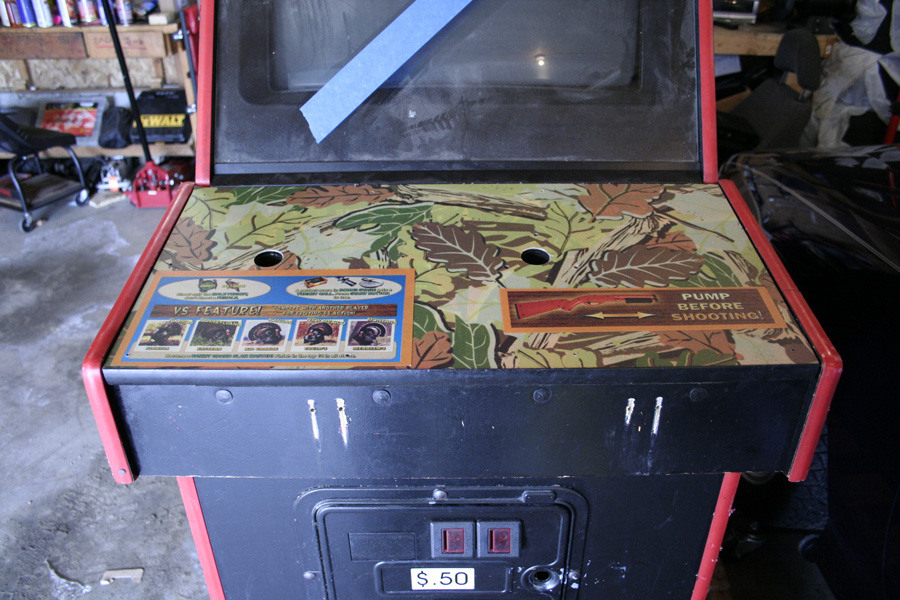
Last month I cam across an eBay auction for a former Killer Instinct 2 arcade machine. I say “former” because this poor machine was converted to “Turkey Hunter USA”. A conversion generally means spray-painting all of the original cabinet artwork black, replacing the computer board and the marque and finally gutting the old control panel, covering over the original control panel art with new art and drilling fresh holes for the new controls. It’s quite sad to see, and it’s something I hated doing when I worked in an arcade.
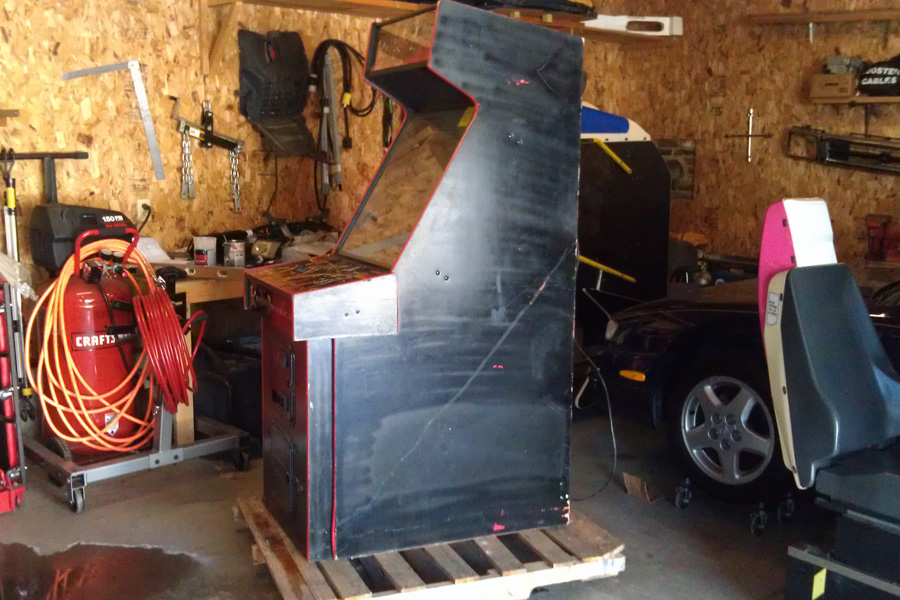
Killer Instinct 2 is my all-time favorite arcade game, they’re pretty uncommon to find in arcades these days and they’re fairly uncommon among collectors as well and growing in value. The cabinet for sale had the turkey hunter controls and PCB removed so it was just a cabinet and monitor with Turkey hunter art work. $200 +another $150 or so for freight shipping. I decided to buy it and this is what I got:
I had a lot of parts to order, I had to buy buttons and joy sticks, a Killer Instinct Marquee, new control panel lexan overlay and art, and the condition of the monitor and power supply were completely unknown and of course I had to buy a Killer Instinct 2 PCB, without that it’s just a fancy box. Lots of other little things such hardware, wiring, connectors, etc.
Paint Removal/Cabinet: First thing was getting the paint removed off the original artwork, this was first because I wanted to get it done out in the garage before moving the machine indoors. I first tried a product called Lift-Off, which worked but not very well, I then switched to a different product called Citri-Strip, which was fantastic. The results:
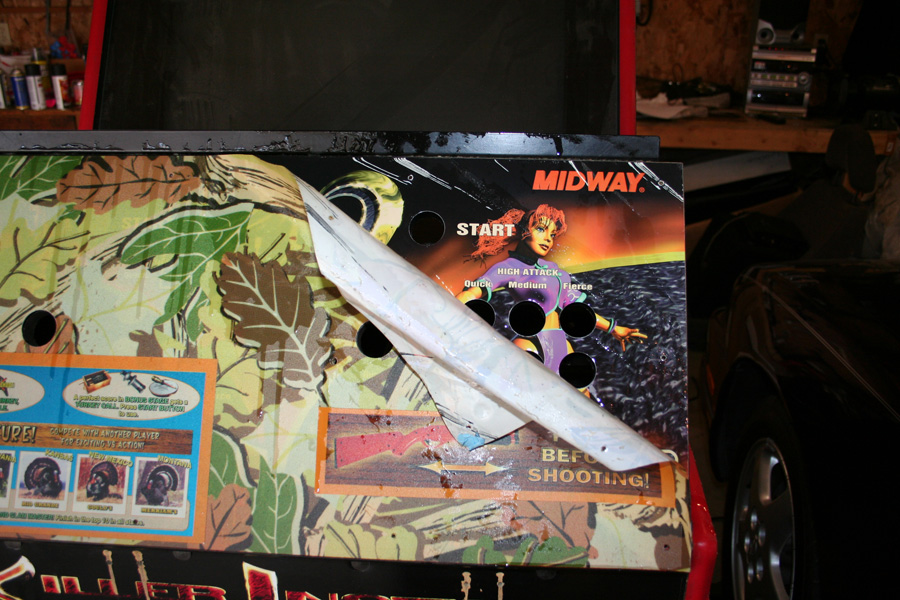
I also attempted to remove the Turkey hunter control panel graphics, after unbolting the plastic overlay I tried both a heat gun and goo-gone to separate the new control panel art from the original control panel art, the results, sadly, weren’t that great:
You can see that the new art work pulled up some of the paint from the original art, leaving nasty white lines of missing graphics. Even if that wasn’t the case there were three additional holes drilled in the original overlay around the player 2 joystick and the colors were all faded and dingy (the Killer Instinct logo on the Control panel top is supposed to be red just like the Killer Instinct logo on the control panel front).
I managed to find a new, never used Killer Instinct 2 marquee, which made for the easiest and best looking part of the cabinet “deconversion” so far.
Of course even this took some work, the marquee was for a conversion kit (meaning for people who wanted convert a non Killer Instinct machine to Killer Instinct 2) so it needed to be trimmed to size.
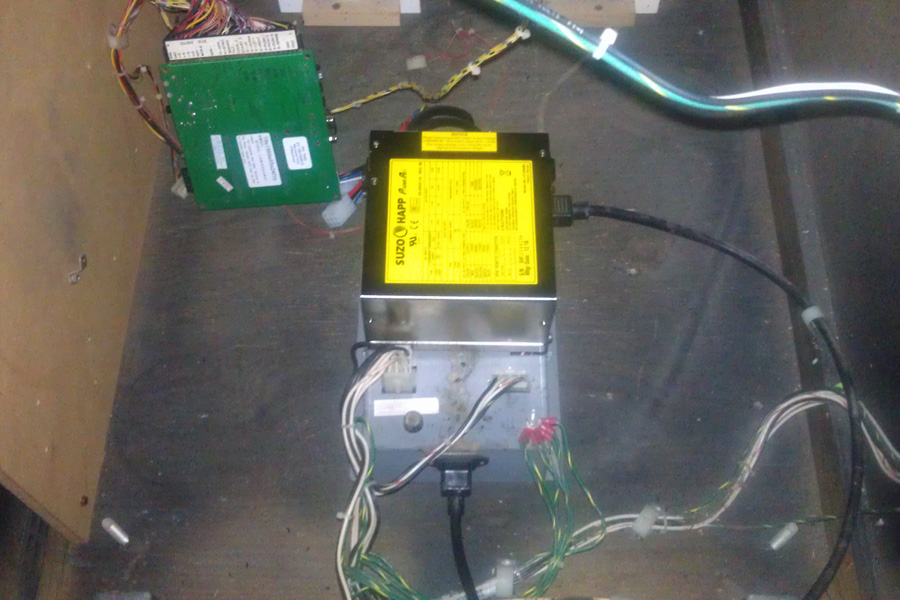
Electronics: The power supply was making some horrid noises, it wasn’t even the original power supply. I pulled it and bench tested it and found that the output voltages were way off so it was getting junked. The monitor was making some horrible noises too, the PCB I put int to test it wouldn’t boot (due to the bad power supply) so I couldn’t determine if it worked or not.
For some odd reason there were hundreds of finishing nails among other bits of hardware on the floor so I cleaned all of that up to prevent any electrical shorts and I bought a new power supply, then modified it to fit in the original mounting location (the junk one that came with the cabinet wasn’t original and had just been screwed into the floor)
This let me boot it up but sadly the monitor wasn’t showing a clear image
I pulled the monitor chassis and bought all new capacitors and a new flyback, I also planned to replace a few small parts related to image sync to fix the horizontal sync issue the monitor seems to be having. Here is the chassis with all of the new parts installed:
No good, after reinstalling the image quality was better but the monitor couldn’t hold a sync; it was even worse than before. After getting advice from a few experts they told me to check that I hadn’t installed one of the new parts backwards… after pulling the board back out again and checking I found that the part in question wasn’t in backwards but the solder joint wasn’t strong enough, fixing that, and reinstalling the board I get a nice stable picture. Some small adjustments still need to be made but on a whole the picture looks great.
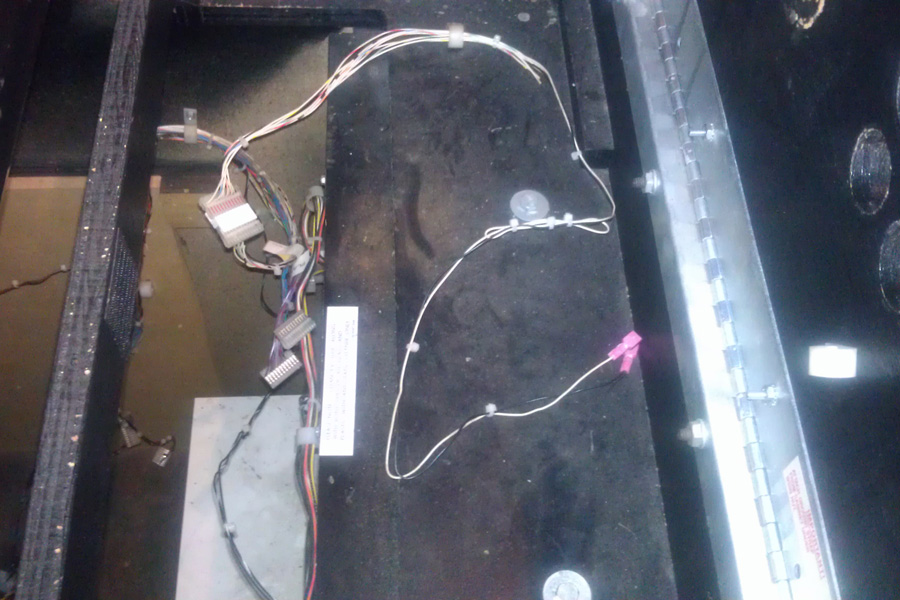
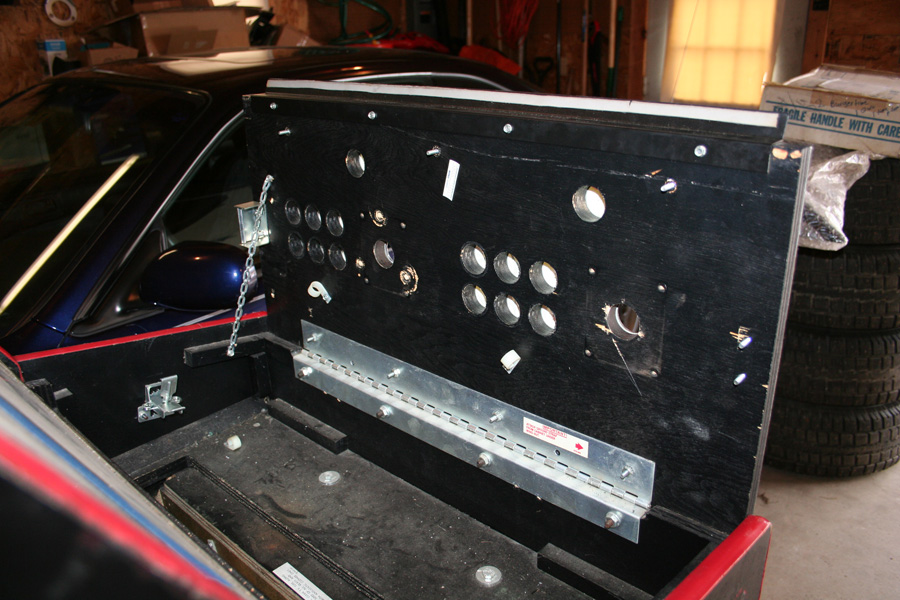
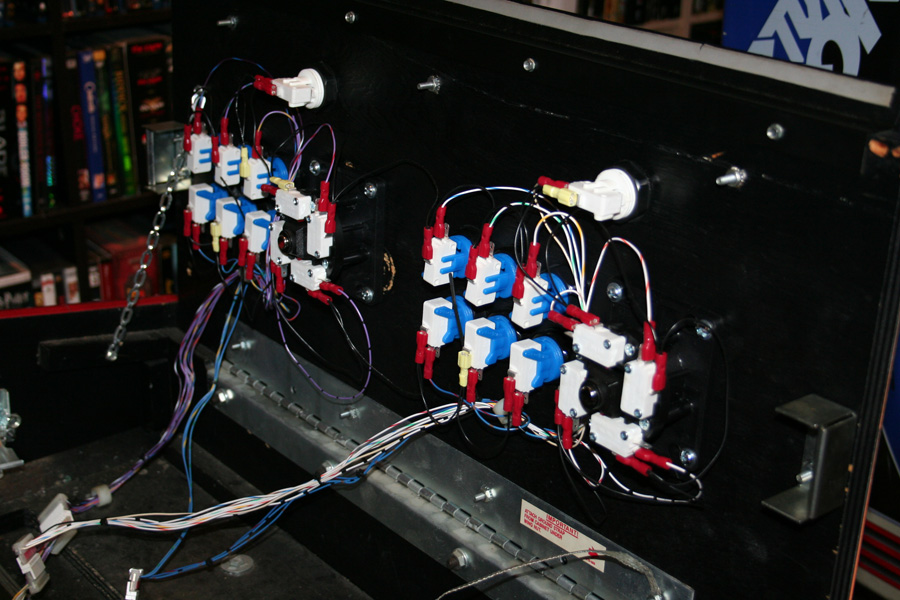
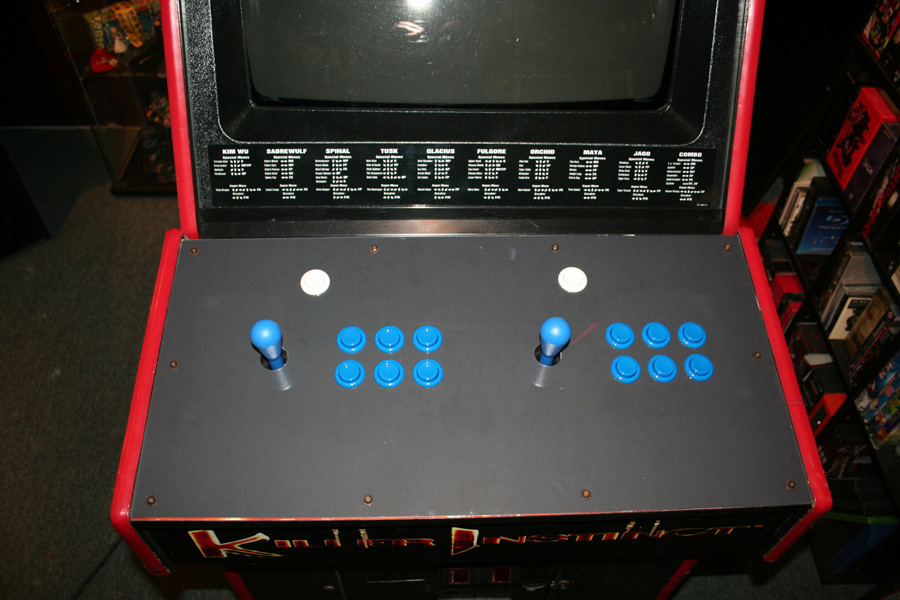
Control Panel: Not only was the original control panel gutted and then drilled out when it was converted but all of the original control panel wiring had been cut out of the machine as well. I had to completely disassemble the control panel and install new tee-nuts for the joysticks. I bought all new buttons, joysticks and switches. I couldn’t find a Killer Instinct 2 control panel harness for sale so I would have to build one. I found a harness for a different Midway game that used the same style connectors and wiring colors so I bought it. Repinned the connectors for Killer Instinct and then routed, trimmed, and crimped a disconnect onto each wire. Here is what I started with (just 2 wires!), and what I built:
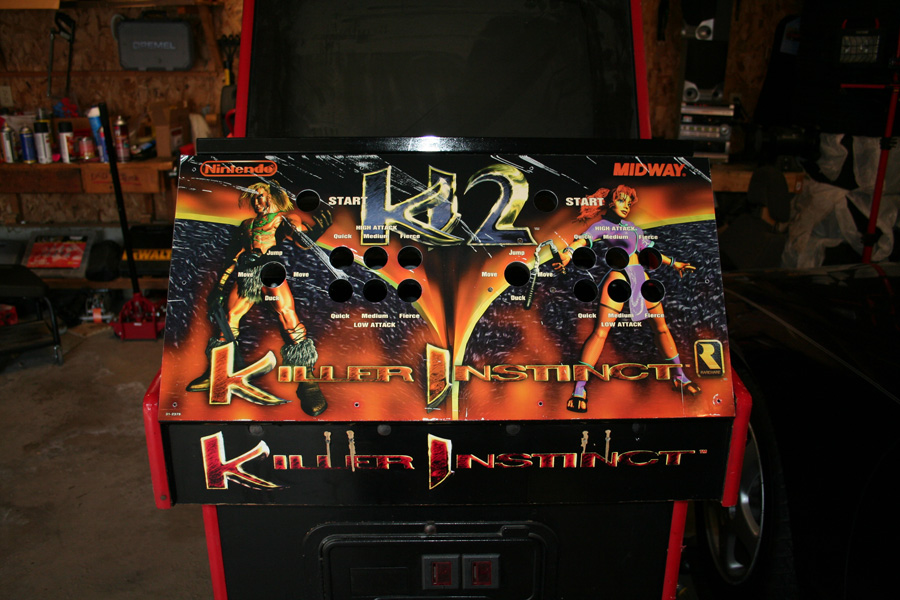
Control Panel Overlay and Monitor Bezel: I still haven’t been able to find new control panel art, so I made myself an temporary cover-up out of some black poster board. I also bought a reproduction laser-cut lexan control panel overlay and I had new monitor bezel stickers printed from some scans that I found online.
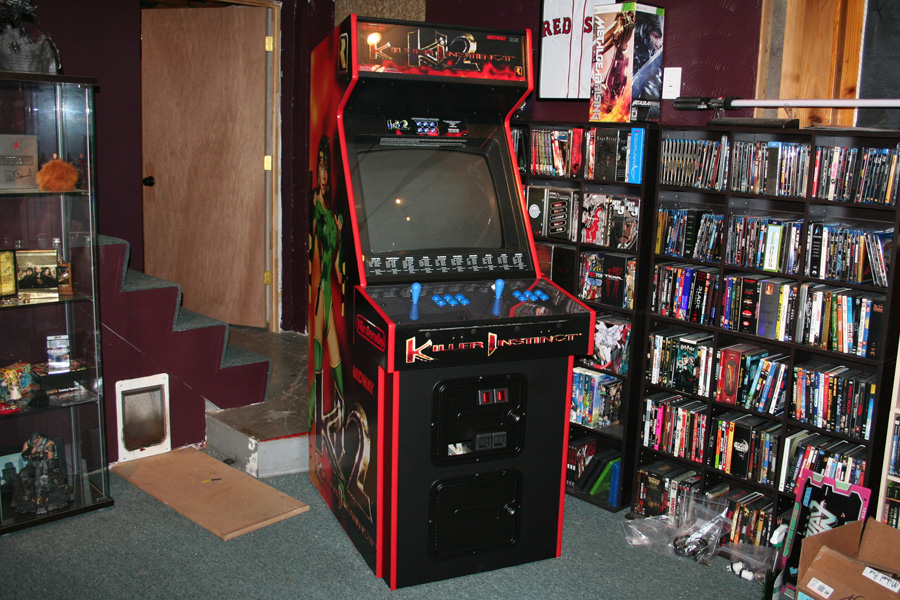
The Results so far: So I’ve got all of the electronics fixed and rebuilt the cabinet has been washed clean of all the Turkey Hunter conversion stink, the last bit is to plug in the Killer Instinct 2 PCB I bought and fire it up:
I got a few games in and I’m really happy to have all the work so far pay off.
What’s left to do: I’ve still got some finishing touches to do here is the list
touch up paint on the side art to cover up scuffs and scrapes
repaint the front lower section of the cabinet
replace a coin door light bulb
find and install a bill collector blank for the hole in the coin door
find and install a proper control panel graphic
properly mount the KI2 PCB
install a cooling fan for the PCB
fine-tune the convergence on the monitor
built a light shield to prevent the marquee light from bleeding onto the monitor bezel
install new t-molding
I’ll get some of the larger items on this list done soon, but other items might take a while to source the right parts. I’ll do an in-depth wrap up video once I’m 100% done.
I haven’t been a PC gamer for years. I spend all day at work sitting a computer desk, I spend a lot of time at home sitting at a computer desk working (to keep my various websites running) so when I need some down-time I’d rather sit on my couch and play games then spend even more time at a computer desk…
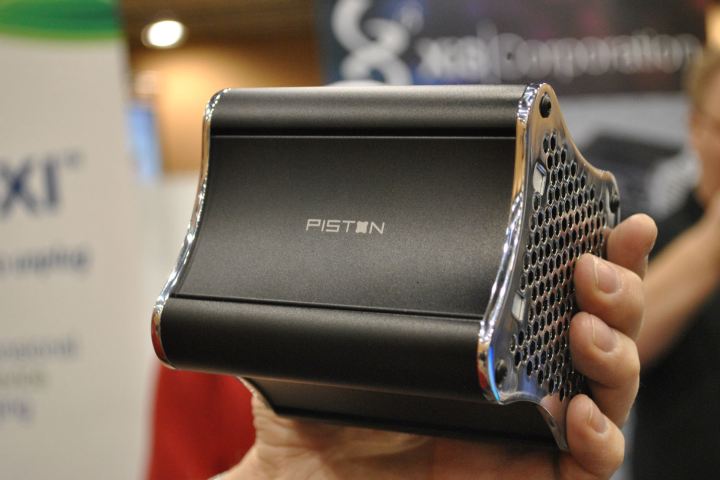
A few months ago Valve introduced “Big Picture Mode” for Steam. This mode basically adjusts the Steam menu system for HDTVs and controller based navigation. Rumors started flying that they were going to make their own console to compete with Playstation and Xbox. More recently those rumors were somewhat confirmed when Valve announced that they will be making a “SteamBox” spec for what this Living Room PC should be, essentially allowing any hardware manufacturer to make their own variation of the SteamBox and at the same time help standardize the PC; the first of which is the Xi3 Piston.
This obviously intrigued me since there are a number of PC games I’d love to play but not wanting to drop $1000+ for a gaming PC and then spend even more time in my office playing it. So I set out to build my own budget SteamBox. The SteamBox “spec” hasn’t been released, though chances are it would be out of my price range anyway so I was just going to see if I could get the job done for under $300 (what I’d expect to pay for a console) leveraging the piles and piles of old PCs I had laying around.
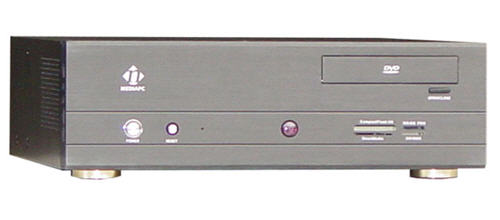
The first PC I was sacrificing was an old HTPC/DVR I built, after looking at the equipment inside I quickly determined that the only thing worth salvaging was the case itself and the disc-drive. The case was an nMedia HTPC 600BAR. It’s a nice black steel chassis that supports a full-sized ATX Motherboard with a real brushed aluminum front, an integrated IR window, as well as flash media ports right on the front and a decorative disc tray door. (it’s also got USB, Firewire, and audio ports on the side right near the front). The DVD R/W drive is nothing special but it’s compact, quite and supports SATA.
The second PC I salvaged was one that my brother gave to me. I had built it for him 2 years ago for HD Video editing. it was blue-screening on him every-time it booted up and he got frustrated and just bought a new PC and gave me his old one since I had built it. This had an Asus P5N-D motherboard which is setup for gaming with overclocking features, it had a Intel Core 2 Quad (Q6600) processor 3GB of DDR2 memory across two sticks, and a two Seagate Barracuda 320GB 7200RPM SATA drives setup in a RAID array. It had a really nice Rosewill 550W power supply and a good-for it’s time but now dated ATi graphics card along with various other bits of essentially uninteresting hardware.
Comparing the specs of the Q6600 to an Intel i3 I found them to be fairly comparable CPUs, the i3 was more efficient and slightly better for gaming tasks, but the Q6600 was a slightly better performer for non-gaming tasks. So I considered this a good-enough platform for my needs… I don’t need a graphics powerhouse and my projector is only 720P so as long as I can run games above 30FPS at 1280×720 with decent AA and textures I’ll be happy with the results. Sure an i3 would be a bit better and an i5 would be a big step up… but the Q6600 was free and that would give me a lot of room to work with the rest of it.
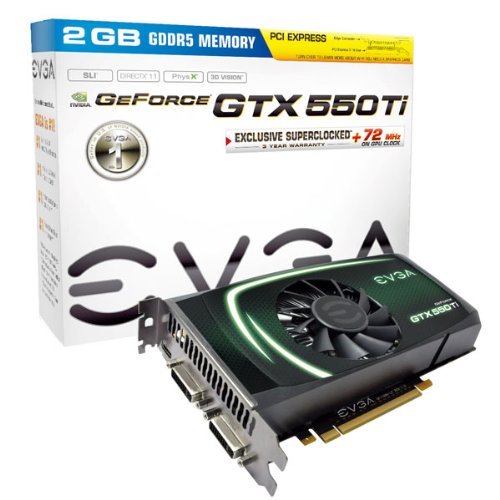
Since I was short-changing myself slightly on the processor side I wanted to get the beefiest graphics card (I could afford) that was compatible with the somewhat dated motherboard. the P5N-D includes 2 16x PCI-e 2.0 slots (3.x is the current new standard) looking around there were a few $400+ cards that still supported the v2.0 slot but the GTX550 seemed to fit my needs, it has an HDMI port (an absolute must for a TV build) and I found a used “superclocked” variant with 2GB of on-board memory for $120, I probably could have found. The next step up used v3.0 and the 2GB variant of that was prohibitively expensive so this seemed like a good choice. I also picked up two used 2GB sticks of matching DDR2 memory for $25 to max out the motherboard supported of 8GB of memory.
If you’re keeping track at home I’ve spent $145 including shipping and my PC specs are:
nMedia 600BAR HTPC Case
Asus P5N-D Motherboard
Intel Core 2 Quad Q6600 processor
8GB Corsair DDR2 memory
nVidia GTX 550 Ti 2GB Superclocked
Seagate Barracuda 320GB 7200RPM HDD in RAID array
Rosewill 550W Power Supply
Lite-On DVD R/W drive
integrated flash media slots
Now came the came the part where I’d need to chose an operating system. Ideally I’d run Ubuntu but that’s not really an option for gaming. Rumor has it the official Valve SteamBox will run Linux, which is great and I’m sure that will vastly improve linux gaming support, but the market is just not there yet. I like Win 7 but I’ve heard that Win 8 is a little lighter and runs a little faster, not to mention the Metro UI while loathed by traditional PC gamers seems the perfect interface for a HTPC Gaming machine… Win 8 was the easy choice.
The Last piece of the puzzle is the peripherals, I have a wireless keyboard and mouse that I bought so I could use the keyboard with my Xbox 360 before they released the “chat pad”… it’s USB based with it’s own 2.4GHz transmitter. Keyboard and mouse are a necessary evil but I really don’t want to be using that very often, especially not from the couch. after some research I found there are these generic chinese IR remotes sold under a dozen different names that emulate a keyboard and mouse. The one above I bought on Amazon for $7.50 shipped. It’s pretty slick you can move the mouse pointer around using the big directional button and most of the other buttons are mapped to standard keyboard shortcuts. The best part is that the Harmony Remote supports this protocol so anything you can do via keyboard I can do via my harmony remote.
The first one I received had a defective IR receiver, but the Amazon seller sent me another one without any hesitation. I had to rig up a custom mounting bracket to hide the receive behind the IR window in the front of the case and I even had a USB pin header adapter so I’m not even snaking the cable out to an external port… nice and clean.
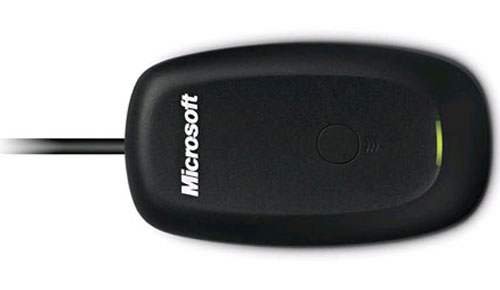
The last peripheral bit was to pickup an official Microsoft “Wireless Gaming Receiver” a small USB dongle that allows you to use any wireless Xbox 360 controller on a PC. Sadly I wont be able to easily mount this inside of the case as I will need access to the sync button. I considered doing something clever like cracking it open and re-appropriating the case’s reset button for sync but then I might still run into problems with the metal chassis interfering with the signal… so outside the case it will stay, I may make up a custom mount to keep it at the back of the case.
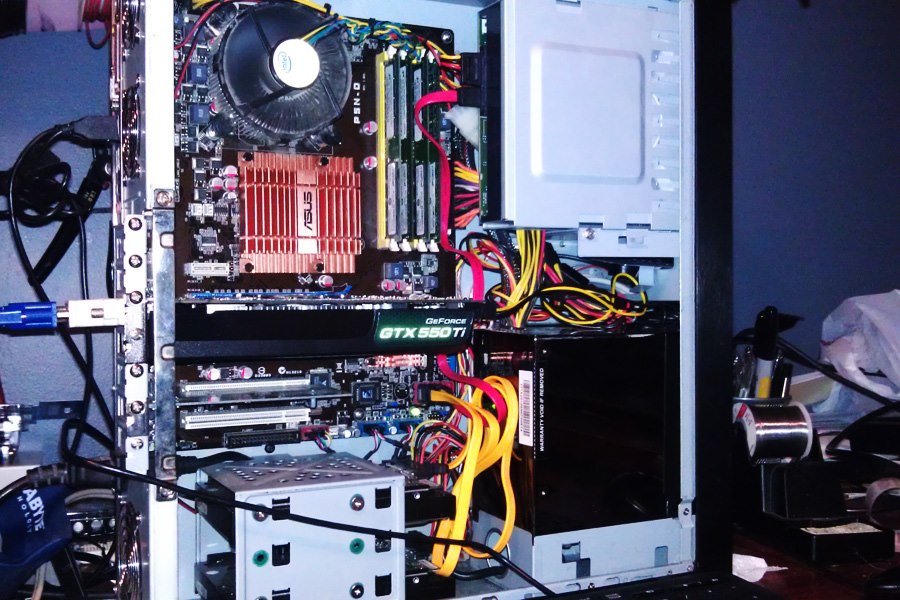
You may notice that there is another PCI card in there, this is simply a second network card. The reason being is that I had been using another old PC as a hardware firewall for my Xbox 360, this allowed me to force block people on Xbox Live, I’d remote into that PC and identify the IP of the person I didn’t want to play with and add them to the block list. I’d then never connect to them in-game again. It also worked the other way where I could set a white list so I would only connect to my friends, keeping randoms out or forcing myself onto a specific Xbox Live server. Now that I’ll have a PC in the same room as my Xbox I can use this for the firewall tasks and simply switch inputs on my receiver instead of involving my laptop to remote into the old firewall PC.
I haven’t tested it out yet (two of the fans in the case seems to be on their last leg so I want to replace those before I put it through it’s paces… I’m pretty happy with it so far and will be interested to see how my sub $300 SteamBox works out.
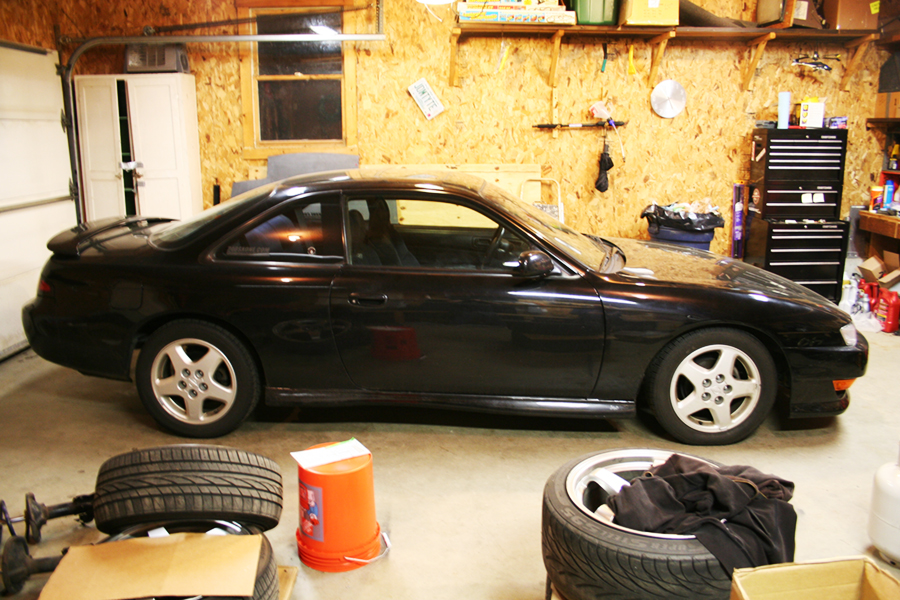
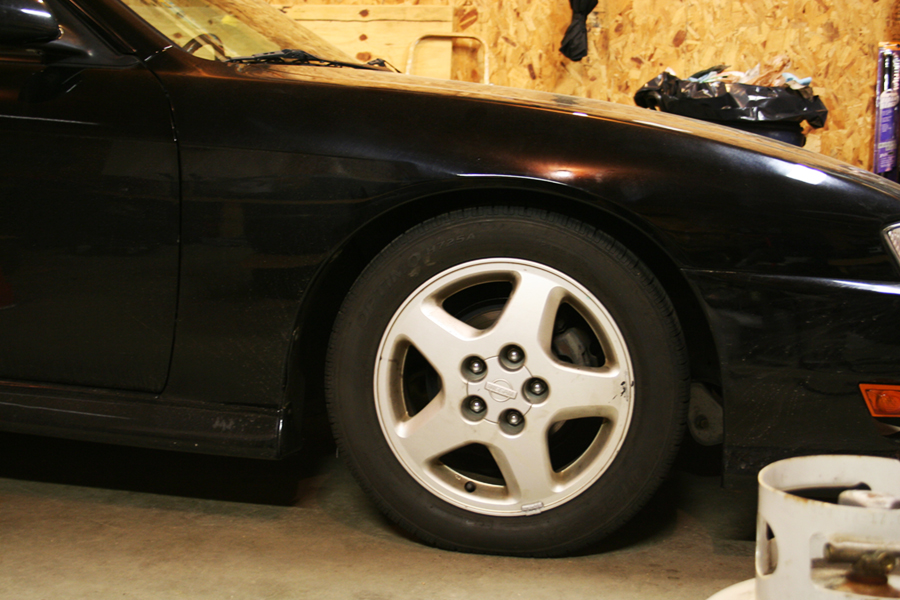
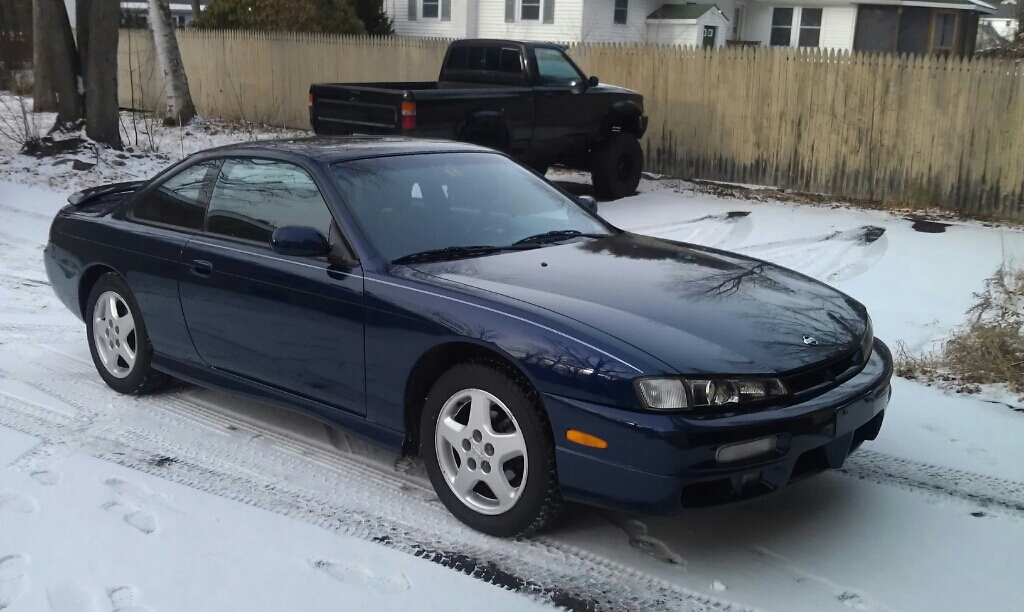
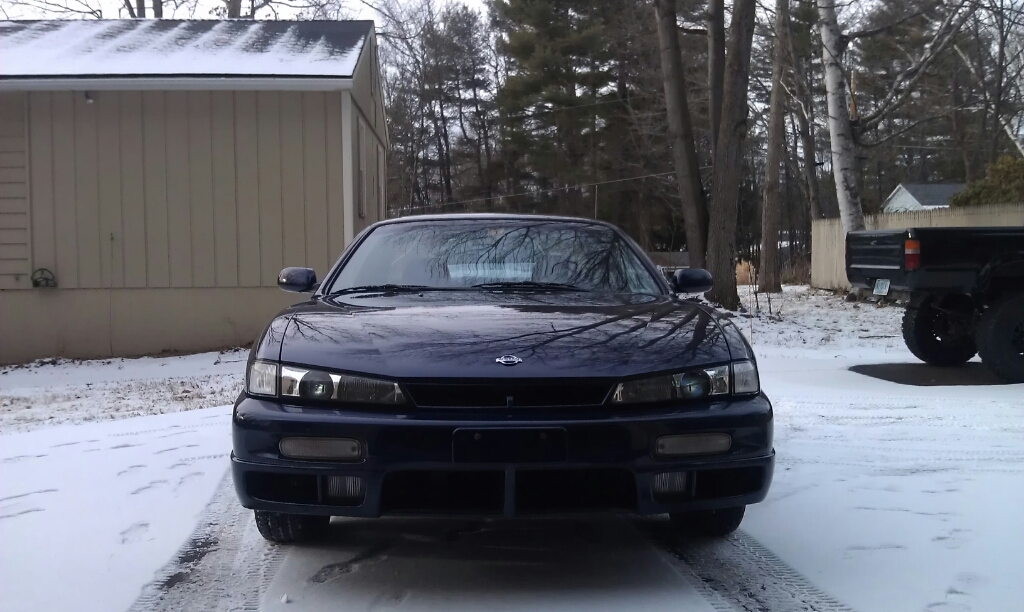
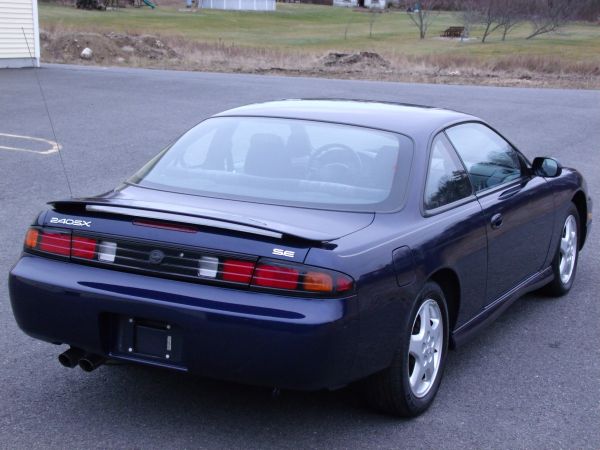
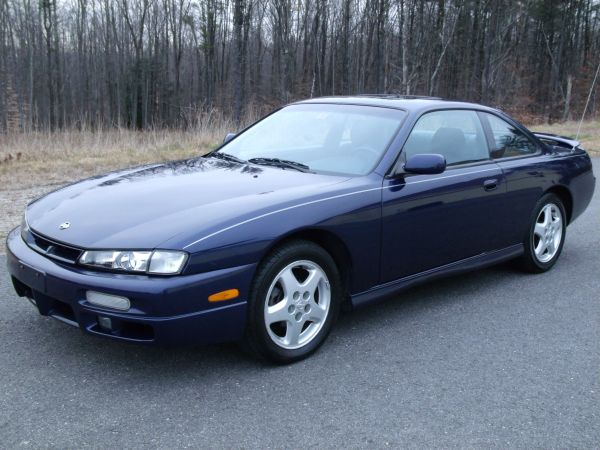
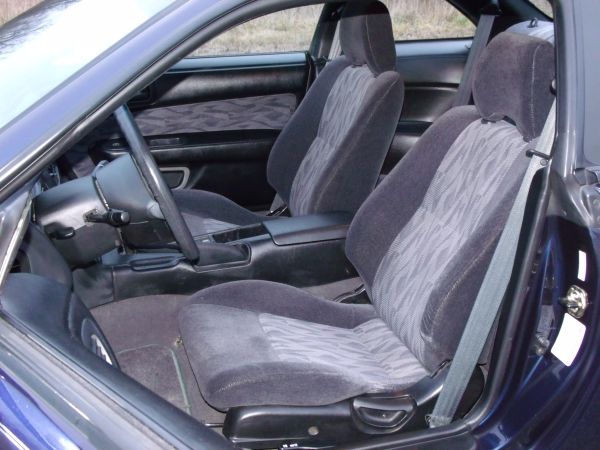
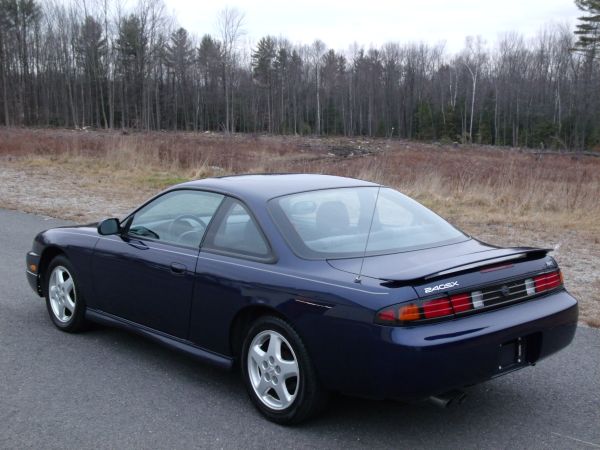
I happened to find a very nice 1997 240SX SE pop up on Craigslist last Thursday after a few calls, and a test drive I put down a deposit on Christmas-eve day and Today I finalized the paperwork and brought it home ahead of the snow storm we’re supposed to get tonight.
It has 68K miles and spent it’s entire life with it’s original owner in West Virgina. I bought through Historic Motor Sports in Candia NH, who had it for sale on Consignment. (If you’re looking for a rare or vintage European car I highly recommend them, they have a beautiful showroom and made for one of the best car buying experiences I’ve ever had).
I’ve already started planning the process of moving all of my equipment from the Black car onto this one… stay tuned.
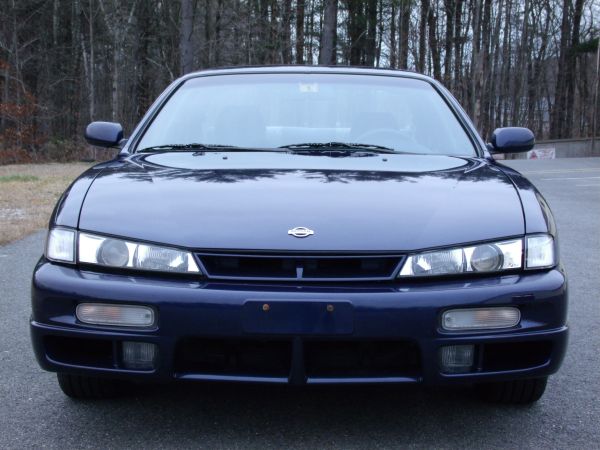
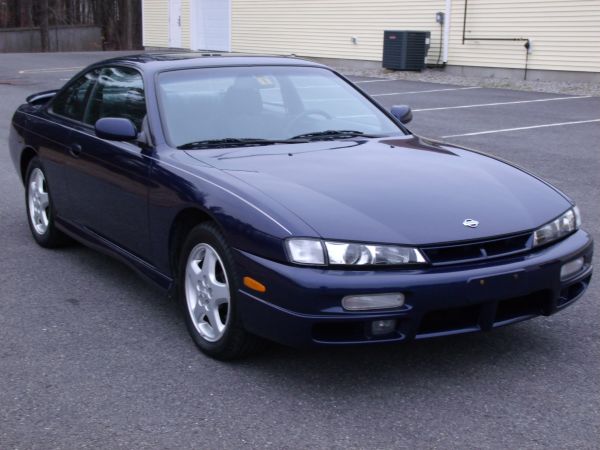
UPDATE: Here are some pictures from the for-sale listing…
I finally got all the bugs worked out of the custom rear brake setup on my truck. I drove it around for the first time today since the spring. A big thanks to Aaron at Silver Lake Fab for helping me get get past the last few roadblocks.
Rotors, calipers and pads are from the rear of a 2001 Mitsubishi Montero Sport 4×4. The bolt holes on the rotors had to be drilled out slightly (14mm). They seemed to fit initially but they didn’t fully seat.
The brackets are a custom made from my own design. They’re 2-piece, so that the caliper is mounted at the appropriate offset to the rotor. They’re made out of 3/8″ hardened steel.
The soft brake lines are from the front of a Dodge Neon, I’m sure there are lots of other brake lines that could have worked (it’s a standard 10mm fitting) but that’s what my local parts store had in stock. The hard-lines are just pre-flared lines from the local parts store also. They didn’t have the exact sizes I needed so I had to add these j-bends into them to take up the extra length. The soft lines are longer than I would have liked also but they do have these nice little brackets on the ends so I could make up some adapter brackets and bolt them to the axle if I like.
I received my S14 Kouki cluster from the UK in today. The European clusters are nice because the gauges have a lot cleaner look to them Instead of E and F on the fuel gauge there is just a red line at empty. The temp gauge is similarly styled. They’re clusters also went up to a higher speed and the UK is of course in MPH which is nice.
I found a set of Aluminum trim rings for the gauges which I think really improves the look of the cluster. These rings are made of polished aluminum. I’m not 100% sold on the shiny look I’m tempted to go over the rings with some steel wool to give them a brushed look… I’ll see how I like it polished for a while first.
For reference (not my cluster, but exactly like it) this is what my current cluster looks like:
…I’d say the new setup is way more classy.
I also noticed that the Euro cluster has the interior brightness adjustment right on the cluster, this means I’ll be able to remove the button in my dash which is quite nice since I was considering relocating it so that I could use the spot to mount the ambient temp sensor for the Digital Climate Control system.
>rear drum brakes had problems.
>rather than replace them I decide to upgrade to disc brakes.
>disc brakes don’t support an e-brake.
>I buy disc brake parts (a couple hundred bucks).
>I buy the disc brake adapter kit (a couple hundred bucks).
>and I buy a transfer case mounted e-brake kit (a couple hundred bucks).
>e-brake kit doesn’t support my transfer case (even though specs said it was compatible).
>decide I’ll have to throw out most of the kit and build custom to make it work.
>remove old drums destroying them in the process.
>calipers and rotors need to be modified to work (this is normal; part of the installation).
>install disc brake adapters and hardware.
>everything seems to be going well.
>surprise, the calipers wont fit under my wheels (even though the specs said they would).
>calipers wont even fit under the larger wheels I have.
>decide this is bullshit so I start taking measurements and doing research.
>buy completely different disc brake parts based on my research (a couple hundred bucks).
>mock up install and wheels have clearance for days.
>take additional measurements and design my own adapter kit.
>my design would be cheaper to manufacture.
>my design will be easier to install.
>my design requires less expensive brake parts.
>my design doesn’t require modification of the brake parts.
>my design is more appropriately proportioned for the truck.
>oh yeah, and my design clears the wheels with room to spare.
>this isn’t the first time I’ve spent over a grand buying specialized parts to save myself time and engineering.
>I sent my LS1 engine mount kit back 4 times before I finally gave up and just modified it to work.
>this time I didn’t even bother trying to send it back.
>apparently I can’t trust people design these things properly.
>if you want something done properly you have to do it yourself.
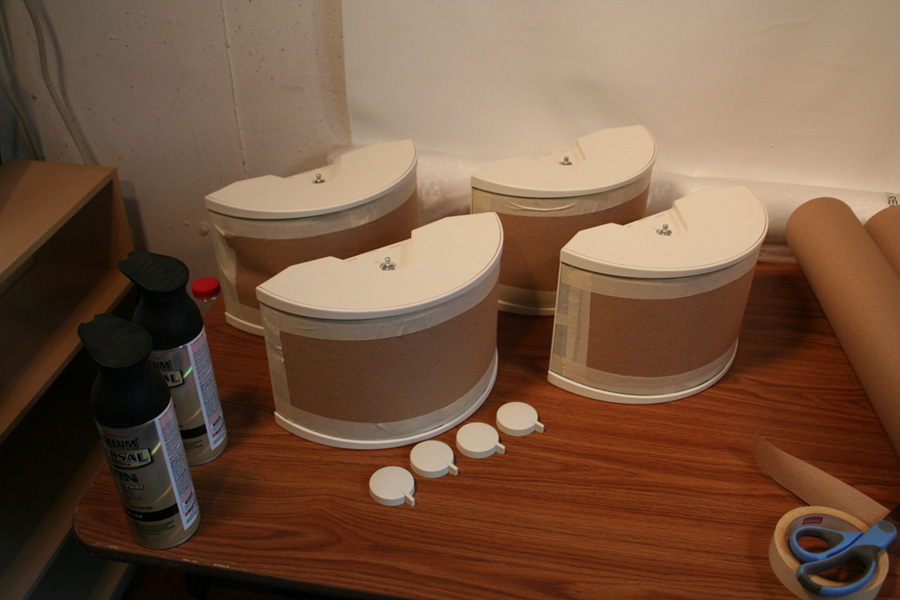
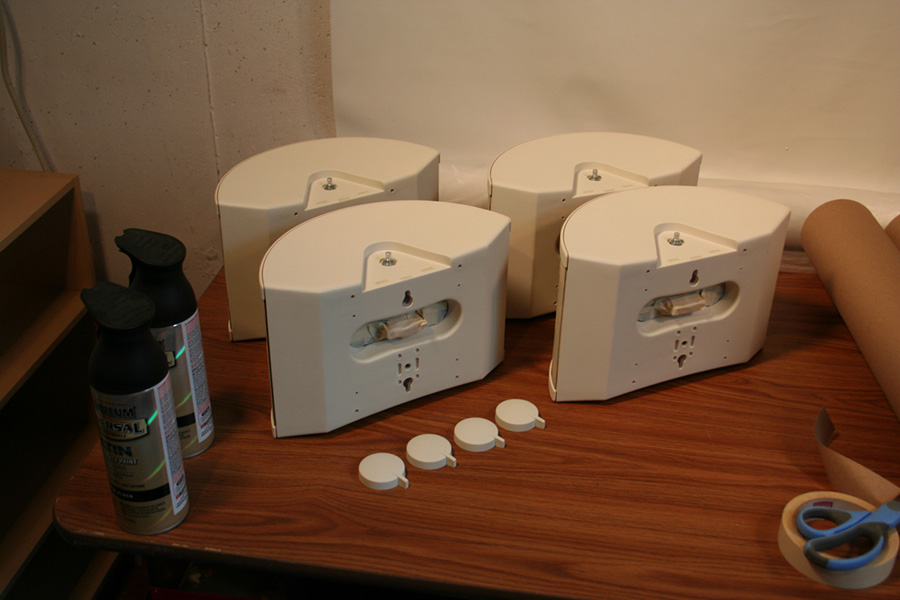
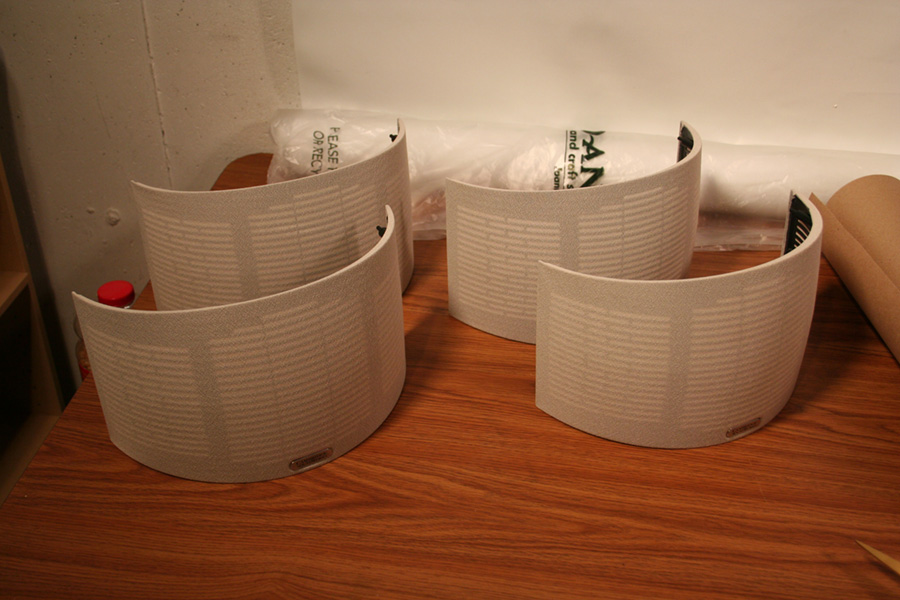
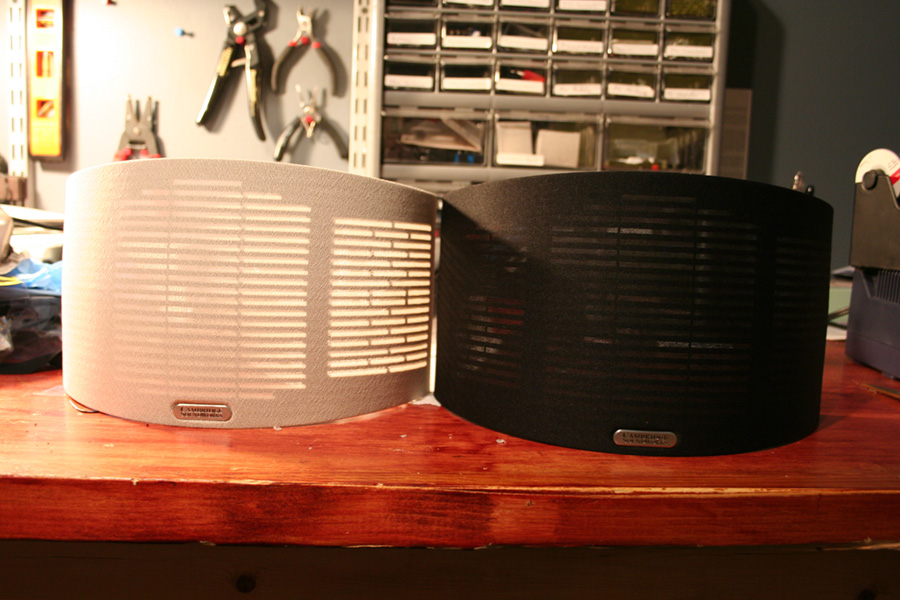
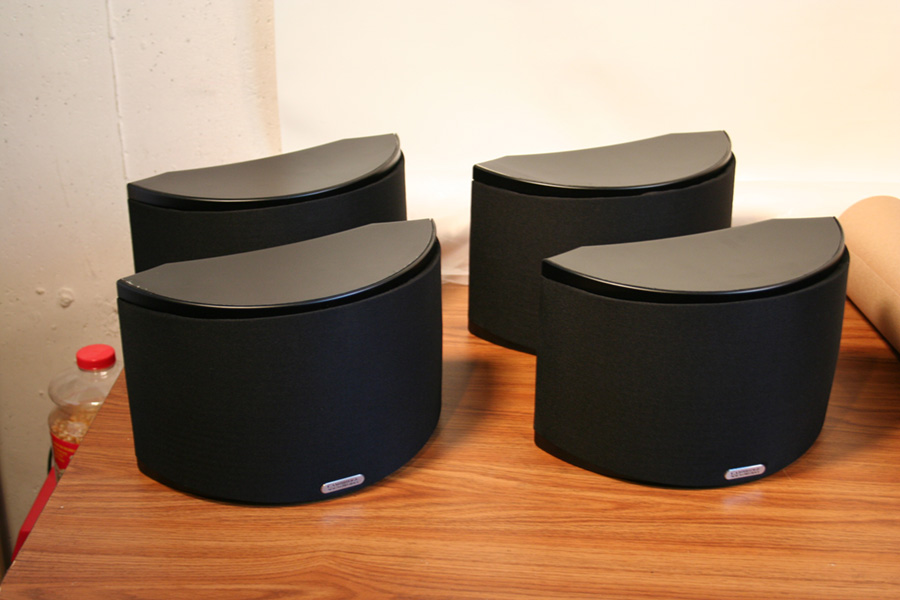
3 Years ago I got a deal on some Cambridge SoundWorks S305s to help round out my 7.1 surround sound system. Normally they sold for $300 a pair but I got them for $100 a pair on clearance. Part of the reason they were so cheap was due to the fact that they were the less desirable white color.
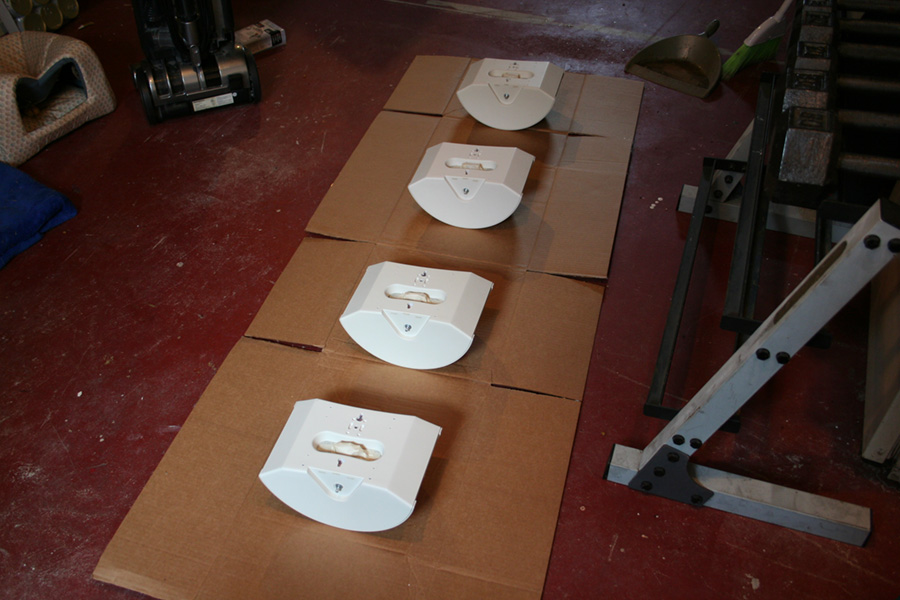
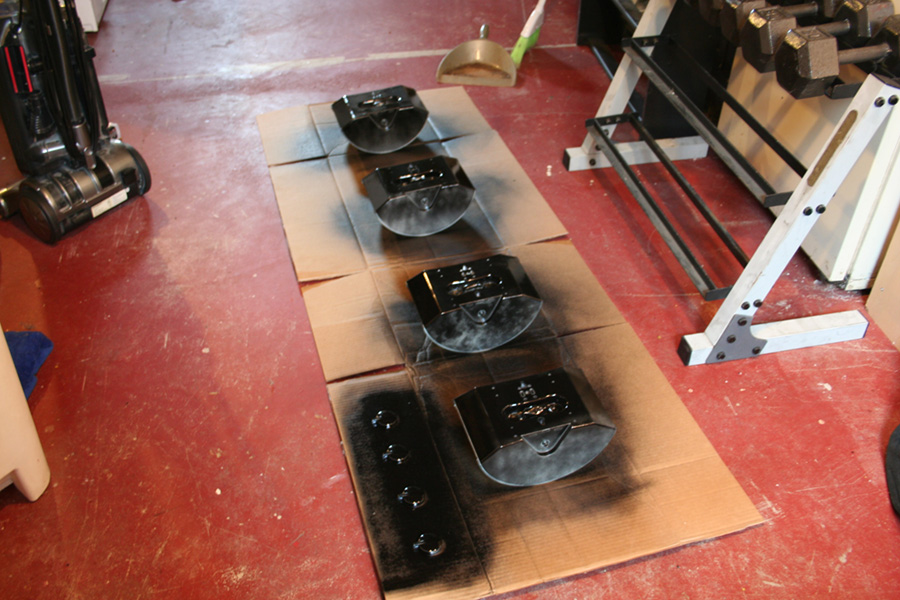
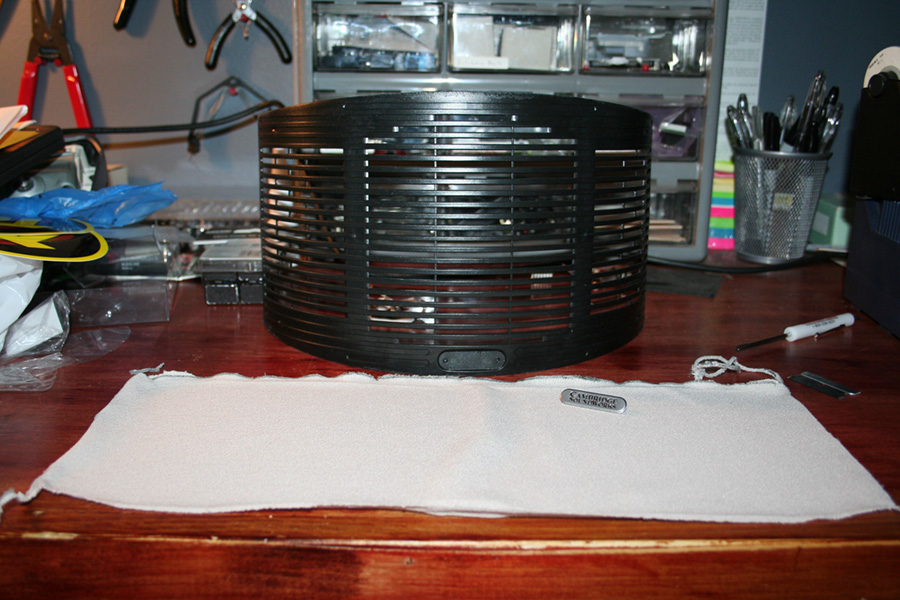
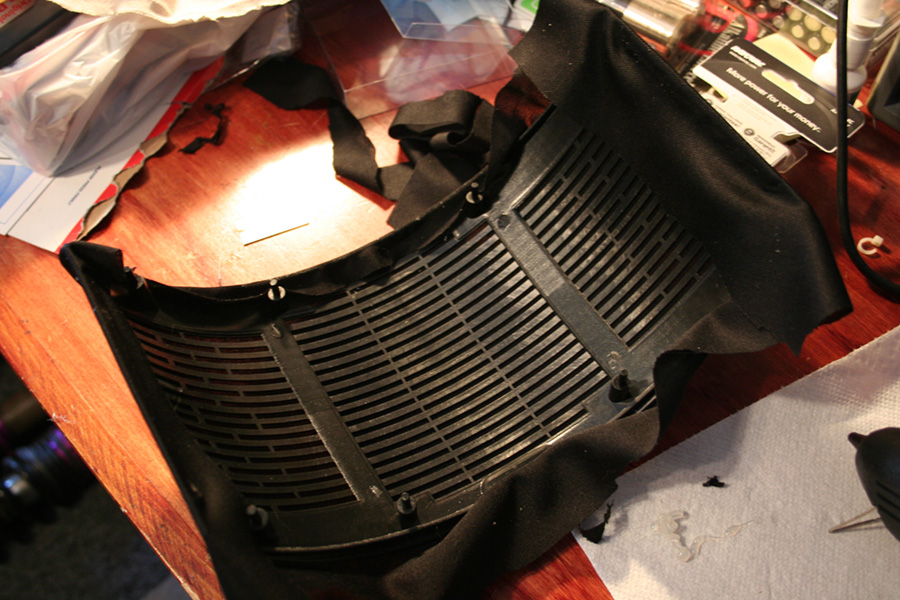
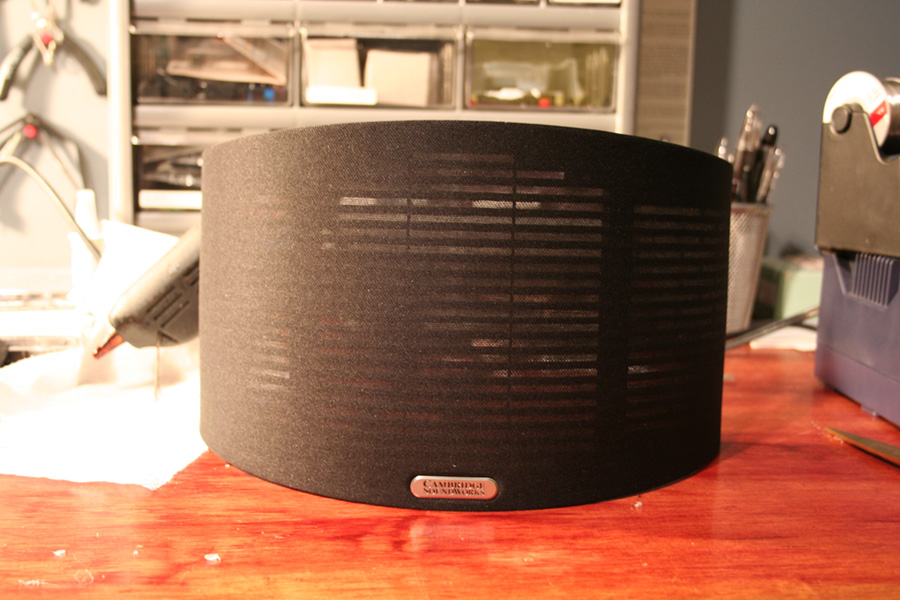
They’ve been sitting in the box since… I finally go around to painting them and re-upholstering the grills.
Well, not “new” but newly installed. As part of my goal to accomplish at least 1 thing on one of my cars every weekend I finally got around to installing this steering wheel.
This is a steering wheel from a Japanese market “Kouki” Silvia with the Autech Sports Package (Which also included an Autech Spoiler, Autech Grill, Special Badging and “Silvia” Logo seats). The only one of these I’ve ever seen for sale I bought as soon as I saw it.
This bolts right up and plugs right in but I did need to swap on a JDM clock spring, as it’s significantly different than the US model. I also recently picked up a digital hanging scale so I can compare weights of the various items I swap out on the car. The original Wheel weighed 9.48lbs while the Momo wheel only weighs 7.78bls … 1.7lbs isn’t a huge savings but it’s nice to know that I’m going in the right direction with these changes.
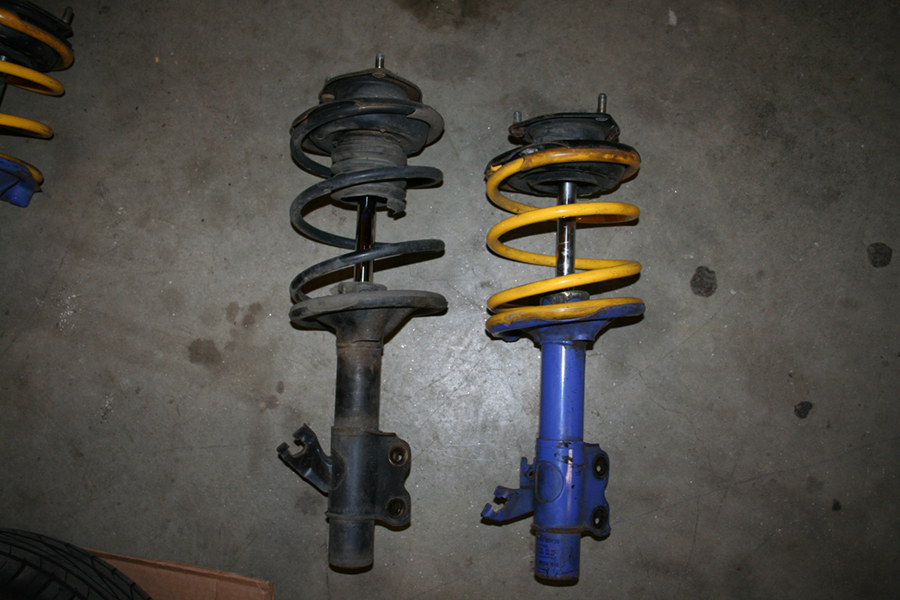
Rene wasn’t the only one upgrading their suspension today…
Thanks to Rudy I got a new torque wrench and was able to finally install my Nismo suspension. it took longer than expected since I decided to sand and paint all the hardware and mounting brackets with a rust inhibitor. Also I discovered that the brake line bracket on the Silvia is backwards from the 240sx so I had to make a small modification to the brake-line to make it mount to the bottom of the strut housing.
I only did the front, so I’ve got a nice rake going on… I’m not sure if I’m going to do the rear too or just leave it like this.
Consider anything I share here free for public use. The only thing I ask is that you link back to the relevant page here, or at very least tell them that "twistedsymphony" created it.
If you find something I've done here useful and would like to buy me some caffeine/more hardware/new tools/or just help pay the server bill, you can paypal.me.
thanks.


")
")
")
")
")
")