Ok so after waiting half a day for the mounts to arrive and having a little scare when they didn’t arrive with the mail I texted everyone I knew to come over and help me drop the motor in for hopefully one last time.
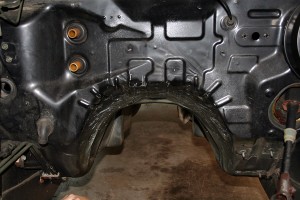
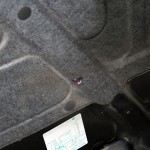
Before putting in the motor I was super jealous of how Randall’s tunnel looked and while the last time everything cleared I felt better with a little more breathing room. so we hammered out EVERYTHING forward of the pinch-weld up to the firewall and make it mostly smooth.
Not as Nice as Randall’s job but after this photo was taken I think we hammered it smooth a little more before sanding and painting it. Much better looking than it was before.
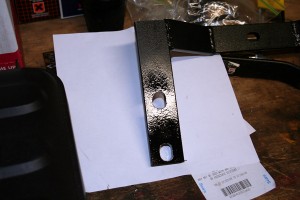
Also before dropping in the motor I checked the transmission cross-member. Previously the cross-member was too narrow such that if one side was bolted in it wouldn’t line up on the other. Also previously the cross-members were not square. This time the cross-member WAS square. it sat flush against the mounting surface and the bottom beam that held the transmission was level with the car. the mounting holes were still a hair off though. Previously the holes were off by about half a bolt width, now they were off by about a thread. We took a milling bit and widened the holes on one side just enough, and then repainted it.
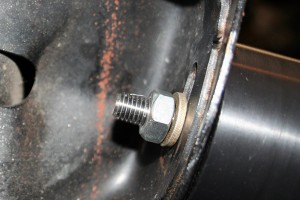
Also previously the threaded rods that go through the mount were exceptionally long. with the rod threaded all the way into the mount it stuck out the other side of the engine cross member quite a bit. Enough such that previously we couldn’t have the mounts attached to the engine when dropping it in as it wouldn’t slide into the cross-member.
Above you can see how much it stuck out after being bolted up to a cross member. I cut off 6 threads from the rod which made dropping the motor own with the mounts already attached much MUCH easier. In hindsight I probably could have cut off even MORE threads since the rod doesn’t technically need to be threaded all the way into the mount… that would allow me to screw it in a little while dropping the motor in, sliding the motor into the cross-member slots, then threading the rod out a little to put the nut on.
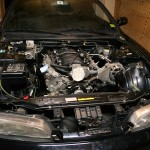
The engine now sits low and level like it should
We put some grease on the throttle body and the alternator and test fit the hood. The hood closed without issue and completely clears the throttle body. the top of the alternator bracket rubs just slightly but is nothing to be concerned about.
The engine sits way lower now compared to how it did previously.
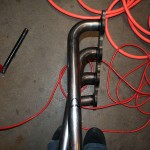
After fitting up the motor we tried for the headers. Drivers Side first, we hat to pull the coil packs, the alternator and the, searing column (Pro-tip: disconnect it at the bottom of the u-joint where it connects to the rack, and remove the pinch bolt completely), we also had to unbolt the master cylinder (the booster can stay where it is) and the header dropped right in no problem, with plenty of clearance around the rack and the frame rails
The collector does actually come up a little bit in the back and rub against the floor though, I’m not sure what I’m going to do about that, I might see if I can shift around the motor a little (you’ll see why in moment) or failing that hammer the floor a little)
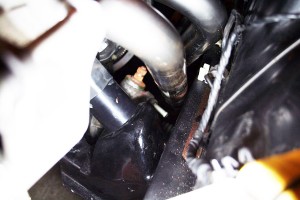
The passenger’s side header was a bitch to get in. Again coil packs had to be removed, the starter motor had to be removed, also everything attached to the side of the fuse box had to be removed, the original S14 fuel filter and lines had to be removed and the huge bracket holding up the ABS module had to be removed too. we loosened the mount and hoisted the engine a little and the header went in after a little coaxing. Once it was in the clearance to the bell housing by where the starter goes is really tight but it clears, it also clears the floor unlike the driver’s side. however it hits the engine cross member.
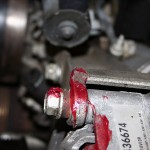
We marked it with a sharpie where it hits the cross-member. I’d like to see if I can shift the passenger’s side UP slightly and the driver’s side down slightly, that might fix this collision issue, as well as the floor board header collision on the drivers side, and clear up a tiny bit of space where the alternator bracket rubs the hood. Failing that I’m going to either hammer or slightly grind the top of the engine cross-member.
A note about the fitment of stuff, the ABS bracket will have to have the long arm that bolts to the frame rail removed completely, this shouldn’t effect it too badly since it bolts to the chassis in three other places. Also the two brakes lines that go directly down from the module (rear brakes, and front right brake) will need to be bent back a little since they rub on the header as it is. I will take pictures of these changes when I make them.
On a whole I’m very happy with how today worked out, a few tweaks here and there but this is about what I had expected the first time I attempted this. I appreciate that Rich made the effort to make this right and send me new parts that worked and got them here when I needed them.
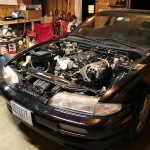
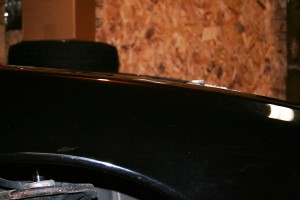
One last pic… I’m totally 4x4ing even with the LS1 in… and the car sat much lower with the KA.
