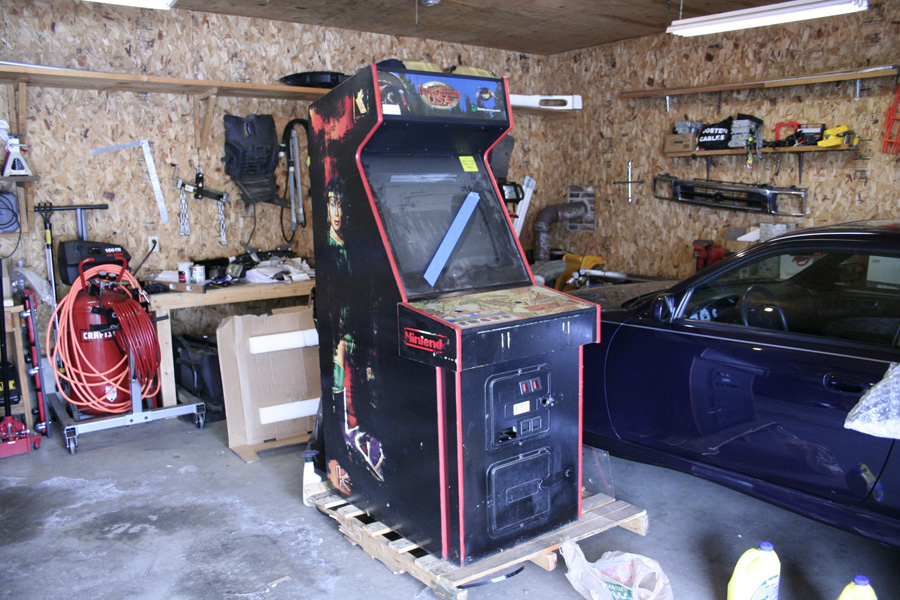
If you have or want to build an arcade machine that displays and plays emulated games as authentically as possible then there are a number of things to consider that are quite different when compared to building a normal gaming PC. This guide assumes that you have a functioning arcade machine already and that you’re simply looking to install a PC in it to use along side your arcade PCBs.
This guide also assumes that you’re gaming on an RGB CRT monitor. This is what most arcade machines used from the early days up through the early 2000s. LCDs fail to properly display the video output from most arcade boards designed for CRT, not just in terms of lag and scanlines, but also in terms of scaling, aspect ratio, refresh rate, and artifacts such as phosphor glow, jitter and curvature are difficult to properly emulate. The detailed reasons for sticking with an arcade CRT monitor are numerous enough to fill their own article so I’m not going to get into them here. There is lots of useful information below even if you are gaming on an LCD but keep in mind it’s written for those who will be using an Arcade compatible CRT and are looking to swap their emulation PC in and out with original arcade boards.
This point in time…
By it’s nature emulation technology tends to be behind the curve. Up until about a year ago Windows XP was still the preferred OS for most emulation. Right now I feel that Windows 7 is likely your best OS choice as there are still some things that don’t work well or haven’t been figured out with the newer OSs. (NOTE: Xbox 360, PS3, and WiiU emulation tends to rely on Direct X 12 which is Windows 10 only, but you probably don’t want to be playing those games on a low-res RGB CRT anyway).
Even still, the emulation landscape is changing constantly, what is true today might not be true tomorrow. At the time of this writing it’s the end of 2016. While my suggestions in this guide are the most relevant today, even just a few months ago some of my suggestions here would have been radically different. It’s impossible to know what new tools and emulators will be available in the future but hopefully this guide will give you the insights you need to recognize these advancements and incorporate them into your build when appropriate.
Selecting a Video Card
Like building a normal Gaming PC the video card is one of the first things to consider when building an Emulation PC except you’re not looking for processing power your main concern is low-resolution compatibility. What we want is to output games at their “native resolution” so that the video signal being output from our PC is identical to the video signal output from the original game board. That means no scaling, no filters, no speed up or slow downs to match the screens refresh rate. Getting as close as possible to the original game. This is also crucial in order to achieve compatibility with an arcade CRT or other RGB CRT monitors.
Most arcade games, and thus arcade monitors are designed to run “15KHz” or “25KHz” resolutions. What this refers to is the horizontal refresh rate (not to be confused with the typically 60Hz vertical refresh rate). Most modern resolutions (480p and higher) run at a horizontal refresh rate of 31KHz or higher . There are many resolutions that can be output in this rage, and most of these resolutions are BELOW 640×480 (aka 480p). a lot of times you might see this referred to as “240p” (or 320×240) and while that particular resolution was widely used, many arcade games use different resolutions; there are dozens if not hundreds of resolutions used across classic arcade games. The sad reality is that while most video cards are technically capable of outputting these low resolutions, most drivers aren’t programmed to support them and as a result there aren’t any name brand video cards on the market that will support arcade/classic console resolutions out of the box.
The most important thing to remember is that MAME doesn’t use your GPU for emulation, all of the emulation is done on the CPU and the GPU is only used for post processes such as filters or scaling (all the things we’re attempting to avoid using by outputting natively to a CRT). To be clear, even thought MAME doesn’t use the GPU for emulation you SHOULD still buy a dedicated video card, even a cheap one. Using on-board graphics saps resources away from the CPU and makes it less performant; a dedicated video card will remove the burden and allow your CPU (and thus your emulator) to run at peak ability. If you’re planning on playing other games or using other emulators then there might be additional options to consider. For instance Dolphin (Gamecube/Wii Emulator), Demul (Dreamcast/NAOMI Arcade Emulator), and PCSX2 (PS2 Emulator) all need a Direct X 11 (DX11) compatible graphics card to run at their best since they DO use the GPU for emulation. So that’s something to keep in mind. Even with these emulators however the bulk of the emulation is still performed on the CPU and a GPU that is slow by today’s PC gaming standards is will have good Emulation performance.
There are 3 options for outputting proper 15KHz and 25KHz resolutions on a Windows PC:
Option 1: Soft15KHz
This is a windows driver that supports a handful of old GeForce, Matrox and ATi graphics cards, For a while it was the go-to method however it’s no longer supported (only works with Windows versions up to XP and no updates are being developed). Even the original developer doesn’t recommend using it anymore since the other options work better. If you’re planning on an XP build and happen to already have an old compatible GeForce card it might consider this option but even then the alternative is cheap enough that there it little reason to still be using this. Also, since this only supports up to XP any Direct X 11 compatible cards are right out since DX11 is Win7 and newer only. Another thing to keep in mind is that since this is a hacked Windows Driver, the video output during the POST screen will not support 15KHz resolutions as the driver isn’t loaded until Windows has started.
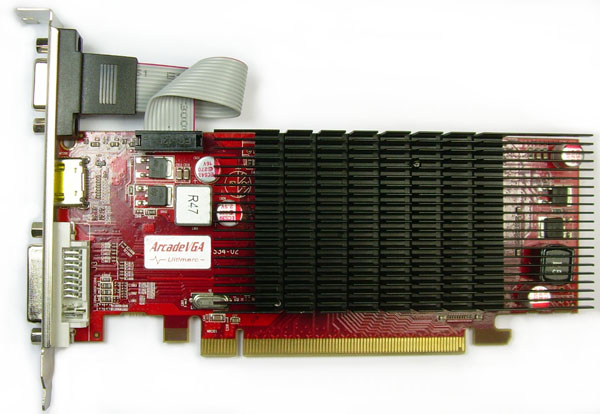
Option 2: Ultimarc ArcadeVGA
Ultimarc makes a lot of hardware to make emulation on an arcade machine easier. To this end they offer their own graphics card. They’ve made a few versions of this in the past but the current model is the “ArcadeVGA 5000” which is a modified ATi HD5450 based card. This is better than older versions of their cards since it’s fanless and low-profile which gives you a lot of flexibility in terms of the size of your PC. The best features of this are that it supports 15KHz even during POST, and installation is no different than installing a normal graphics card. The down side is that it costs $90+shipping and what you get is a card that without the low-resolution modification is worth about $15 on eBay. Another thing to keep in mind is that it only supports a small number of additional low-resolution modes. This will cover most classic games, but if you plan on running a huge collection of games you’ll likely need quite a bit more resolution modes available.
Option 3: CRT_EmuDriver & Atom-15
This is my preferred option. CRT_EmuDriver is a modified version of the ATi Catalyst Driver; the generic Driver that ATi Uses to support several generations of the GPUs at a time. The 1.x line of CRT_EmuDriver runs up to Windows XP and supports ATi cards up to and including the Radeon HD4xxx series of cards. The 2.x line of CRT_EmuDriver also supports Windows XP up to and including Windows 10, and supports ATi cards up to and include the Radeon HD7xxx series of cards. A nice benefit here is that you can buy and use a large number of cheap and late-model ATi cards for this purpose. CRT_EmuDriver supports up to 120 additional low-resolution modes. Like Soft15KHz CRT_EmuDriver is just a driver and as such only supports low-resolution modes once Windwos has booted, however Atom-15 firmware patching program for these ATi cards (developed by the same person behind CRT_EmuDriver) will allow you setup your GPU to output in a low, arcade-monitor friendly resolution during POST.
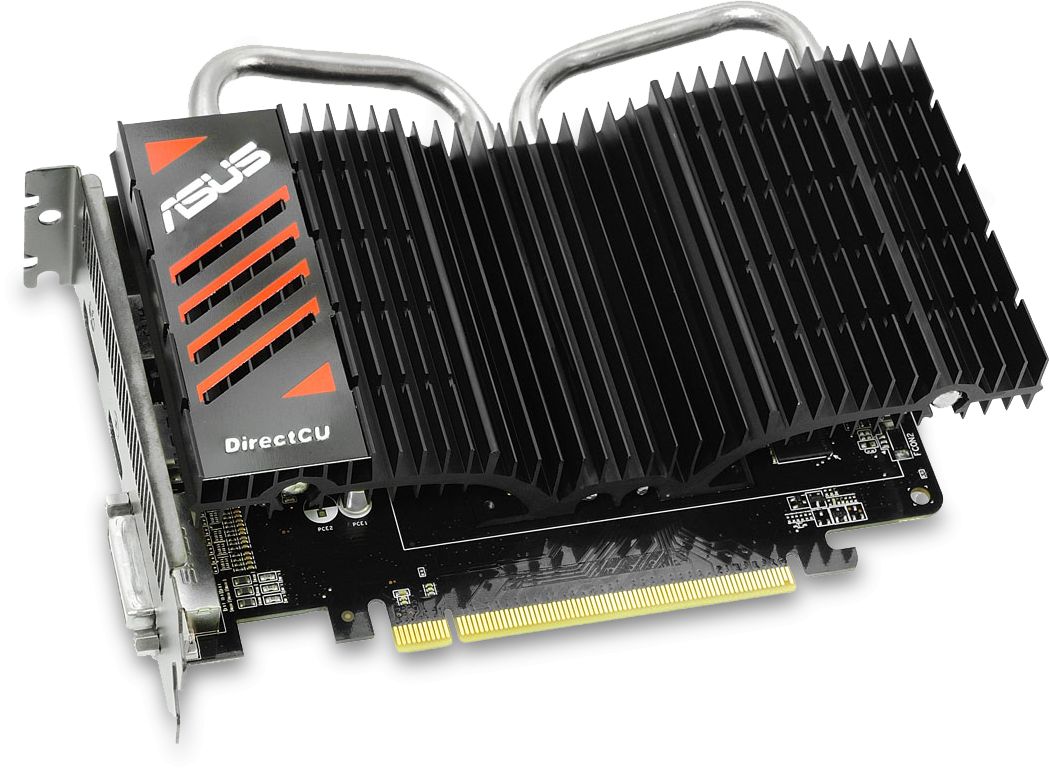
I think you can understand why CRT_EmuDriver is my favorite option, it has the most features, supports the widest array of Video cards, and is also the lowest cost option. If you’re like me you’re probably looking to buy either a low-profile card to fit in a slim case, or a fanless card to keep things quiet (or a low profile fanless card to keep things quiet and compact). To that end I’ve compiled a spreadsheet of every Low Profile and/or Fanless card from the Radeon HD4xxx range up to and including the Radeon HD7xxx range that I could find. This list is not exhaustive but it should give you a great staring point to show you what is available and give you an idea of what trade offs you might need to make. Of course if you want to go with the biggest baddest GPU that CRT_EmuDriver supports then there are plenty of options for Radeon HD79xx cards that take up an acre of space and come equipped with a small army of cooling fans. These are overkill and in general even a lowly Radeon HD5450 is more than powerful enough for most emulation tasks.
Selecting a CPU
While we spent a lot of time talking about Graphics Card selection because your options are limited. The CPU you select for your Emulation machine is perhaps the most important part as it’s the one component that will have the greatest impact on what games you can Emulate and how well the emulation runs. The thing here is: CLOCK SPEED IS KING. Most modern CPUs get their performance by being multi-core, this is great if you’re multi-tasking or if you’re running software that is optimized for multi-threading, but that’s not the case with emulation. Most emulators don’t support multi-threading and the few that do support it, do so in a limited way. As a result you need to throw most CPU benchmarks out the window and concentrate on clock speed. There are some variations between CPU architectures, I’ve found that Intel CPUs with the same clock speed as a compatible AMD CPU tend to run emulation a bit better but when it comes down to it you want the highest GHz CPU you can get.
MAME has dabbled in multi-threading. When enabled it provided a good boost for some newer games like Golden Tee, but it has caused problems with some classics such as Mortal Kombat II and as a result was removed. Multi-core support is still built in for the few games that support it, so depending on which games you plan on playing more it’d be worth buying one over another. There are some emulation based benchmarks available too.
MAME is an interesting beast as even with a the fastest CPU on the market there are some games that wont run in MAME due to not-enough CPU, meanwhile if you’re planning on just running early 90s and older games than even an low-speed Core2 Duo will work fantastic. However if you’re looking to run Demul, PCSX2, or Dolphin you’ll want a Minimum a 3.2GHz Intel chip, or ideally, one that’s 3.4GHz or higher. Thankfully there are some great, reasonably priced options here. If you want to really push the limits there are some great overclocking options too.
These are my picks for those who DONT want to over clock:
Super Budget Option: Any Used Core2Duo or Core i3 3.0GHz or better – you can find these with a motherboard used for anywhere from $50-$100 on eBay. Throw in a compatible GPU and you’ve got yourself a great, cheap emulation machine.
Middle of the road option: Pentium G4520 3.6GHz – This CPU runs under $100 new, for general computing it’s not as nice as say a Core i5 but it’s got great clock-speed for emulation purposes and should be able to emulate just about anything you can throw at it.
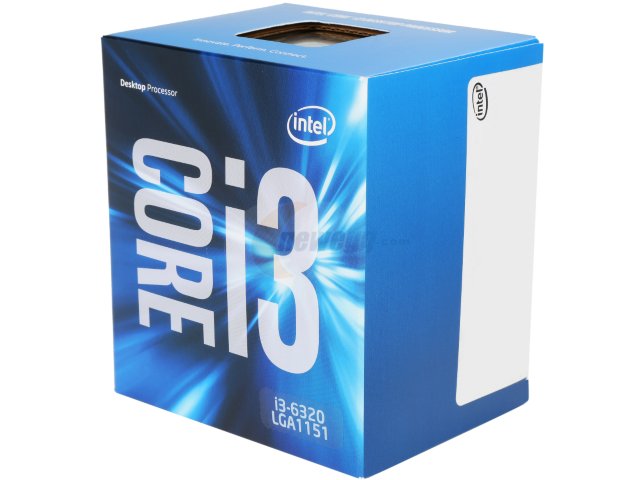
High-End Option: Core i3-6320 3.9GHz – These run about $160 new and offer a bit more speed than the G4520. The Core i3 is dual core and great for running other modern applications if you plan on playing some PC games on this machine in addition to emulators.
Money is no Object Option: Core i7-6700K 4.0GHz – AFAIK this is the highest clock speed chip on the market now, it’s multi-core which should be great for general computing tasks as well as those few games that make use of multiple cores.
If you’re willing to tinker and try your hand at overclocking these are some things to consider:
Best Bang for the Buck Overclocking Option:
Pentium G3258 3.2GHz (overclocked up to 4.5GHz)
with MSI H81M-P33 Motherboard – if you look at the emulation benchmarks above you can see that an overclocked G3258 performs exceptionally well, outclassing an overclocked i5 and approaching the numbers of an overclocked i7. The best part is this CPU and motherboard combo runs about $110, making it not only one of the cheapest options but one of the fastest options too
Middle of the Road Overclocking Option:
Core i3-6100 3.7GHz (overclocked up to 4.7GHz)
with ASRock Z170M Pro4S Motherboard – With the Exception of the G3258 Intel has locked out overclocking on all but their “k” series “enthusiast” CPUs, which fetch a premium price as well. AsRock however, found that they could overclock the locked chips with their Intel Z170 based motherboards. There are many options for chips here that might do well (such as the Pentium G4520 and the Core i3-6320 mentioned as non-overclocking suggestions) but the i3-6100 was tested and able to hit 4.7GHz, which is great but it’s also our only proven option for overclocking these locked chips so far. (please let me know your results if you overclock one of the other chips).
Money is no Object Overclocking Option:
Core i7-6700K 4.0GHz (overclocked to 4.5GHz)
with ASRock Z170M Pro4S Motherboard – As a K-series chip this is unlocked by Intel for overclocking, while this has slightly lower clockspeed than the overclocked i3-6100 the fact that it’s got many more CPU cores should provide a boost for those few emulated games that utilize them. Also this CPU is the bar by which all other CPUs are compared in current emulation benchmarks. the overclocked i3-6100 might have a higher clockspeed but it hasn’t been bench-marked for emulation. so the i7-6700k remains the best in terms of proven emulation performance.
Selecting The rest of the PC Parts
The rest of your part selection isn’t really very consequential. Most of it will depend on what games or other software you plan to run OTHER than Emulators, but I’ll write my thoughts on what to consider.
Motherboard: Something Micro-ATX and name brand that is compatible with your CPU (likely socket LGA 1155) as well as your Graphics Card (likely x16 PCI-e). You wont need a large motherboard, especially if you get one with on-board Audio and on-board LAN that will help keep things compact. SATA 3 is useful as hard drives are usually the biggest bottleneck to speed and if you’re planning on emulating disc-based consoles then you’ll be pulling a lot of data from the hard drives so speed here is good. USB 3.0 ports as well as Gigabit LAN are nice to have as these will help speed up any large transfers of data from network sources or USB drives. If you plan on hosting all of your ROMs and ISOs on a network drive then Gigabit LAN is recommended for sure.
Memory: Having a lot of memory isn’t very important to emulation, honestly it’s more important to running your front-end menu than anything else. For a Win 7 setup I’d recommend a minimum of 4GB, but otherwise base your memory needs on the games and apps other than emulators that you’ll be running.
Hard Drives: Whatever money you saved on your Video Card, CPU, and Memory selections, spend it here on SATA 3 drives. Large ROM and ISO collections can easily reach several terabytes in size. I recommend a 500GB or so SSD as your main drive, for the operating system, your front end menu and all of it’s associated graphics (this alone can reach several gigs) and then a larger secondary HDD to store your ROMs and ISOs. Speed here wont make your games run better but it will reduce loading time.
Case: Despite arcade machines being fairly large in size there isn’t always a lot of room left over for you to squeeze in your PC. A good example of this is my Dance Dance Revolution arcade machine, which despite being over 80in tall and weighting nearly 1000lbs can’t fit my PC inside so it has to sit beside it. So consider building in a small footprint case. A lot of arcade machines bolt the Game board to a piece of wood, and I’ve done this with a few of my Emulation machines where I had a piece of MDF cut to size and bolted the motherboard directly to it with some stand-offs (if you do this you will also need something to help keep the Graphics card from wobbling. Good ventilation is important and if you stick with larger (120mm) fans you can generally keep it quite too.
Power Supply: Many cases include a PSU, just make sure whatever you get has enough juice to power the rest of the components, no need to go crazy here.
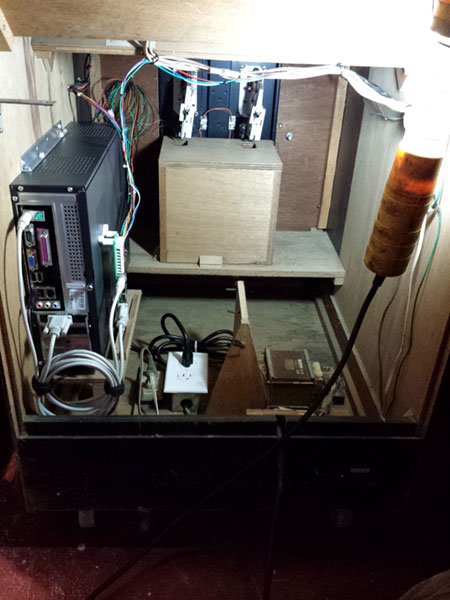
Powering the PC inside the Cab
The first thing you need to consider is how to get AC power to your PC power supply from within the cabinet. You’ll want to follow the wires coming from the power cord at the back of the cab then they’ll usually go through the switch assembly, a fuse, and sometimes an AC filter (a small metal box about half the size of a deck of cards). From there it usually gets split to the original arcade power supply and often to a large isolation transformer (aka an “iso”) for the monitor. You’ll want to grab power somewhere before this transformer but after the fuse, filter and switch. Every arcade machine is setup a little differently, there might be a spare connector available that you can tap into, or you could add new leads off of the AC input terminals on the power supply, the transformer, or a buss bar. Some machines you might even be lucky and they’ll have an AC outlet inside. Once you’ve located your source you can either modify the AC power cable for your PC to plug into the connector you found, or add spade connectors to it to attach to any available terminals you may have found. Alternatively you can buy a junction box, and an outlet from your local hardware store and install an outlet inside your cabinet for your PC to plug into. I’ve done both of these in the past, and there’s no best way, a lot of it depends on what’s available inside your cabinet, how it’s laid out or other factors.
Once you’ve got AC power available to your PC getting to to turn on automatically when the cab receives power can be done through the BIOS screen. Typically there is an option in the power section that instructs the PC to fully boot when power is first received. By default this option will be set to put the PC into standby mode when it senses power. The verbiage in every BIOS screen uses for this option is different but I’ve never found one that didn’t have it.
Safely shutting down your PC is another matter. There are a few ways to go about this, the easiest and safest way is to exit your front-end menu, and shut down your PC through windows and then wait for it to completely shut down before cutting the power. If you don’t want to or can’t reach the power button of your PC easily you can get a cheap wireless keyboard/touch pad device these are handy to have anyway for trouble shooting or tweaking your setup without having to have a fully wired keyboard and mouse attached. If you get a device with a power button then its just 1 button push to shut down. There is also a “shutdown.exe” program available in Windows that will execute a shutdown. This can be added as an option on your front end to allow shutting down from your game menu (if you’re so inclined).
There are more advanced options such as a UPS device setup to automatically shut down the PC once it detects power loss, that will keep the PC running on battery long enough to safely shut down once power is cut, but this is bulky and expensive. Another option is to use a “Smart Power Strip” this will allow your PC to control the power to the rest of the cabinet.
Many modern arcade games actually use PCs in lieu of a dedicated game board. So a good question is how do they manage to allow for an abrupt power-off without any damage? There is no damage to cutting power to the hardware itself, the danger comes in potentially corrupting files (particularly system files) on your hard-drive if they’re in the middle of a write operation when the power is cut. If you disable background processes like windows update, anti-virus and anti-malware software, search indexing, etc. Then you can mitigate any potential corruption that might occur as a result of an abrupt power off. Arcade machines aren’t doing any writing to the hard-drive except maybe to save high score and play data, and the chance of that happening when the power is cut is slim to none. If you set your Windows machine up to similarly not write anything other than high score and play data then chances are you can avoid corruption problems. I have a Windows XP based emulation machine that I simply cut the power to, and after several years of use it has never given me any problems. Even still, move forward with this option at your own risk as you need to be absolutely certain that no write tasks are being performed in the background when you power off your machine.
There is no real “best” option here, it really depends on what suits your setup, how you prefer to power on and off your cab, and the flexibility with switching between arcade PCBs and your emulation PC.
Interfacing with the Cabinet
Now that you’ve got your PC built and receiving power within the cab you need to hook up the audio and video outputs as well as the control panel inputs. You may be familiar with the term “JAMMA” it’s a wiring standard adopted by the arcade industry in the late 80s and was widely used from then though to the early 2000s and even in some new games today. Basically the idea is that a single connector is used for audio, video, power, and inputs such that if you want to change an arcade machine from one game to another all you need to do is disconnect this connector from your old game board and connect it to your new game board.
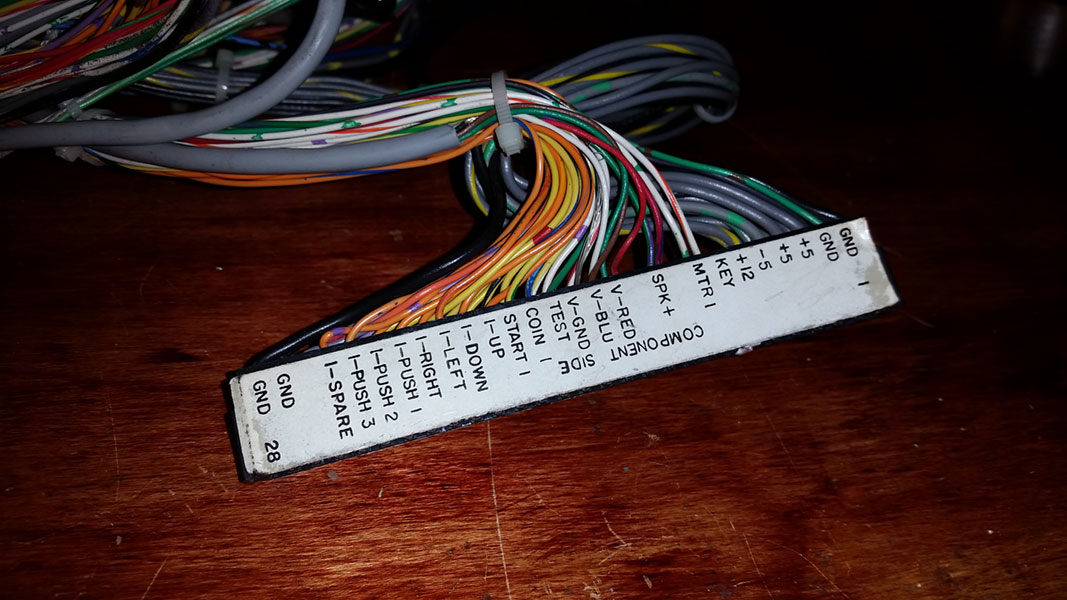
Most arcade machines that are good candidates for emulation will likely already be wired for JAMMA compatibility. Similarly in the few machines I’ve built from scratch I wired them for JAMMA just because it automatically gives me cross compatibility with lots of existing parts, equipment and other devices but it also provides a solid guideline for wiring the cabinet. If you’re building into an older “classic” machine that isn’t wired for JAMMA there’s a good possibility that there is a JAMMA adapter available. If you do need to wire or re-wire your cab a JAMMA harness will set you back about $20 on eBay and will do most of the hard wiring work for you. JAMMA isn’t perfect though, the official spec only supports mono audio, only supports 2 players with up to 3 buttons per player and it also expects that audio amplification is provided on the game board itself, which if you’re using a PC or another modern devices isn’t likely to have on-board amplification. Even still, it’s worth using JAMMA as a foundation, even if you end up adding additional connectors to fill in the areas that the JAMMA connector lacks.
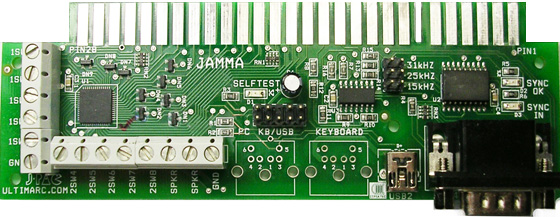
Once you’ve got your cabinet wired for JAMMA you can use a device made by Ultimarc called a J-PAC, this is a small board that plugs into the JAMMA connector and connects to the outputs on a PC. It simulates a keyboard allowing you to map keys to buttons within your emulator. Since the JAMMA standard only supports up to 3 buttons per player if you want to wire up say 6-buttons per player the J-PAC provides screw terminals for the additional buttons, you can run wires directly from these terminals to the buttons on your control panel but I recommend placing a connector between them to allow for easy removal if necessary. If you want to go with something “standard” the Capcom “CPS2 kick harness” is a popular choice among arcade hobbyists as it’s used by a lot of popular games, namely Street Fighter II which was the the game that popularized the 6-button layout. Or you can go with whatever connector system your cabinet already uses. Really, any small connector that clips together and prevents you from accidentally plugging in backwards is a solid choice.
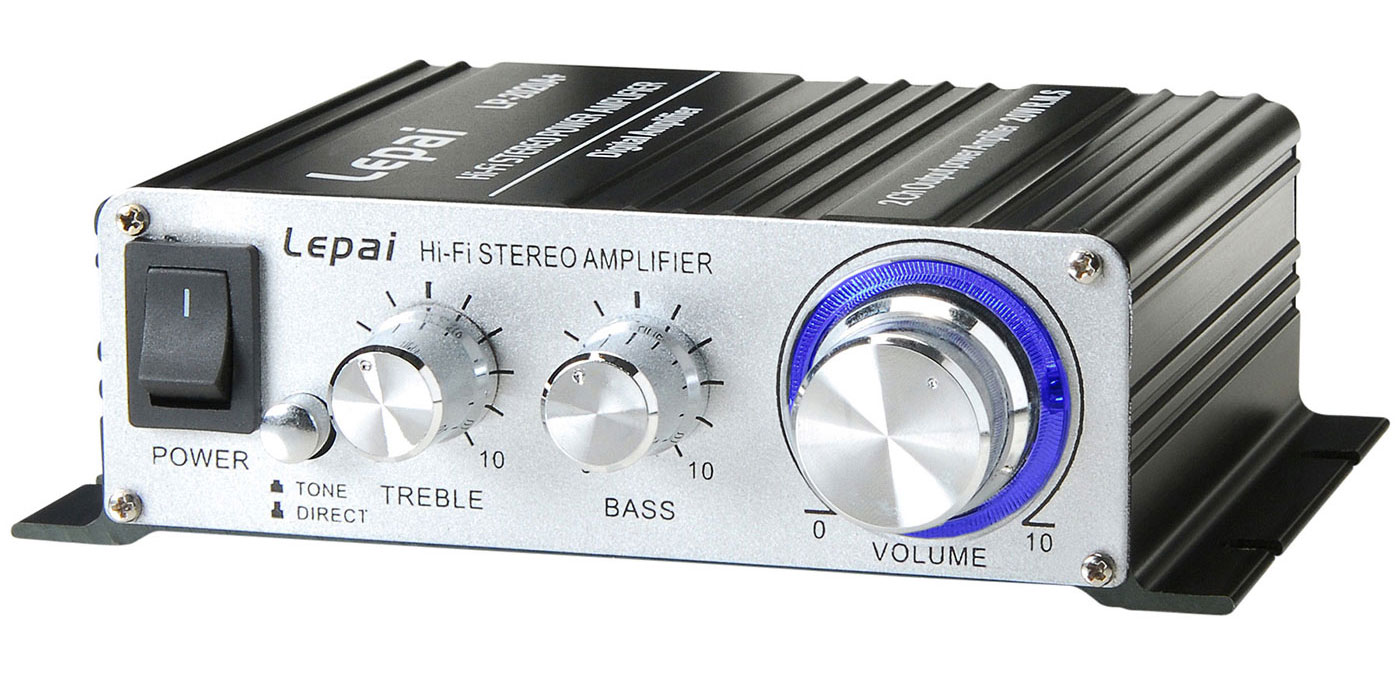
For audio you’ll need to buy a small amplifier such as any number of small T-Type digital amps available or for a slightly less expensive and less flashy option a TDA7297 based amp. The input of the amp would go to the 3.5mm audio output jack on your PC and then the speaker terminals can be connected to the screw terminals on the J-PAC. Alternatively if you’re using self-powered speakers you could bypass the J-PAC altogether and simply connect your speakers directly to your PC.
The J-PAC also provides “video amplification” and monitor protection circuitry which are beneficial when working with CRT Arcade monitors. Most arcade monitors require video signals that fall between 0V and 4V while most non-arcade displays expect video signals between 0V and 0.7V. Since your PC is designed to hook up to a PC monitor, not an arcade monitor the signal voltage is very low. Some late 90s and newer arcade monitors will work with this fine, but most older monitors will not. Best case the image will come out very dim, and worst case it wont see the signal and you’ll get no picture. The J-PAC takes care of this though, boosting the 0.7V output from your PC to the 4V output the monitor expects. Similarly if your PC outputs a video signal that is too high speed for your arcade monitor to interpret (typically if it outputs too high of a resolution) then the J-PAC can block this signal and protect your monitor. Sending a signal that is too fast for an arcade monitor can damage it, especially if it receives this signal for an extended period of time.
Unfortunately this sync protection signal on the J-PAC can cause problems with some monitors, and depending on the situation can also block an otherwise valid sync signal. If you find yourself running into this problem you can remove the jumpers and connect pins 13 and 14 on the VGA connector to bypass the sync protection. Hopefully in the future there will be a more robust PC to JAMMA converter but for now the J-PAC is the best I know of.
Interfacing with a JVS Cabinet
In the Late 90s arcade manufacturers started transitioning away from the JAMMA standard and towards what’s called the JVS standard. Unless your cabinet happens to be a late 90s Japanese “candy cab” it’s unlikely that you have a JVS cabinet, but if you do then you should be able to simply plug into the VGA output on your video card as well as as the un-amplifed audio output (JVS cabs have their own amplifier). The tricky part is the controls. JVS inputs are routed through a “JVS Connector” which looks identical to a USB connector and indeed they use a USB-A/USB-B cable to attach the JVS I/O board to the game board. Despite this the pins are laid out differently from USB and plugging a JVS I/O board into a USB port or plugging a USB device into a JVS port could cause damage to one or both components.
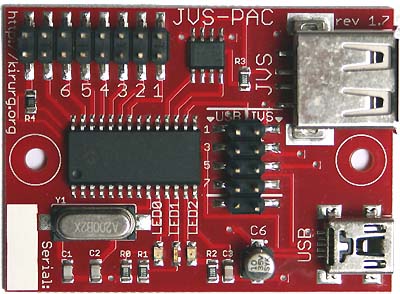
To connect the JVS I/O board to your PC you can use a device called the JVS-PAC, this converts the JVS data signal to a USB signal that your computer sees as a keyboard, allowing you to map keys to specific buttons.
Hooking up outputs
Hooking up outputs is a project in and of itself. There’s no silver-bullet solution when it comes to outputs and emulation. Indeed, on original arcade boards there was no real standard for a long time either, most games that required outputs for lamps, motors, solenoids and other devices would typically implement something that only covered the use needed for that game. JVS attempted to standardize this and the JVS protocol supports digital outputs for lamps and solenoids (sadly this doesn’t include force feedback or other motors). The JVS-PAC doesn’t support outputs. There are a few options available, the one I’ve had success with is the Ultimarc PAC-Drive, which is a small USB board with screw terminals for outputs. they’re strong enough to drive LEDs but not much else, even still you’ll generally have to figure out how to get outputs “hooked up” in software on a game by game basis and the PAC-Drive will only take you so far. These are typically used for button led lights and if attached to a mosfet can be used to drive incandescent bulbs and/or solenoids. If you need more output pins then there are a few other options offered by Ultimarc as well.
 If you’re trying to get force feedback output then you’re in for a real challenge. But if you’re serious about trying I highly recommend reading up on the driving game forum on BYOAC.
Emulator Considerations
The emulator everyone thinks of when emulating arcade machines is MAME but MAME’s dedication to simulating the original hardware as accurately as possible is both a blessing and a curse. It means that many arcade classics are emulated beautifully, however it also means that once arcades started to make the jump to 3D graphics MAME has trouble running those games efficiently as it attempts to emulate the original 3D hardware is through your CPU instead of interpreting it into something your GPU can process.
If you’re outputting to a CRT and especially if you’re using CRT_EmuDrive you shouldn’t be running regular MAME you should be running GroovyMAME. GroovyMAME is a patched version of MAME developed by the same person behind CRT_EmuDriver and Atom-15 it’s designed specifically to interact with your video card drive to ensure that the correct (or as close as possible) video mode is being used for any given game. when it’s launched. It also has some input and video lag reduction enhancements, as well as the inclusion of the popular high score and “no-nag” MAME patches that are useful even if you’re not outputting to a CRT. GroovyMAME releases usually lag behind the official MAME releases by a few months because they need to be fully tested, but recently some of GroovyMAME’s features have started get incorporated into regular MAME so hopefully at some point in the future GroovyMAME and regular MAME will be one in the same.
While MAME/GroovyMAME is excellent and I run it for as many games as possible I recommend looking to some alternative emulators for those 3D games from the late 90s and onward.
Here are some other emulators you should consider:
Model 2 Emulator – Does as the name says, emulates Sega’s Model 2 hardware, which brought us such notable titles as Daytona USA and Virtua Cop, as well as the original Dead or Alive, Virtua Fighter 2 and Zero Gunner
SuperModel3 – This is an emulator for Sega’s Model 3 hardware, while this platform had a whole lot of excellent racing games it also ran Virtua Fighter 3, Fighting Vipers 2, and Spike Out.
DEmul – This is an emulator for Sega NAOMI, NAOMI 2, and Sammy Atomiswave hardware (as well as the Sega Dreamcast), they’re also working on adding Sega Hikaru hardware emulation. If you only run 1 other emulator besides MAME this is the one to run. There are well over a hundred excellent titles from the late 90s and early 2000s that run on this emulator including such gems as Marvel vs Capcom 2, Capcom vs SNK 2, Ikaruga, GigaWing 2, and too many more to list. There are other emulators that support NAOMI but none that I’ve found work this well and support this many systems from this era.
Taito Type-X/PC Hardware – Many arcade games since the turn of the century have relied on normal PC hardware as opposed to bespoke PCBs as a result, with the right software many of these games can be played on a normal Windows PC without any emulation at all. The most notable Arcade-PC hardware who’s games can be played on a normal PC was the Taito Type-X series which ran games such as Street Fighter IV, Blaz Blue, Tetris the Grandmaster III and Shikigami no Shiro III.
Dolphin – Not arcade hardware but an extremely well built and polished emulator for the Nintendo Gamecube and Wii. Since you may be wondering what games were on those consoles that didn’t require an analog stick or motion control I’ve compiled a list of Arcade compatible games on the GameCube and Wii.
PCSX2 – Again, not arcade hardware but would give you access to an enormous library of Playstation 2 titles. Since most PS2 titles made use of analog sticks I’ve also compiled a list of Arcade compatible games for the PS2.
Other Emulators/Consoles/etc. – There are a whole world of emulators out there and keeping on top of them can be a real challenge, particularly older and more popular hardware platforms there can be dozens of choices. A great resource I use to find the best classic emulators is the NonMAME list. This is a list of the most accurate emulator available for any given platform with a preference toward MAME/MESS and open source projects. If you’re interested in emulation on the cutting edge for platforms such as PS3, Xbox 360 and Wii U then I recommend checking out Simply Austin on YouTube. He does regular videos on the recent advancements of emulators in this area so if it’s something you’re interested in it’s worth keeping an eye on his channel.
Front End Considerations
Selecting and setting up a front end to actually navigate and launch your emulated games is really it’s own topic and much of it comes down to personal preference. It’s worth noting that the Visual front end you use to select your game, and the software that actually launches the game and then elegantly closes it down to return you to the menu are often two separate pieces of software. Because of the vast differences in how differences emulators handle things or the fact that controller mapping might be different on a per-emulator basis it’s worth having a dedicated launcher separate from your front end. I highly recommend Rocket Launcher for this task; it’s the most robust and feature filled launching application that I know of.
For the front end itself it’s worth looking into Attract Mode, HyperSpin, LaunchBox, and RetroFE. There are many more options out there so search around and find one that you like.
Fine Tuning
It should be pretty obvious that if you want to launch right into your front end when your PC boots then you should place a shortcut to your front end in your Startup folder. But here are some less obvious things you may want to consider
Increase your USB Polling – Windows checks for new information from your USB devices at a regular interval, this is fine and fast enough to be imperceptible most of the time, but if you want to have the most lag-free arcade gaming possible it’s worth bumping up the polling rate on your J-PAC or whatever other input device you might be using. it can make a noticeable difference in rhythm games as well as fighters, SHMUPs, and other classics if you’re playing at a high level. You can find a guide for this here.
Remap the default MAME/JPAC keys – MAME by default uses the arrow keys, ctrl, alt, shift and space for the player one joystick and buttons mappings. Similarly both J-PAC and JVS-PAC uses these mappings by default as well. Unfortunately while this was fine way back when MAME was first release, these days those keys when pushed in the right combination can execute some unwanted commands in windows. For instance on many PCs CTRL+ALT+Arrow Keys will rotate your screen, and this is something you would likely push by accident while playing. For this reason I recommend re-mapping at least the player 1 buttons to use letter keys as opposed to control keys. Or at very least make sure you disable the screen rotation shortcut.
Virtual Joysticks – You’re likely going to want to play a PC game on your cab at some point and I’ve found that most really dislike keyboard mapping for controls. In-fact I’ve found a good number of games that will only allow 1 player “per device” meaning that while it might be a 2-player game it will only allow for 1 player to have their controls mapped to the keyboard. For this reason it’s worth looking at a Virtual Joystick program such as Headsoft’s VJoy. This will translate your keyboard keys into button pushes on a virtual joystick that the game thinks is a USB game pad. Even if your PC game DOES allow for keyboard mapping it’s often much nicer to use something like this as many of the on-screen prompts will be changed to “Push Button 1” as opposed to “Push the J Key”. This is especially helpful if you have friends using your setup as they’ll likely be confused as to which button happens to be mapped to what.
Narrow down your Game List – MAME has thousands of ROMs and many of them are revision releases, or clones, or don’t work, or use some strange control scheme that wont work with your arcade machine. There’s a great application called ROMLister that will allow you to custom tune a MAME ROM list that will help you to fine tune your game list into just the relevant titles and output in various formats for many of the popular front ends.
Thanks for Reading
If you made it all the way to the end then you’re probably pretty serious about running emulators on your arcade cab. I’ve done this a few times and made some mistakes along the way so hopefully my brain dump above will help you avoid some of the same problems and pitfalls that I’ve run into before. As always if you find any problems with any of the information here, or you have a better way of doing something please leave a comment. Don’t ask about ROMs, ISOs or game dumps or where to find them then I will ignore and likely delete your comment. If you have questions about anything else then I’ll try to answer any questions to the best of my ability.
If any new major advances crop up I’ll do my best to keep this guide up-to-date, and similarly if you know of something I don’t, please let me know.
Thanks for reading and happy gaming. 🙂
Update 11/30/2016 – Added TDA7297 amp suggestion, Smart Power Strip suggestion, J-PAC sync problem note, added note on MAME multi-core support. Thank you to brad808 for the suggestions
Update 12/01/2016 – Added note about avoiding on-board GPUs, added Overclocked CPU options.
Just looking out for ways to contact you… i am looking for decals/stickers of all the panels of a San Fransisco Rush the Rock the rock cabinet. I can print them myselve (on vinyl in highres) but do need the imagery of it… for restauration of a cabinet i am currently working on. Also looking for main PCB board =).
You never know… you can always ask.
gr. Dennis