I’m sure nearly everyone is familiar with the Staple’s Easy Button from the commercials. Many of you are probably also aware that Staples actually sells Easy Buttons for $5 at their stores. It’s a simple device with batteries a speaker and of course a big button. Upon pushing the button you hear the “That was Easy…” catch phrase.

I bought one to use at work since “easy” has come to be known as the ‘E’ word since certain people have come accustom to using the term to describe the difficulty of things that are decidedly NOT easy, at least that’s the reality that is usually discovered after far too little time has been dedicated to a particular project or task. Hence the button gets a push whenever anyone uses the term, or when something is completed successfully that actually did end up being easy.
While it’s entertaining, the gag can get old. For a brief period of time I was moved into the engineering area which sees a lot more traffic and my Easy Button saw it’s fair share of pushes as people found it funny to press as they walked on by chuckling to themselves as if they had just perfectly executed a joke. It didn’t bother me but it was clear that a few others who sat near by were weary of hearing “That was easy” continuously throughout the day… I decided that, for the benefit of myself and those who sat within ear shot, I needed to get some revenge.
I decided that since the Easy button was really just a button attached to some circuits I could very easily just make it a button attached to some different circuits; more specifically a circuit that could play custom messages instead of a pre-recorded one.
I went to radio shack because I remember them selling little voice recorder circuits in the past. I didn’t find one of those but I did find a key fob device that featured a voice memo function among other things. I decided it was small enough that I could strip off all the other crap that I didn’t need and shrink it even further if need be.
[I regret not taking any pictures of the key fob device pre-hack]
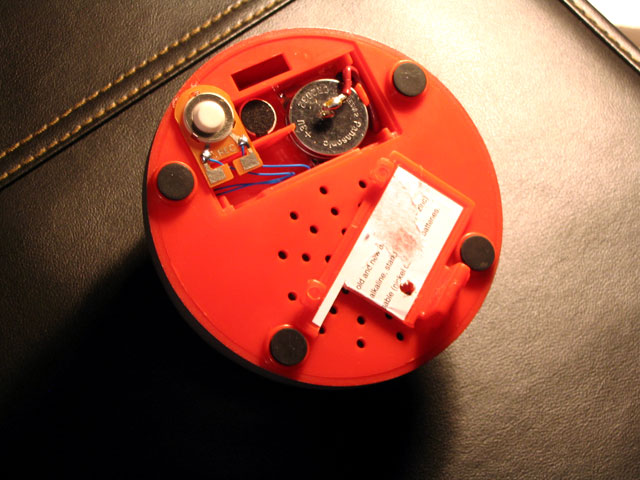
I started by pulling apart the Easy Button to see if it had the necessary space I would need to make it work. As it turns out there is a large piece of metal inside the button used to prove it with the satisfying CLICK when pushed. Also inside were two pieces of metal rod to give the button weight. I decided to do what i could to keep these features intact so that the button would not loose it’s quality. Thankfully the area under the metal plate was empty space albeit tight when taking into account that the plate needed to flex when the button was depressed. I also decided to keep the speaker since it was much larger than the one included with the key fob recorder.
Once I pulled the key fob device apart probed for the appropriate points I needed for microphone, speaker output, play and record buttons, as well as the points for the batteries. I pulled off all of the unnecessary stuff and got the circuit down to a really small size. Before attempting to fit everything into the Easy Button case I first made sure that the circuit worked.

Once I ensured that the circuit worked the way I intended I mounted the voice recorder circuit into the empty space below the metal “click” plate and ran wires. Since the metal plate would likely rub against the circuit I put some electrical tape over it to provide isolation from shorts.
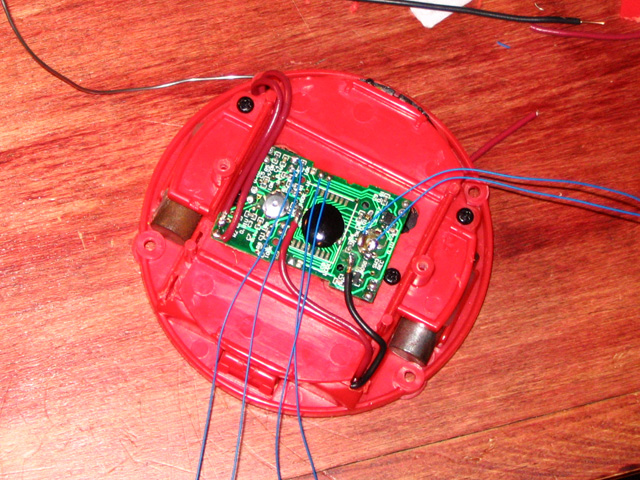

Next I put the metal plate back in place and screwed down the original Easy Button circuit which was modified to short out all of it’s components except for the actual button, which was now connected to the voice recorder.

Since I was using a different circuit that was designed to run on different batteries at a different voltage I decided it would be best to make the Easy Button fit the circular batteries as opposed to building additional circuitry to adapt AAAs. Also the battery holder portion of the button provided ample room to mount my microphone and record button as well. I started by modify half of the battery compartment to fit the circular batteries by bending and cutting some of the original battery hardware.
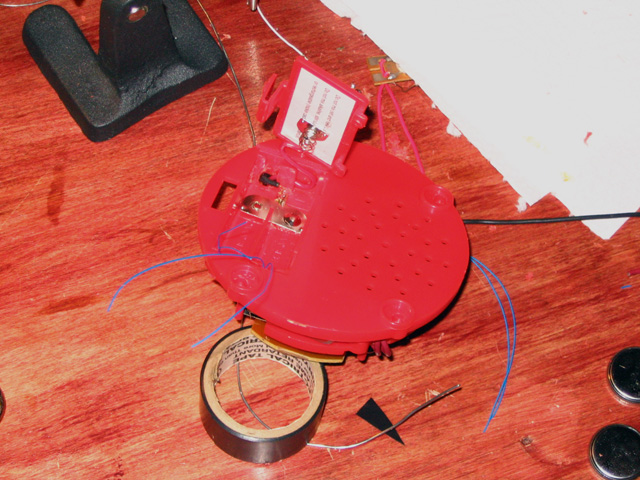
I then modified the other half of the battery door to fit the microphone and record button, both of which I got from my spare parts box. I then put it all back together and had an easy button that looked and felt just like the original but now could be programmed to say whatever I wanted.

To get back at my co-workers I recorded the phrase “Ha Ha! Not this time. Get back to work.” and proceeded to get a good chuckle at every unsuspecting person who walked by pushed the button and then turned around for a double take when they realized that the button was heckling them rather than responding with the soothing Staples advertisement.
BEST HACK EVER!!that my friend should be the new “easy” button phrase.
YOU GOTTA SEND ME A COPY OF ONE PLEASE!!!!!!!!! This would be the funniest thing to do to people ever dude!!
I think u have to much time on your hands HA HA get back to work